 Eats365 產品
 商家指南
商家指南 模組
模組 會員
會員 整合
整合 硬件
硬件 員工操作
員工操作 職級和權限
職級和權限 付款
付款 報表
報表 最新消息
最新消息 產品更新
產品更新 故障排除
故障排除 探索 Eats365 產品
 Eats365 POS 詞彙表
 問題排解
問題排解集團偏好設置
全部資訊
目錄
配置集團共用設定
了解如何配置 Eats365 POS 上的集團共用設定。
商家界面上的 “集團共用設定” 允許您配置適用於整個集團的設置。在這裡,您可以更改集團名稱、啟用 PIN 碼登入以及自訂不同地區報告中的小數位數。
在本文中,您將了解如何在商家界面上設置集團共用設定。
更改集團名稱
若要更改集團的名稱,請按照以下步驟操作:
- 登入商家界面。
- 在左側面板上,點擊「集團共用設定」
 「集團共用設定」。
 - 在 “名稱” 下,輸入每種語言的新集團名稱。要添加更多語言,請點擊「新增語言」。
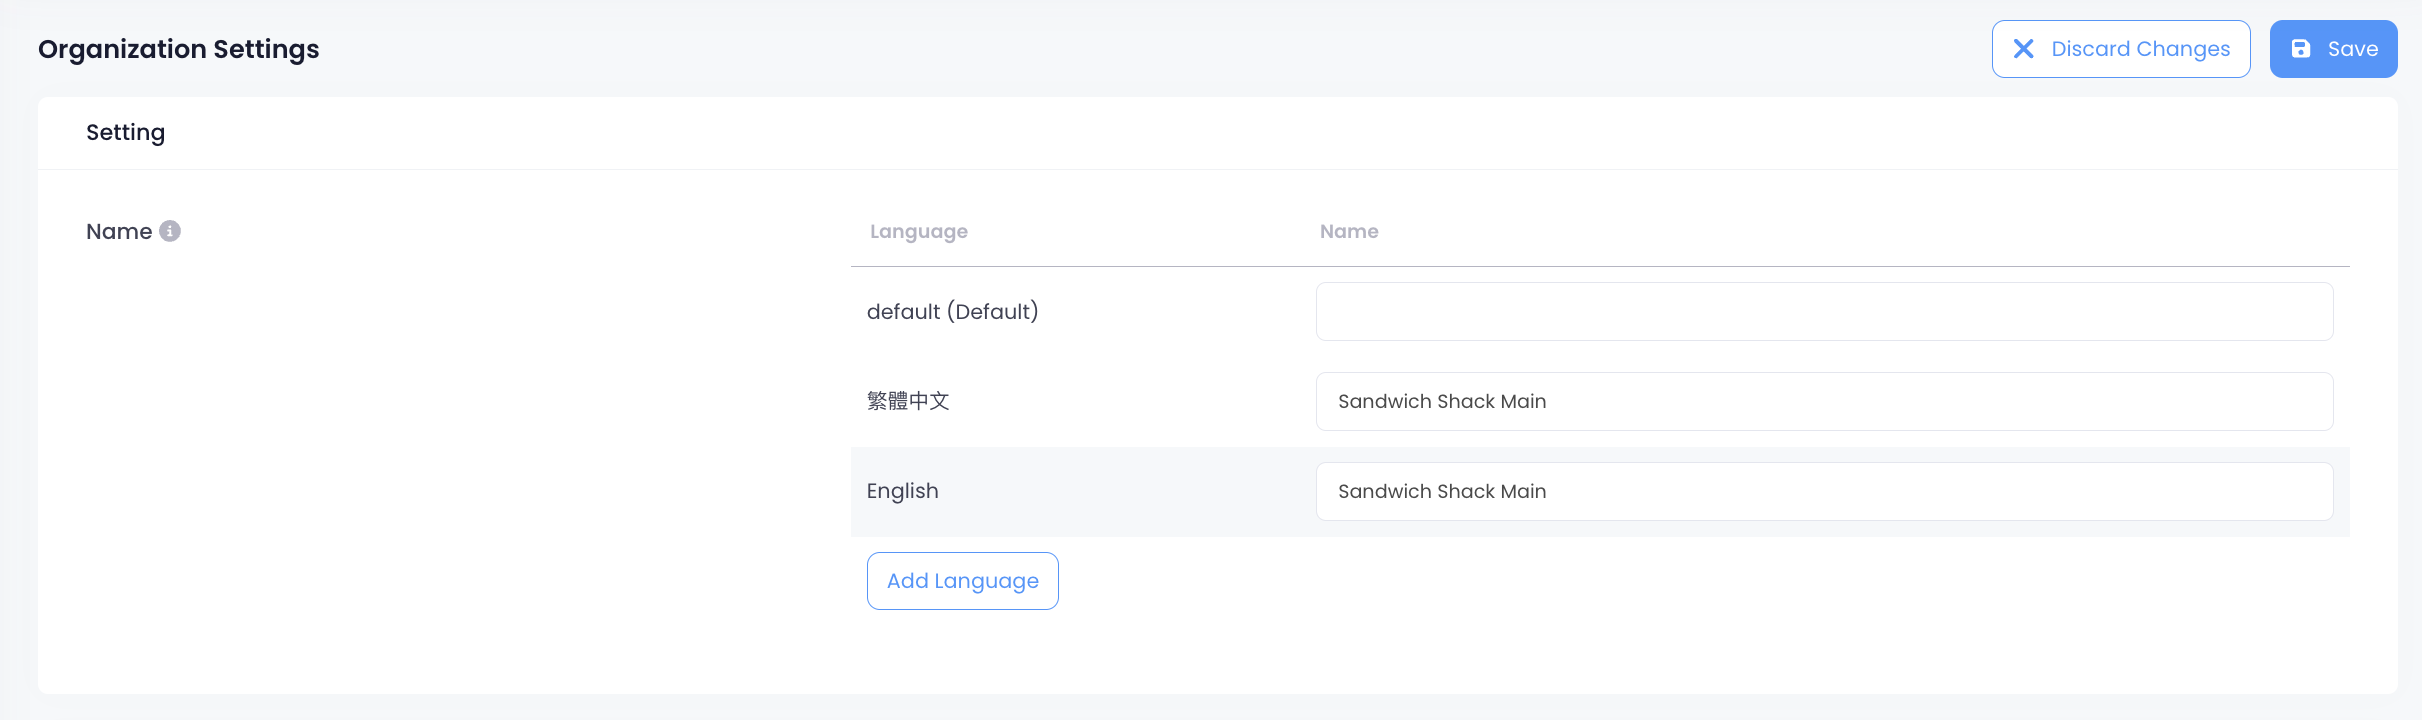
- 在右上角,點擊「儲存」以進行確認。
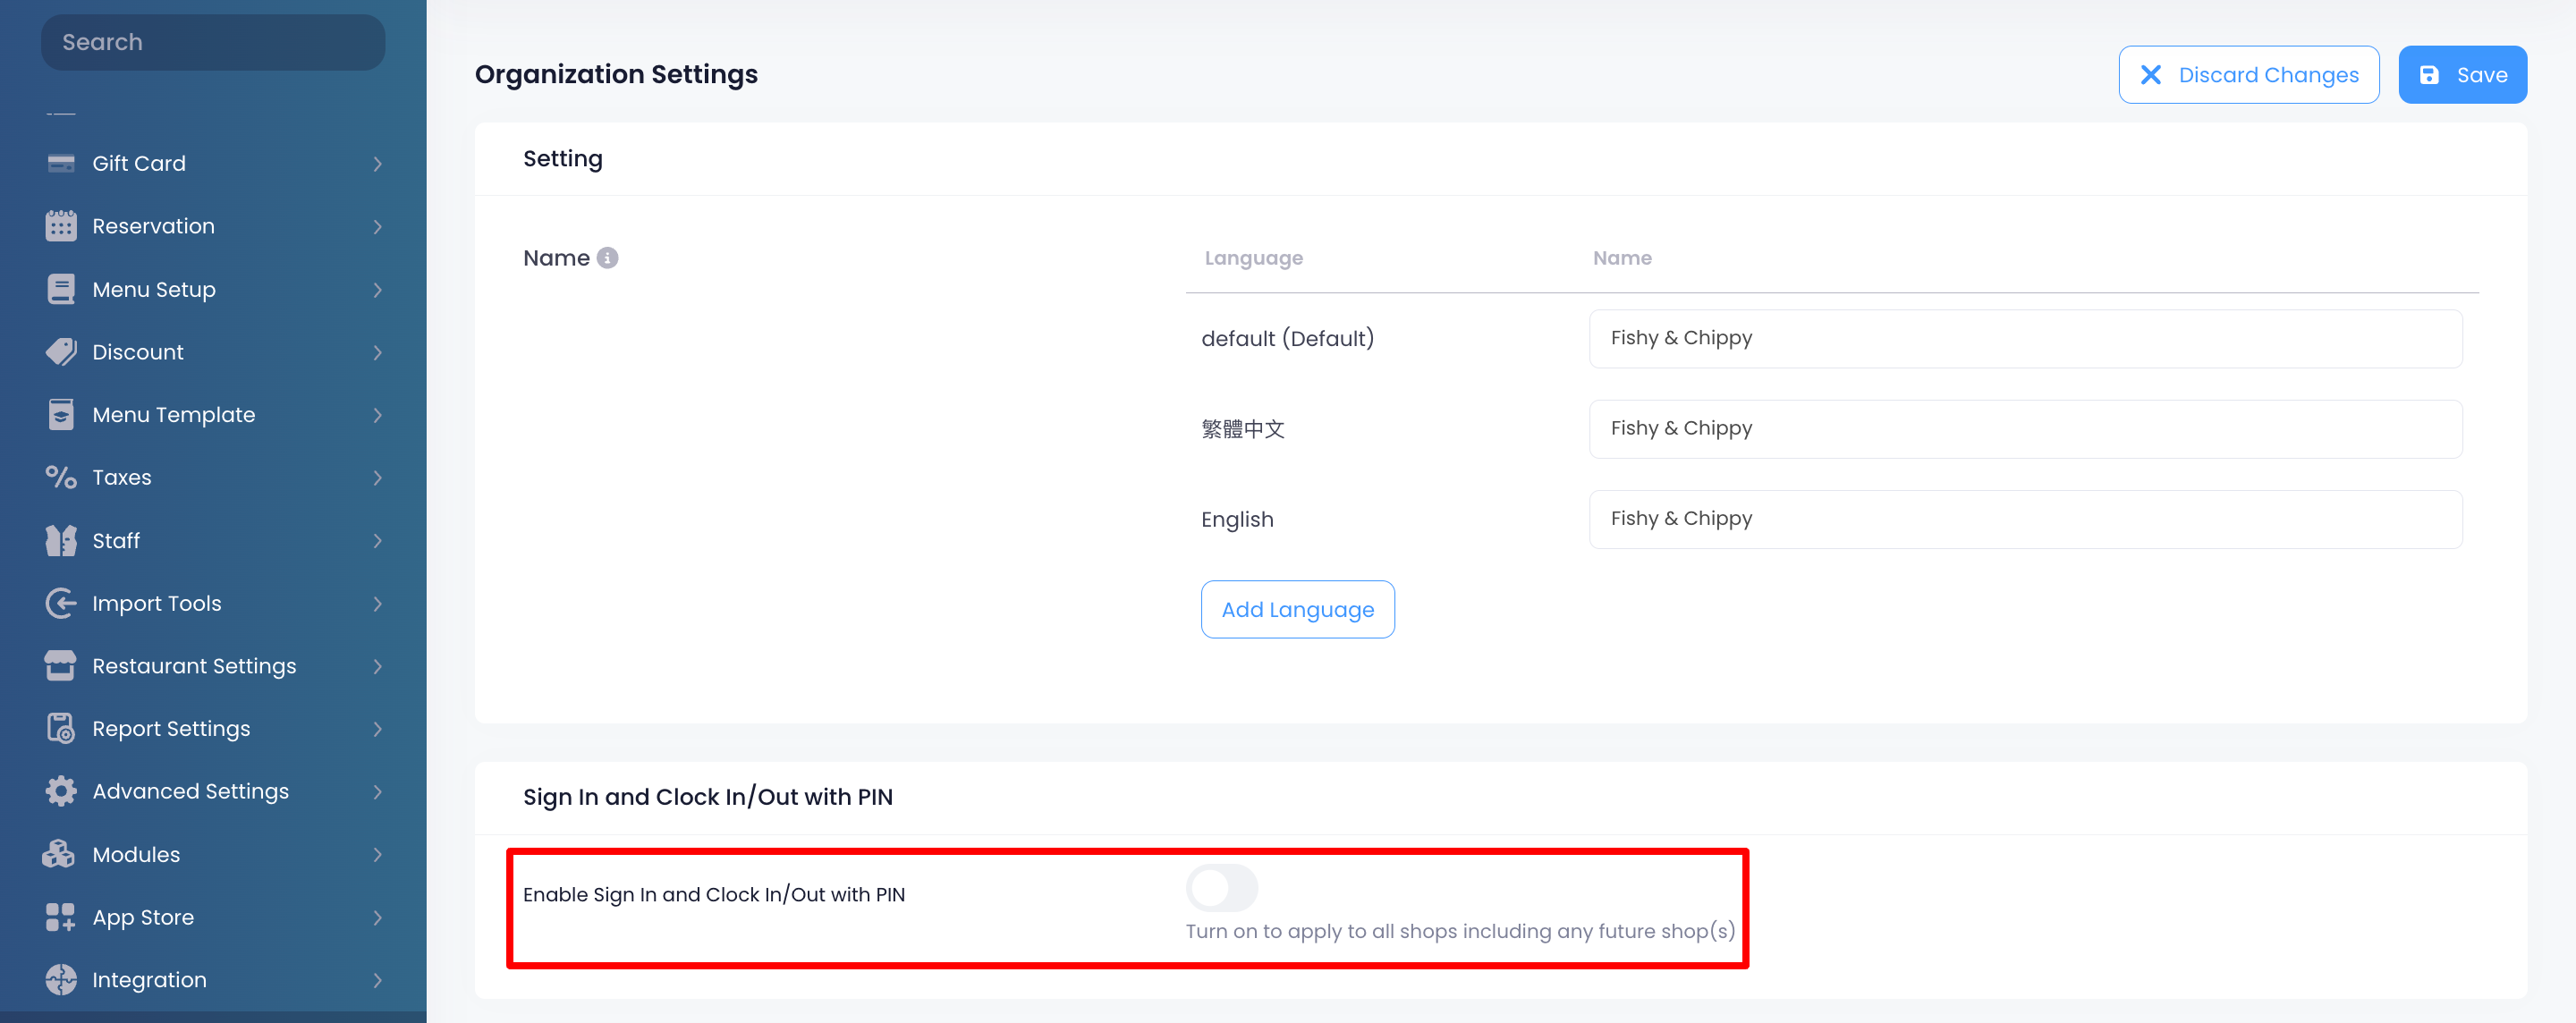
啟用 PIN 碼登入
預設情況下,用戶必須先在 POS 登入頁面上選擇使用者帳戶,然後才輸入 PIN 碼。啟用 PIN 碼登入後,員工可以跳過選擇帳戶的步驟,直接輸入 PIN 碼登入。
若要爲您的餐廳設置 PIN 碼登入方法,請按照以下步驟操作:
- 登入商家界面。
- 在左側面板上,點擊「集團共用設定」「集團共用設定」。
- 在 “使用 PIN 碼登入及打卡” 下,開啟「啟用使用PIN碼登入及打卡」
 。
。 
- 點擊 “PIN 碼長度” 旁邊的下拉式列表並選擇登入 PIN 碼所需的位數。
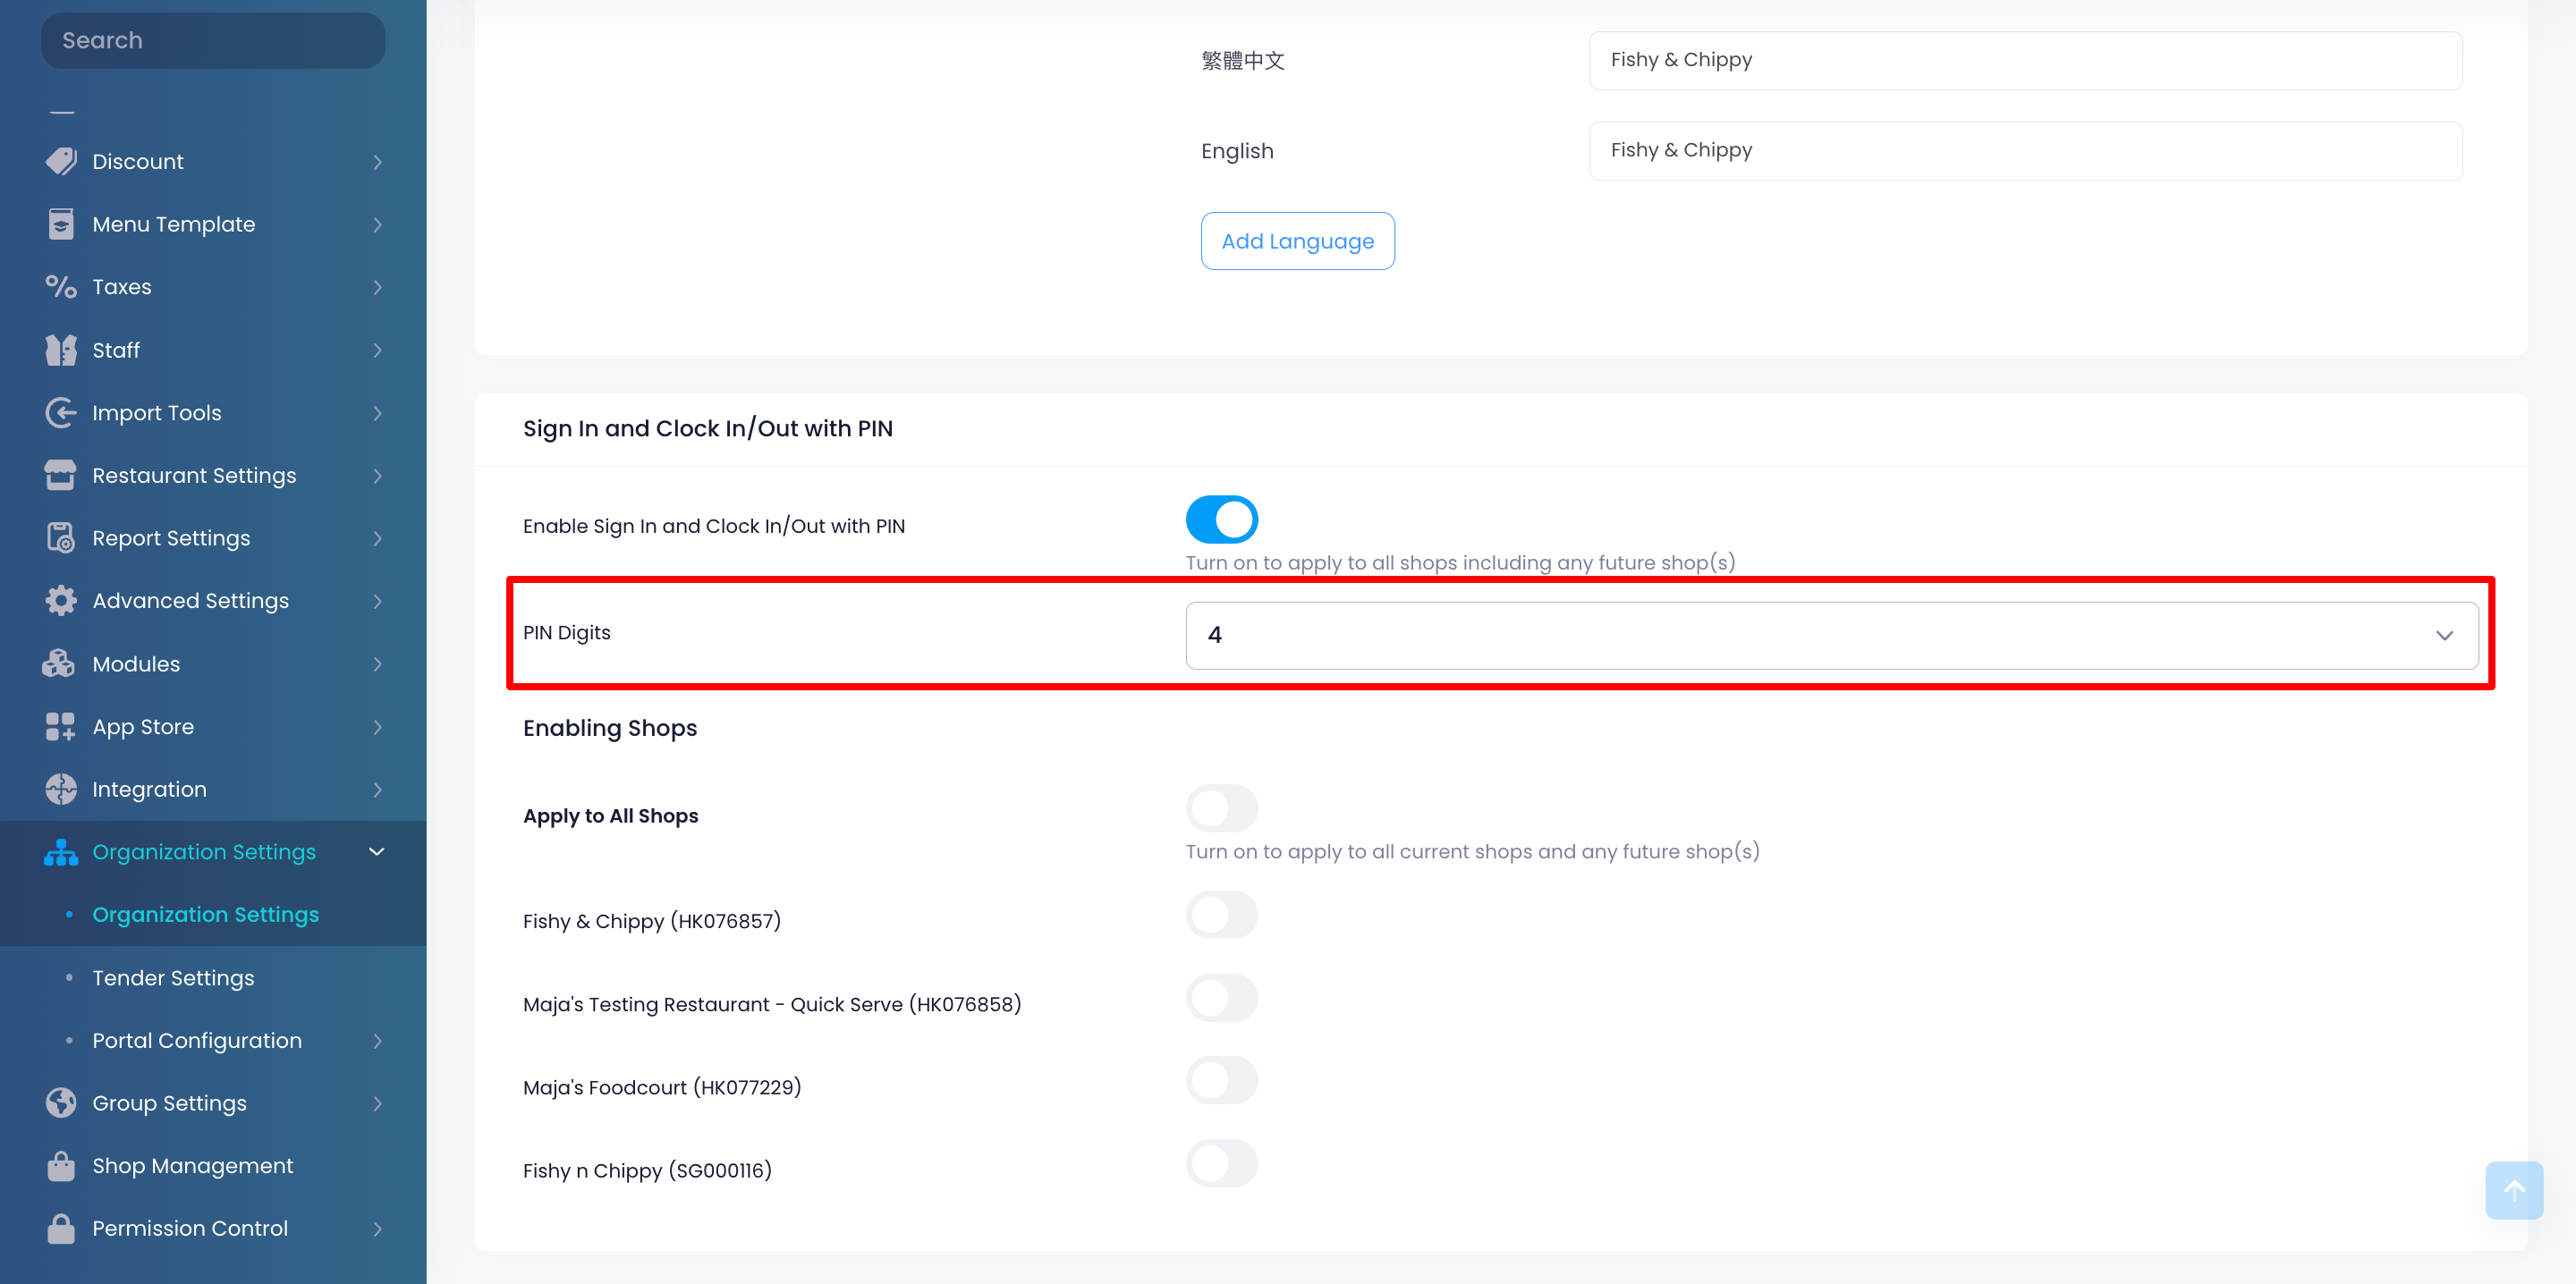
- 在 “已啟用分店” 下,選擇您想要允許通過輸入有效 PIN 碼直接登入 POS 的餐廳。如果您想將 PIN 碼登入應用於所有餐廳,請開啟「套用到所有分店」。
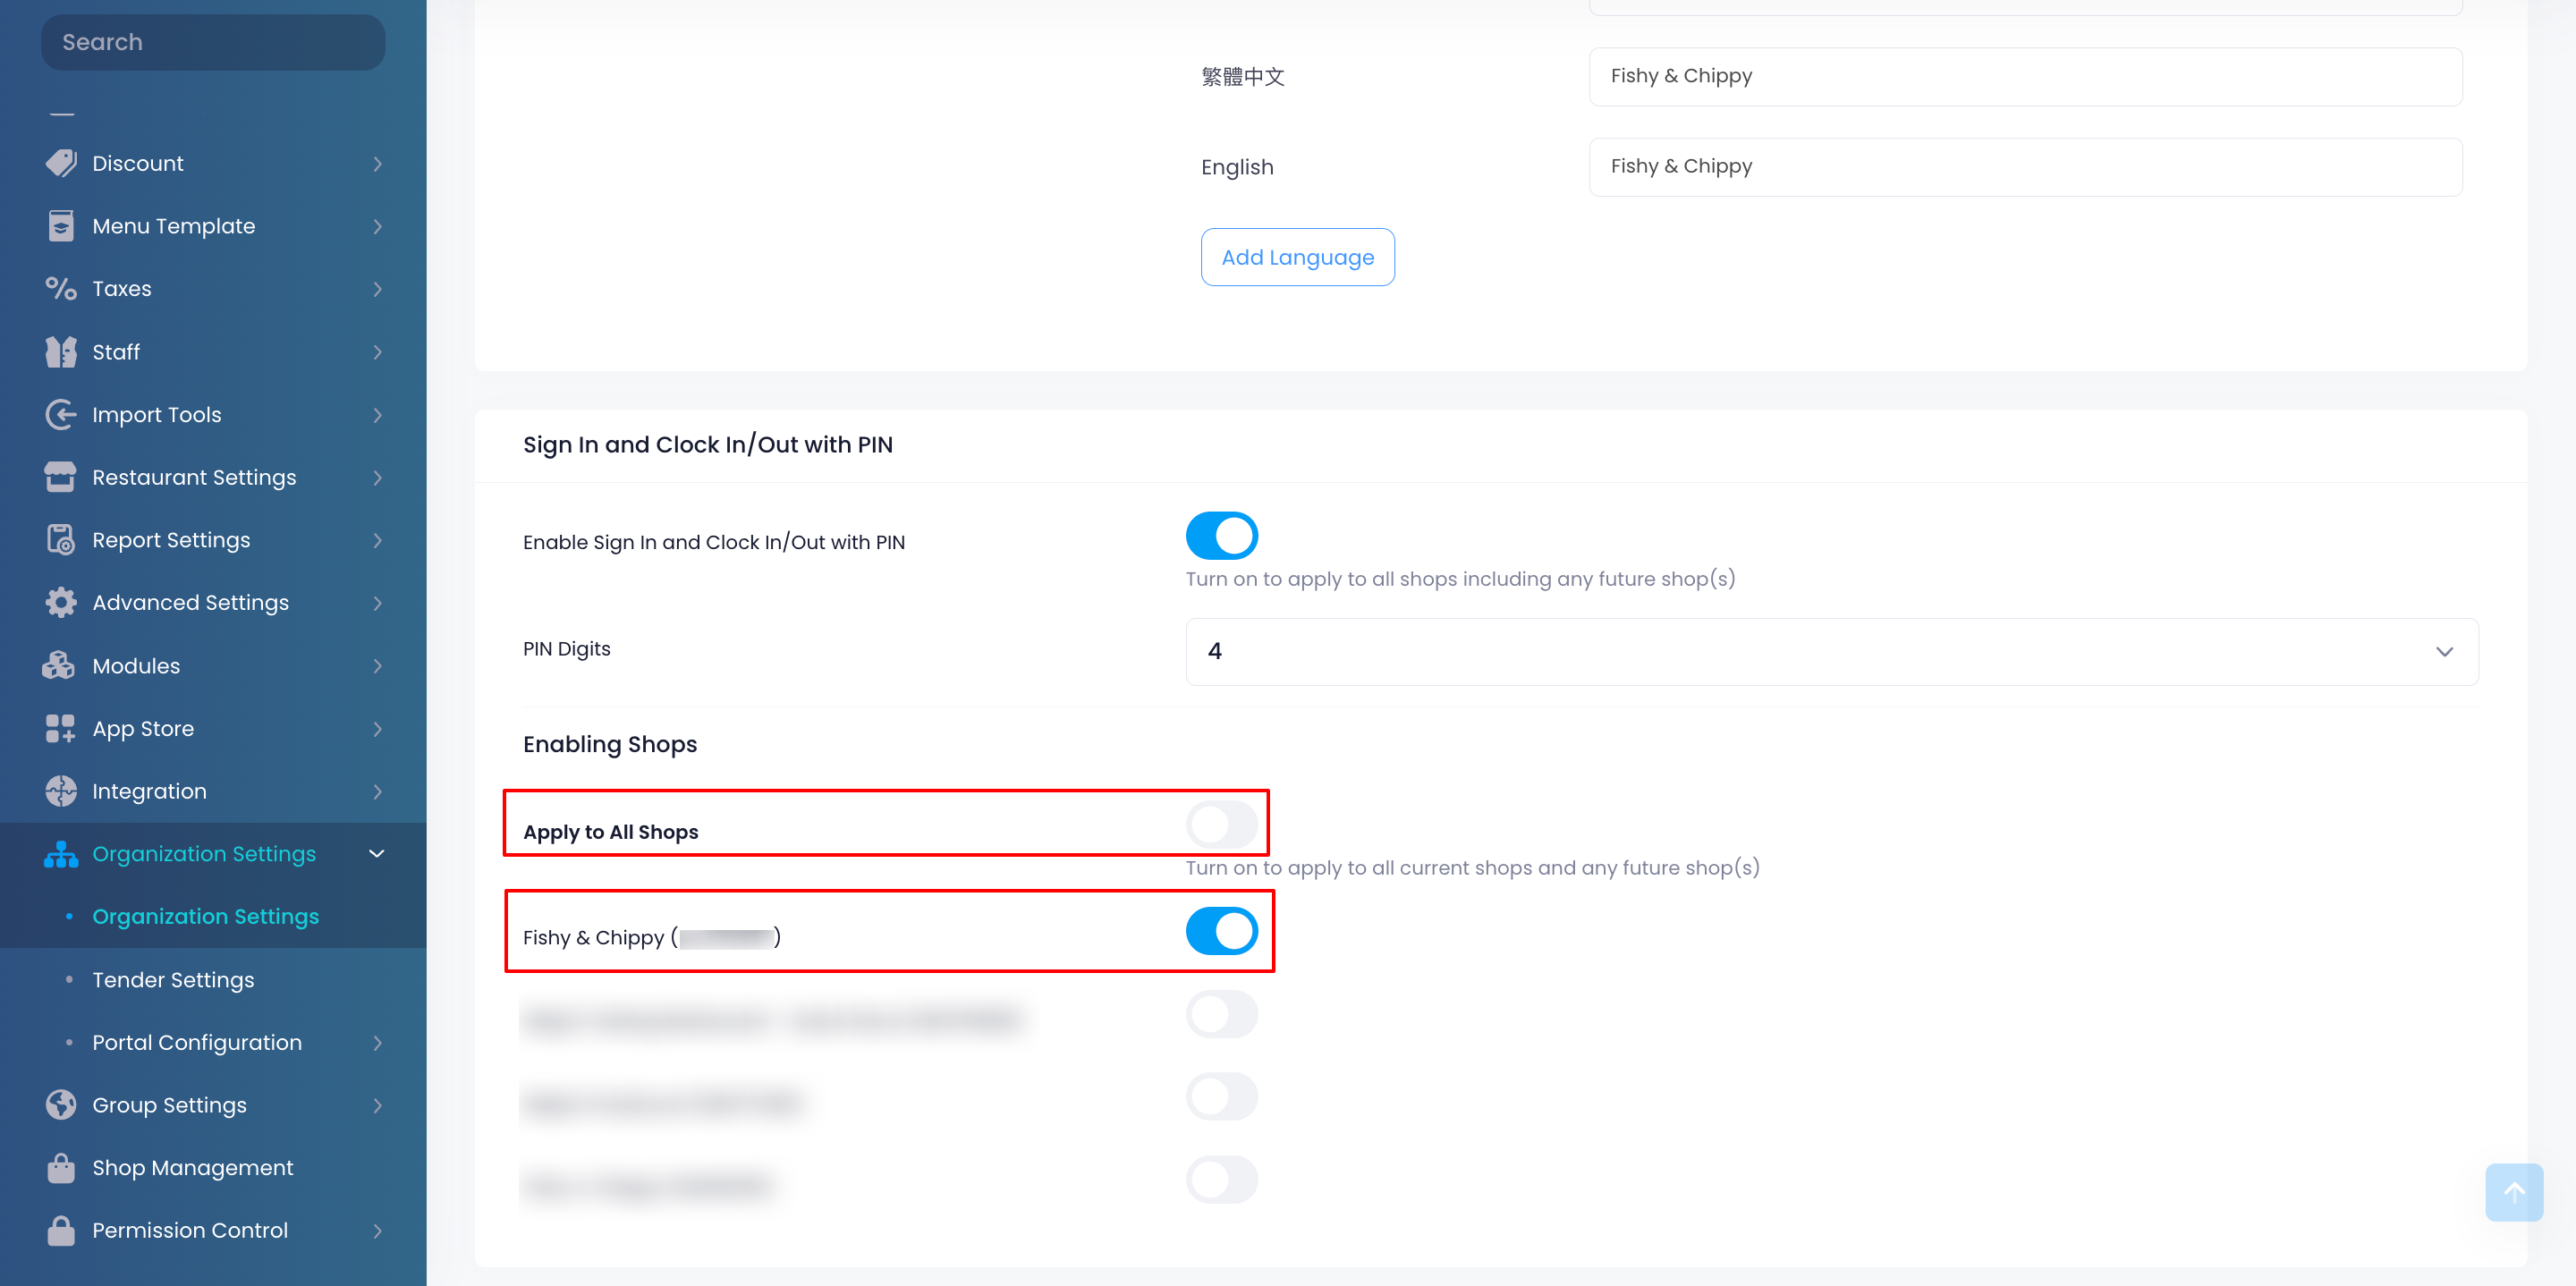
- 在右上角,點擊「儲存」以進行確認。
配置報表數據小數位設定
“報表數據小數位設定” 設置允許您自訂報表中小數位的顯示方式。您可以爲不同地區配置不同的小數位設定,以確保數據準確且符合當地規範。
要配置報表中的小數位,請按照以下步驟操作:
- 登入商家界面。
- 在左側面板上,點擊「集團共用設定」「集團共用設定」。
- 在 “報表數據小數位設定” 下,點擊「+ 新增地區報表數據小數點後位數」。

- 選擇您希望應用自訂小數位設定的國家/地區。
- 選擇您希望用於報表的小數點後位數。
- 在右上角,點擊「儲存」以進行確認。
啟用會員取消的電子郵件通知
“電子郵件通知” 設定可讓相關員工接收顧客透過線上落單網站發出的會員取消請求。一旦顧客提交取消會員請求,員工將透過其關聯的電子郵件地址收到通知,並依照指示從系統中手動刪除該顧客的會員帳戶。
- 登入商家界面。
- 在左側面板上,點擊「集團共用設定」「集團共用設定」。
- 在 “電郵通知” 下,開啟「啟用會員帳戶刪除通知」。

- 選擇您想在電子郵件中使用的語言。
- 輸入接收通知的電子郵件地址。
- 若要新增更多收件人,請點擊「+ 新增電郵收件人」。
- 點擊「儲存」以進行確認。