Roles and Permissions
Table of Contents
Manage an item’s access permissions
Learn how to enable or disable access permissions for menu items on the Merchant Portal.
Item Access Permission allows you to select which Eats365 modules, service types, and delivery platforms can display menu items set up on the Eats365 POS. On the Item Access Permission page on the Merchant Portal, you can apply permission changes to menu items individually or in bulk.
In this article, you’ll learn about the different types of access permissions and how to turn them on or off for items.
Types of permissions
Application Access Permission
Application Access Permission determines whether a menu item appears on Modules and features that can display menu options. You can enable menu items to appear on the following Modules and features:
- User Application
- Photo Menu
- Website
- Digital Menu
- Photo Shuffle
Website Permissions
Website Permissions allow you to display menu items on the Branded Online Store when a specific service type is selected. You can enable website permission for the following service types:
- Pickup
- Delivery
- Dine-in
Delivery Platform
If you have a delivery platform integrated with the Eats365 POS, the Delivery Platform permission allows you to select which delivery service can display your restaurant’s menu items on their delivery platform.
Availability
Availability permission allows menu items to be available for pre-orders and the All You Can Eat Menu.
Turn on or off permissions for an Item
To enable or disable permission(s) for single or multiple Items simultaneously, follow the steps below:
Merchant Portal (Classic Theme)
- Log in to the Merchant Portal.
- On the left panel, click on Menu Setup. Then, click on Item Access Permission.
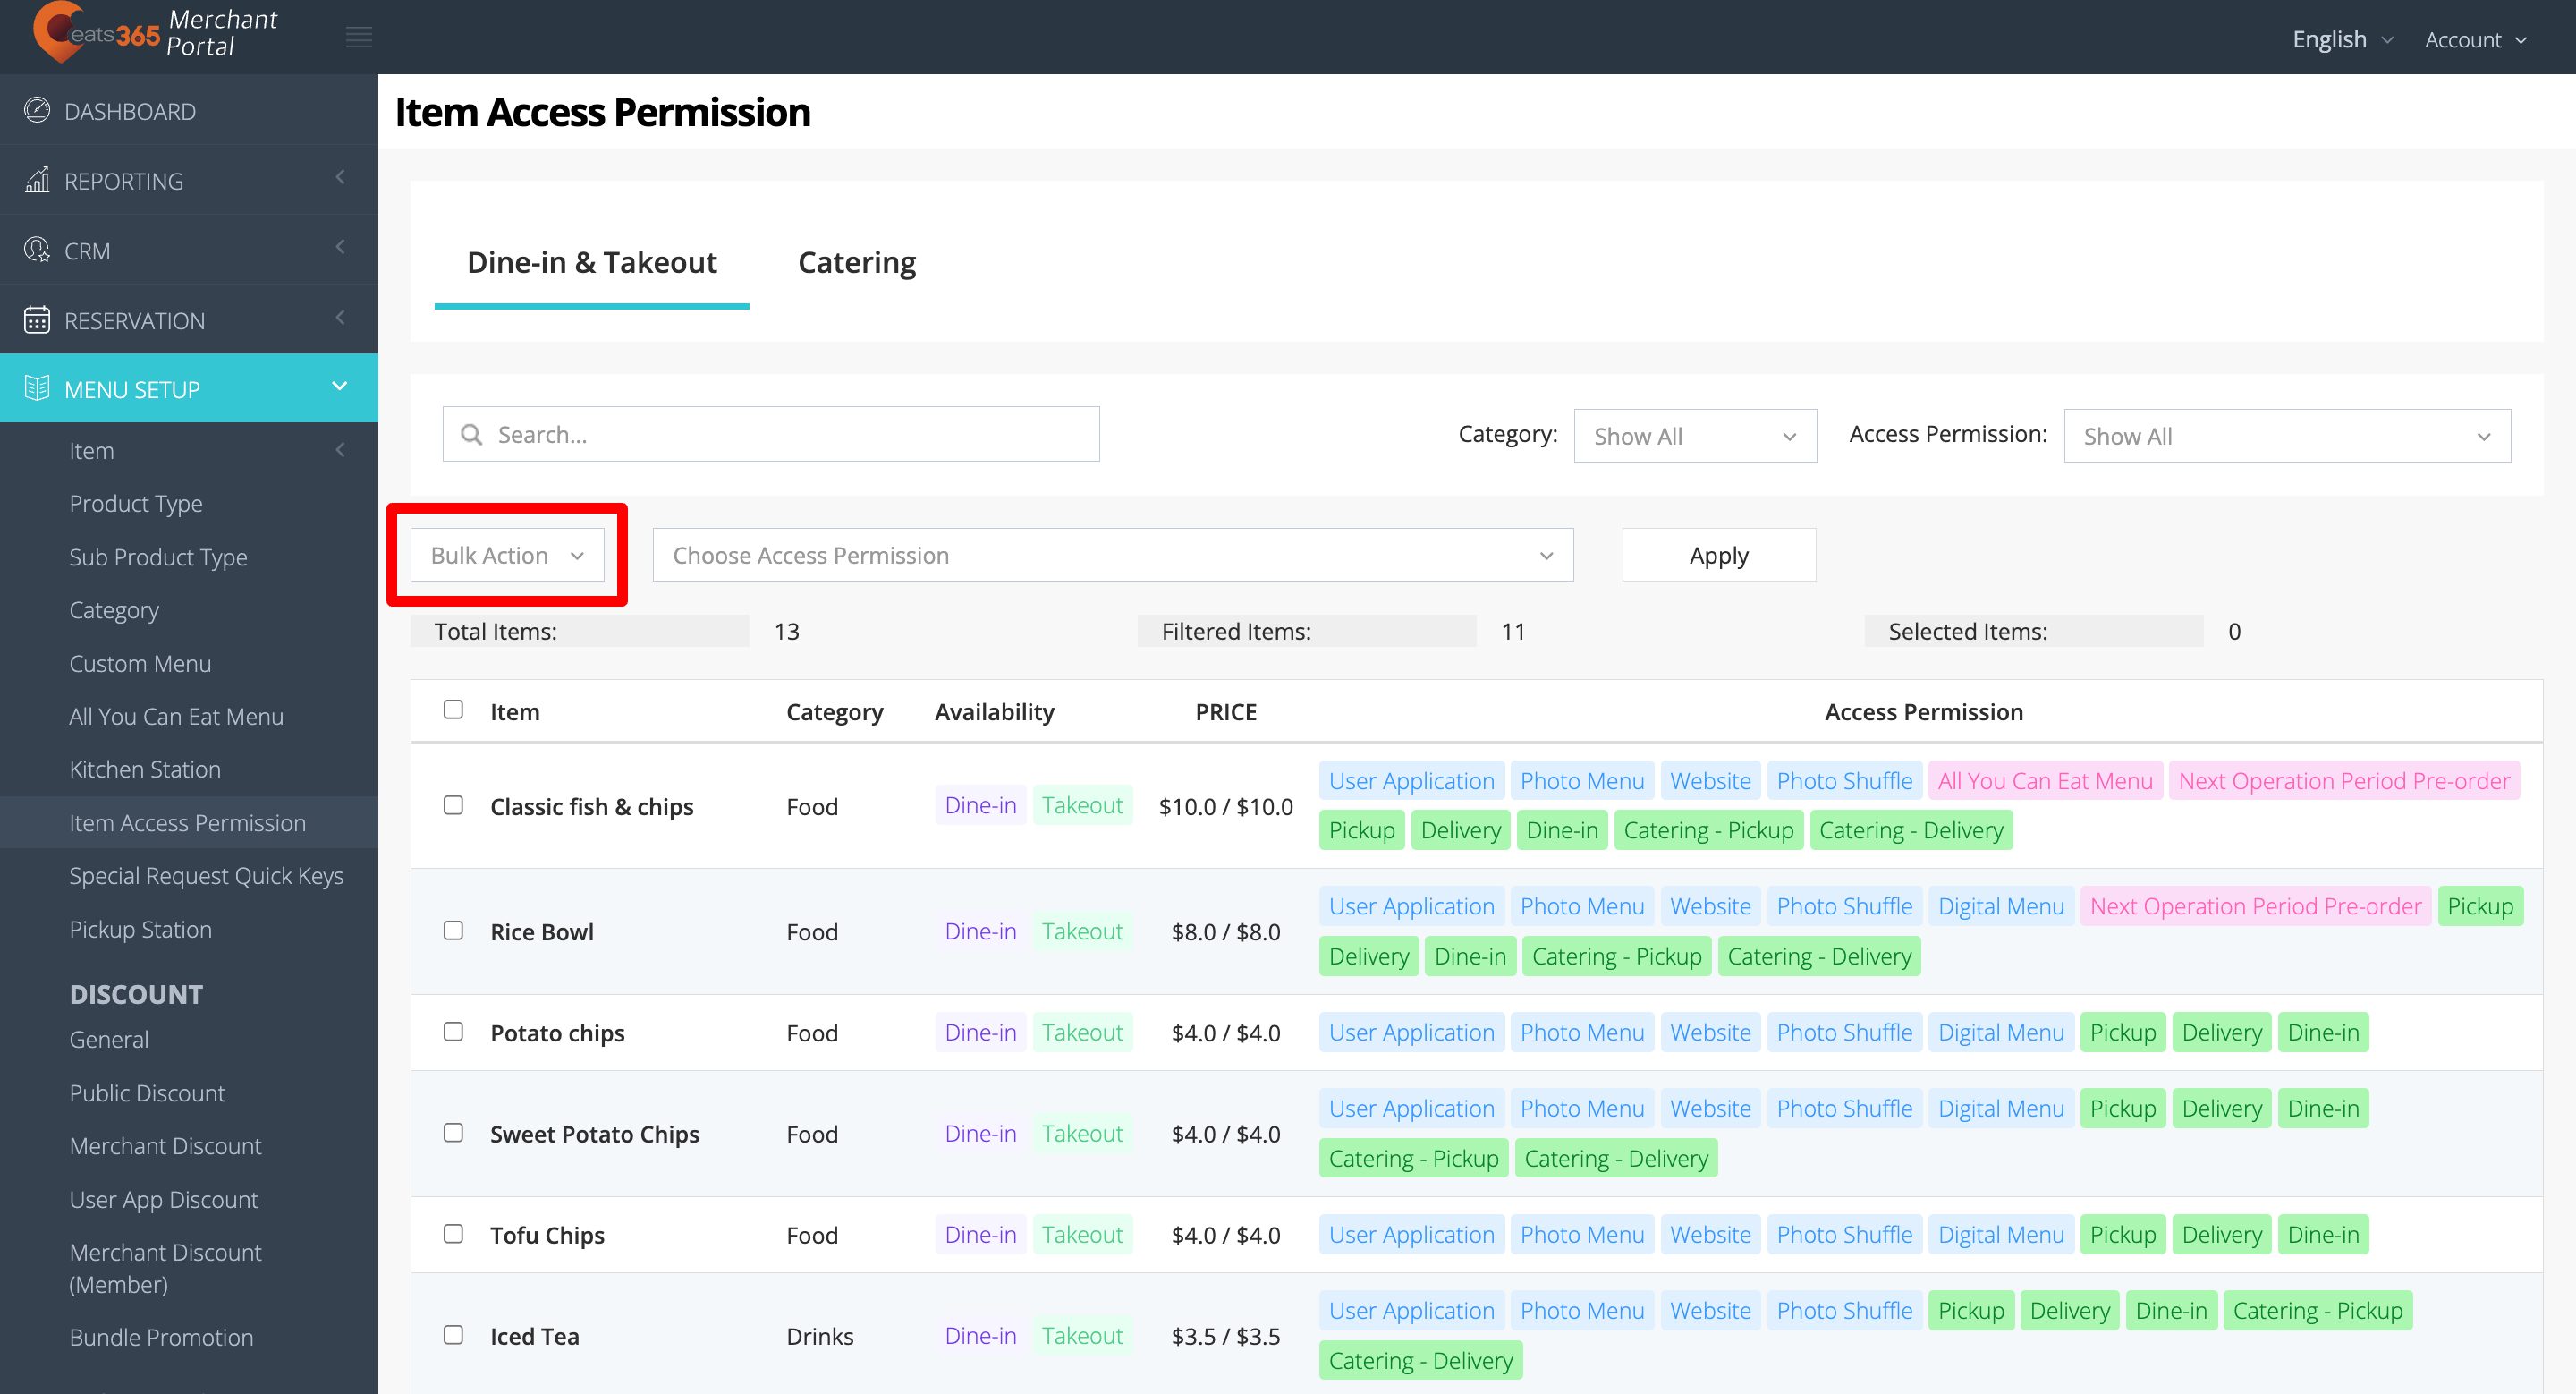
- Click on Bulk Action, then choose whether you’d like to enable or disable the permissions for an Item.
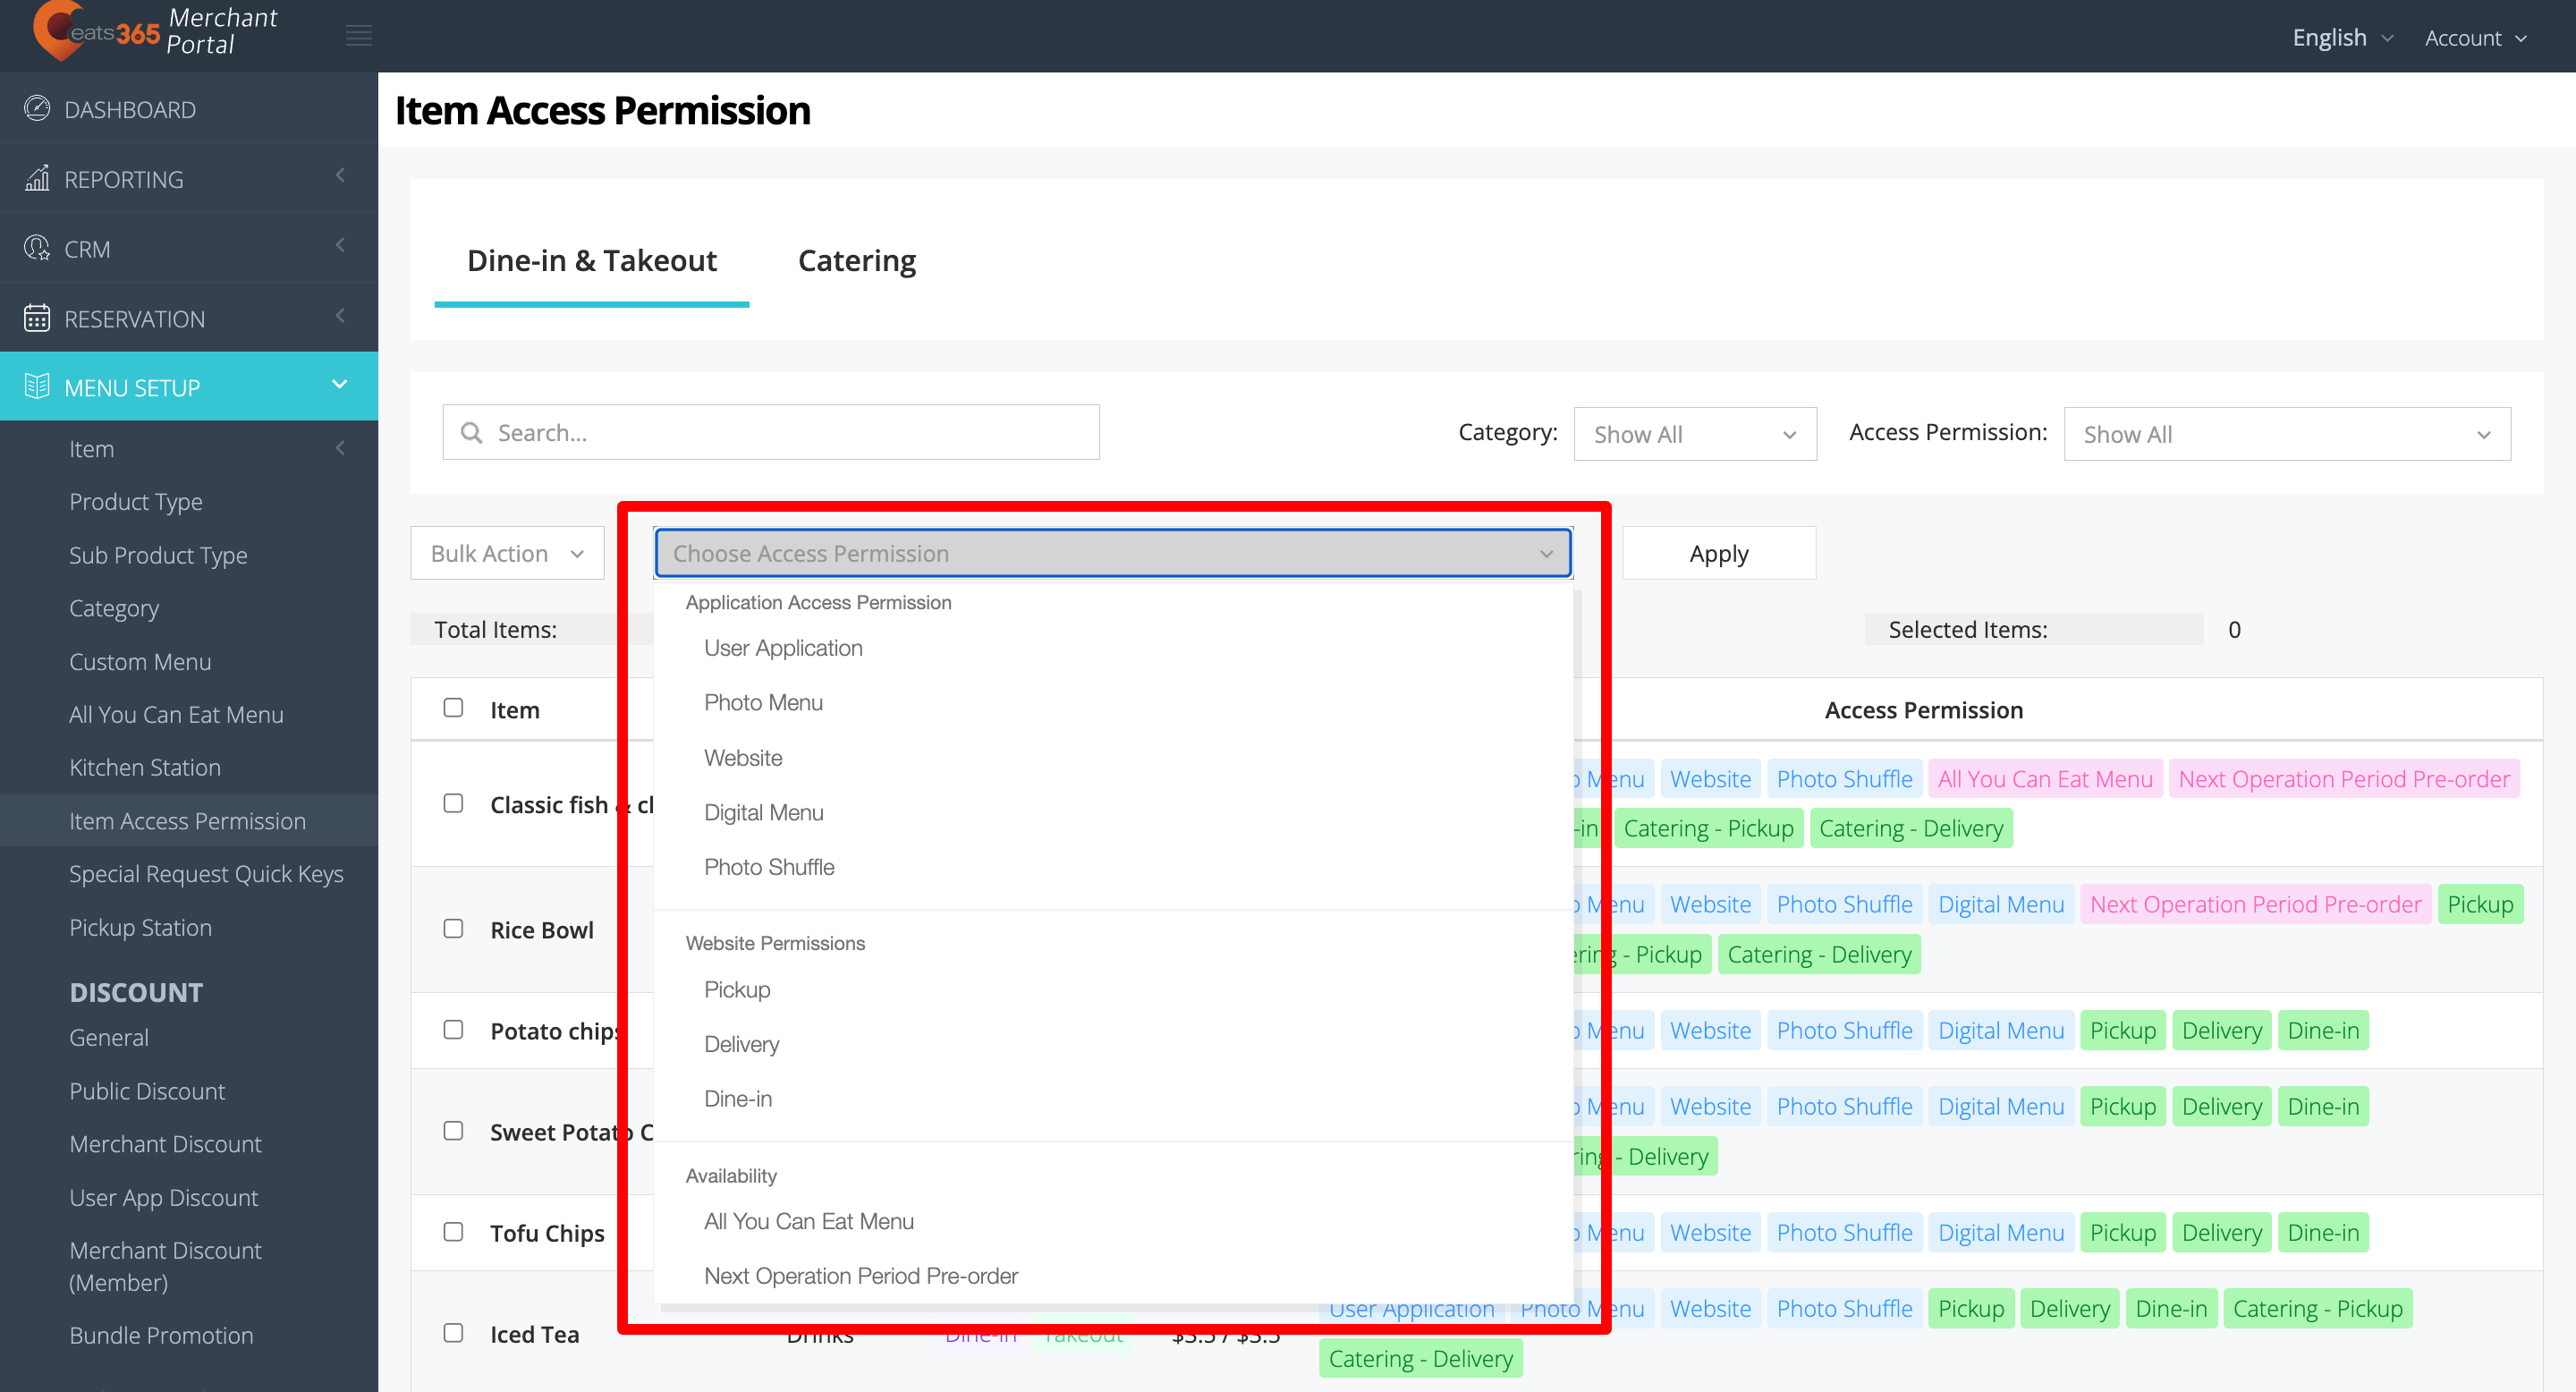
- Click on Choose Access Permission, then choose all of the permissions you’d like to enable or disable for an Item.
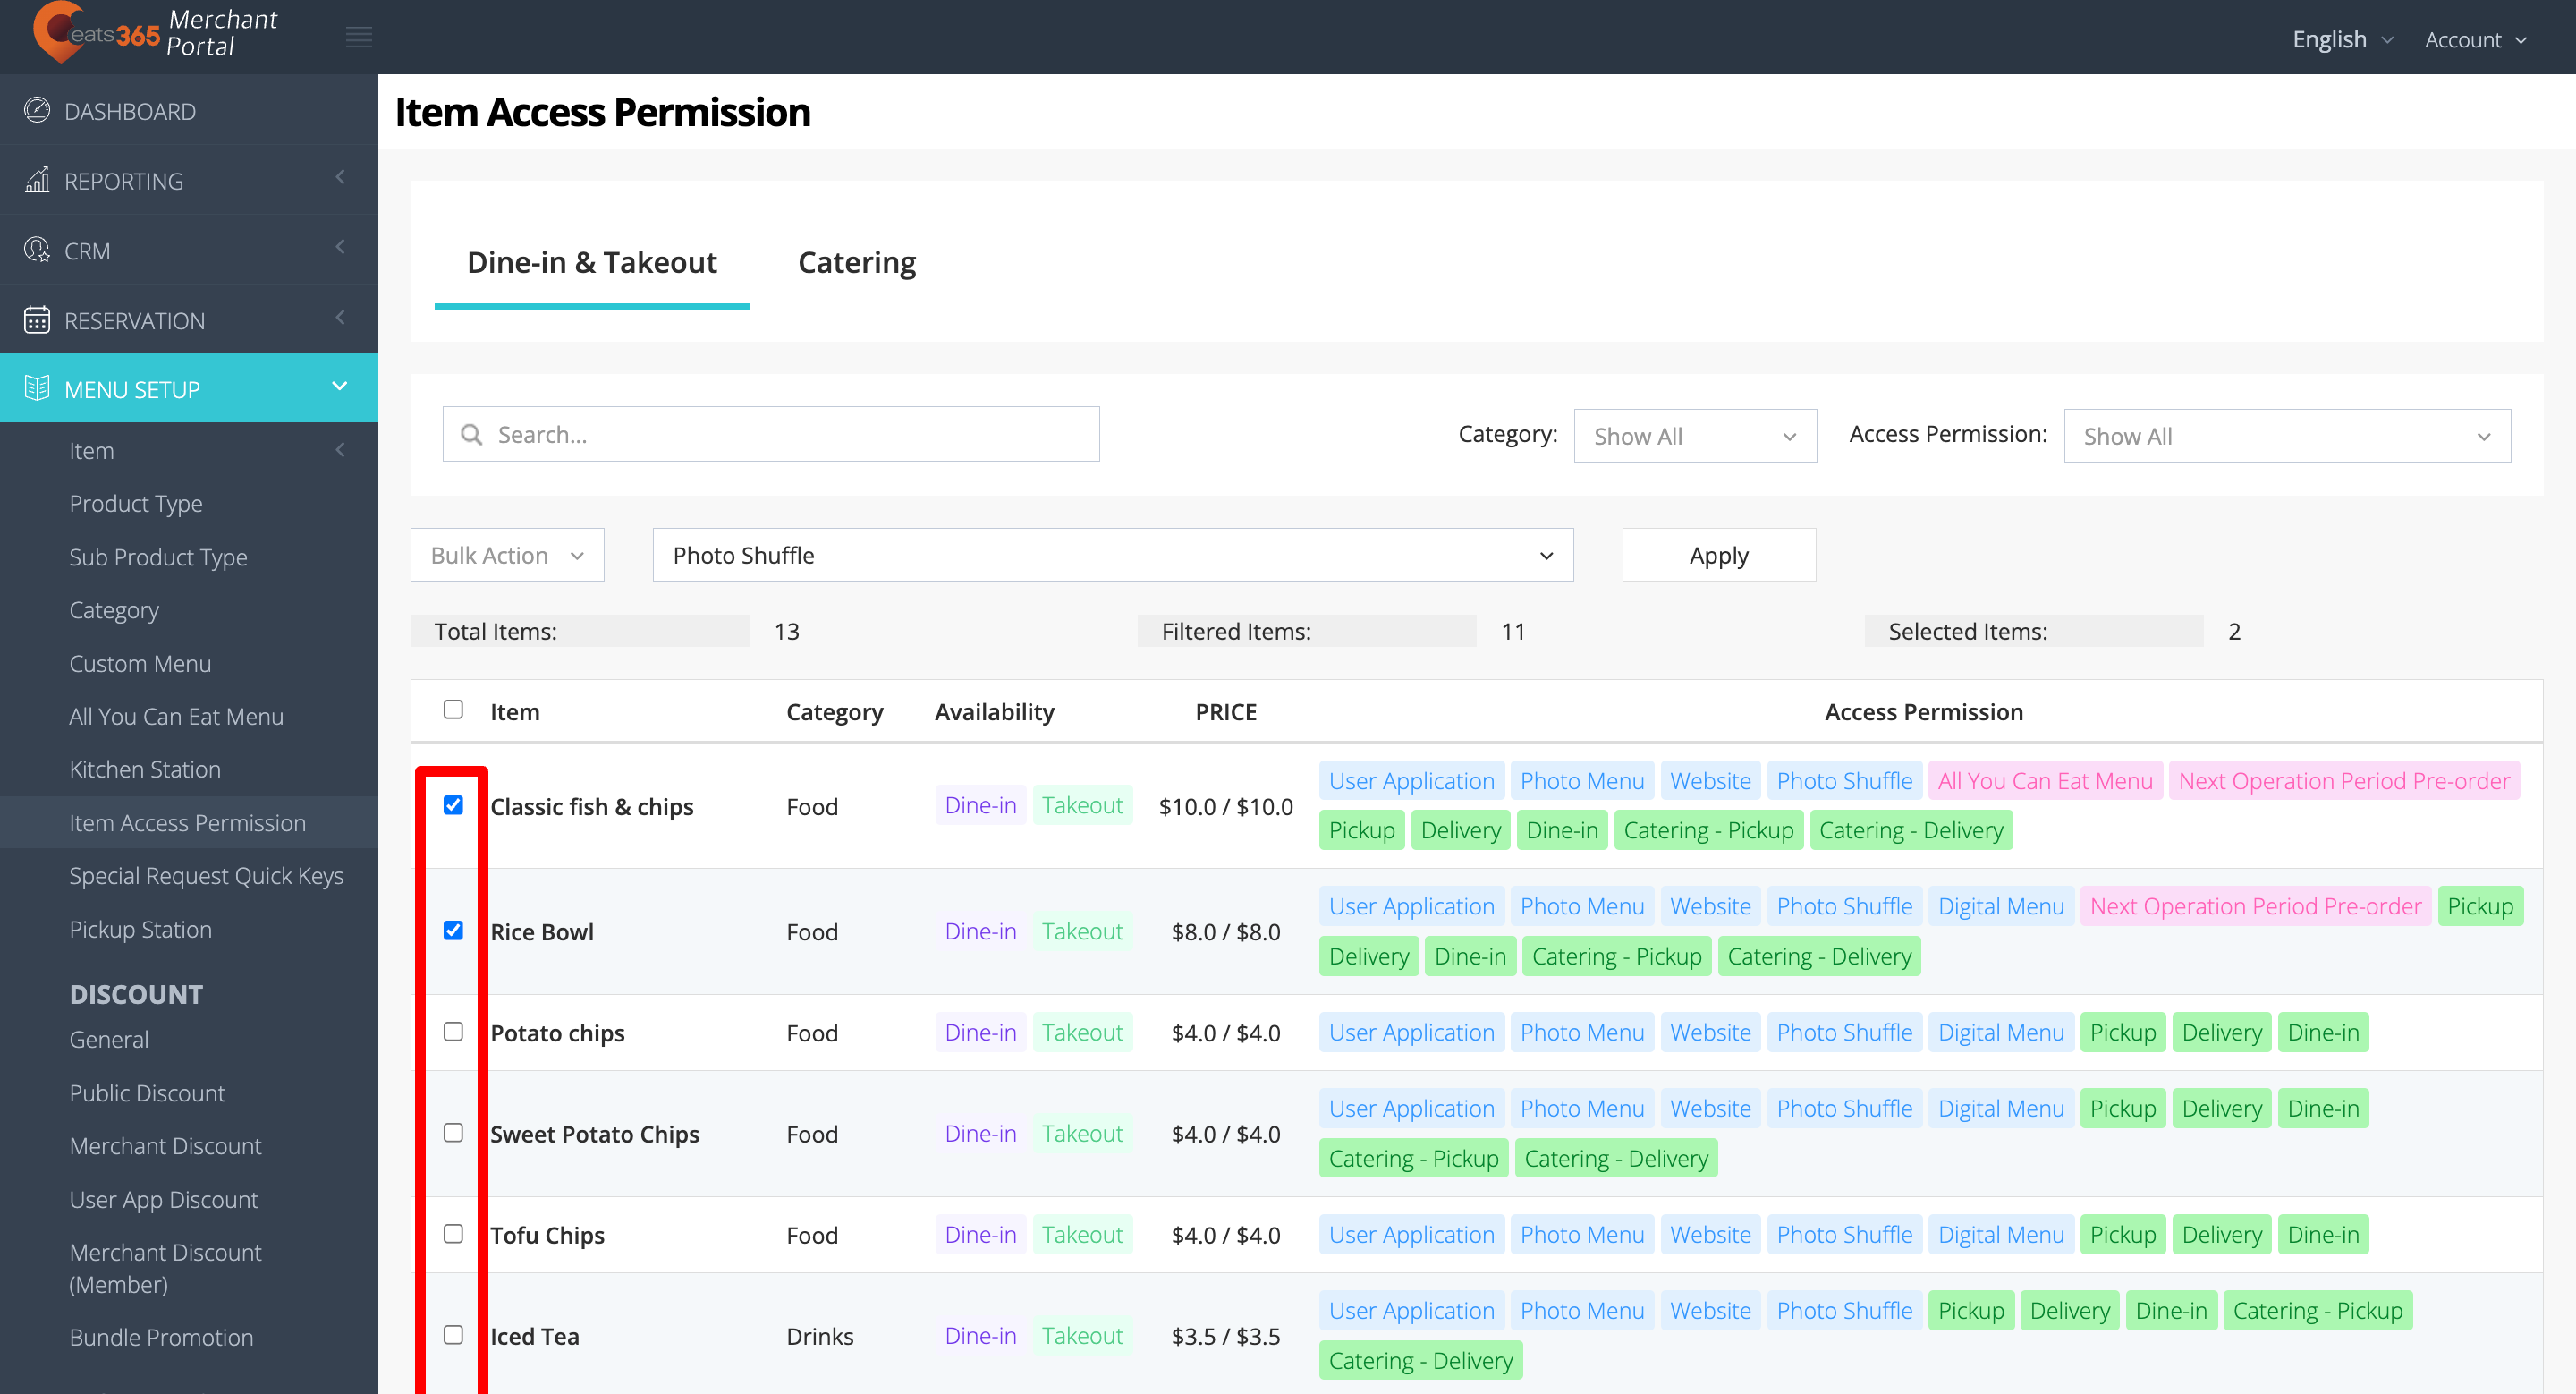
- Click on the checkbox beside the items that you’d like to apply the permission changes to.
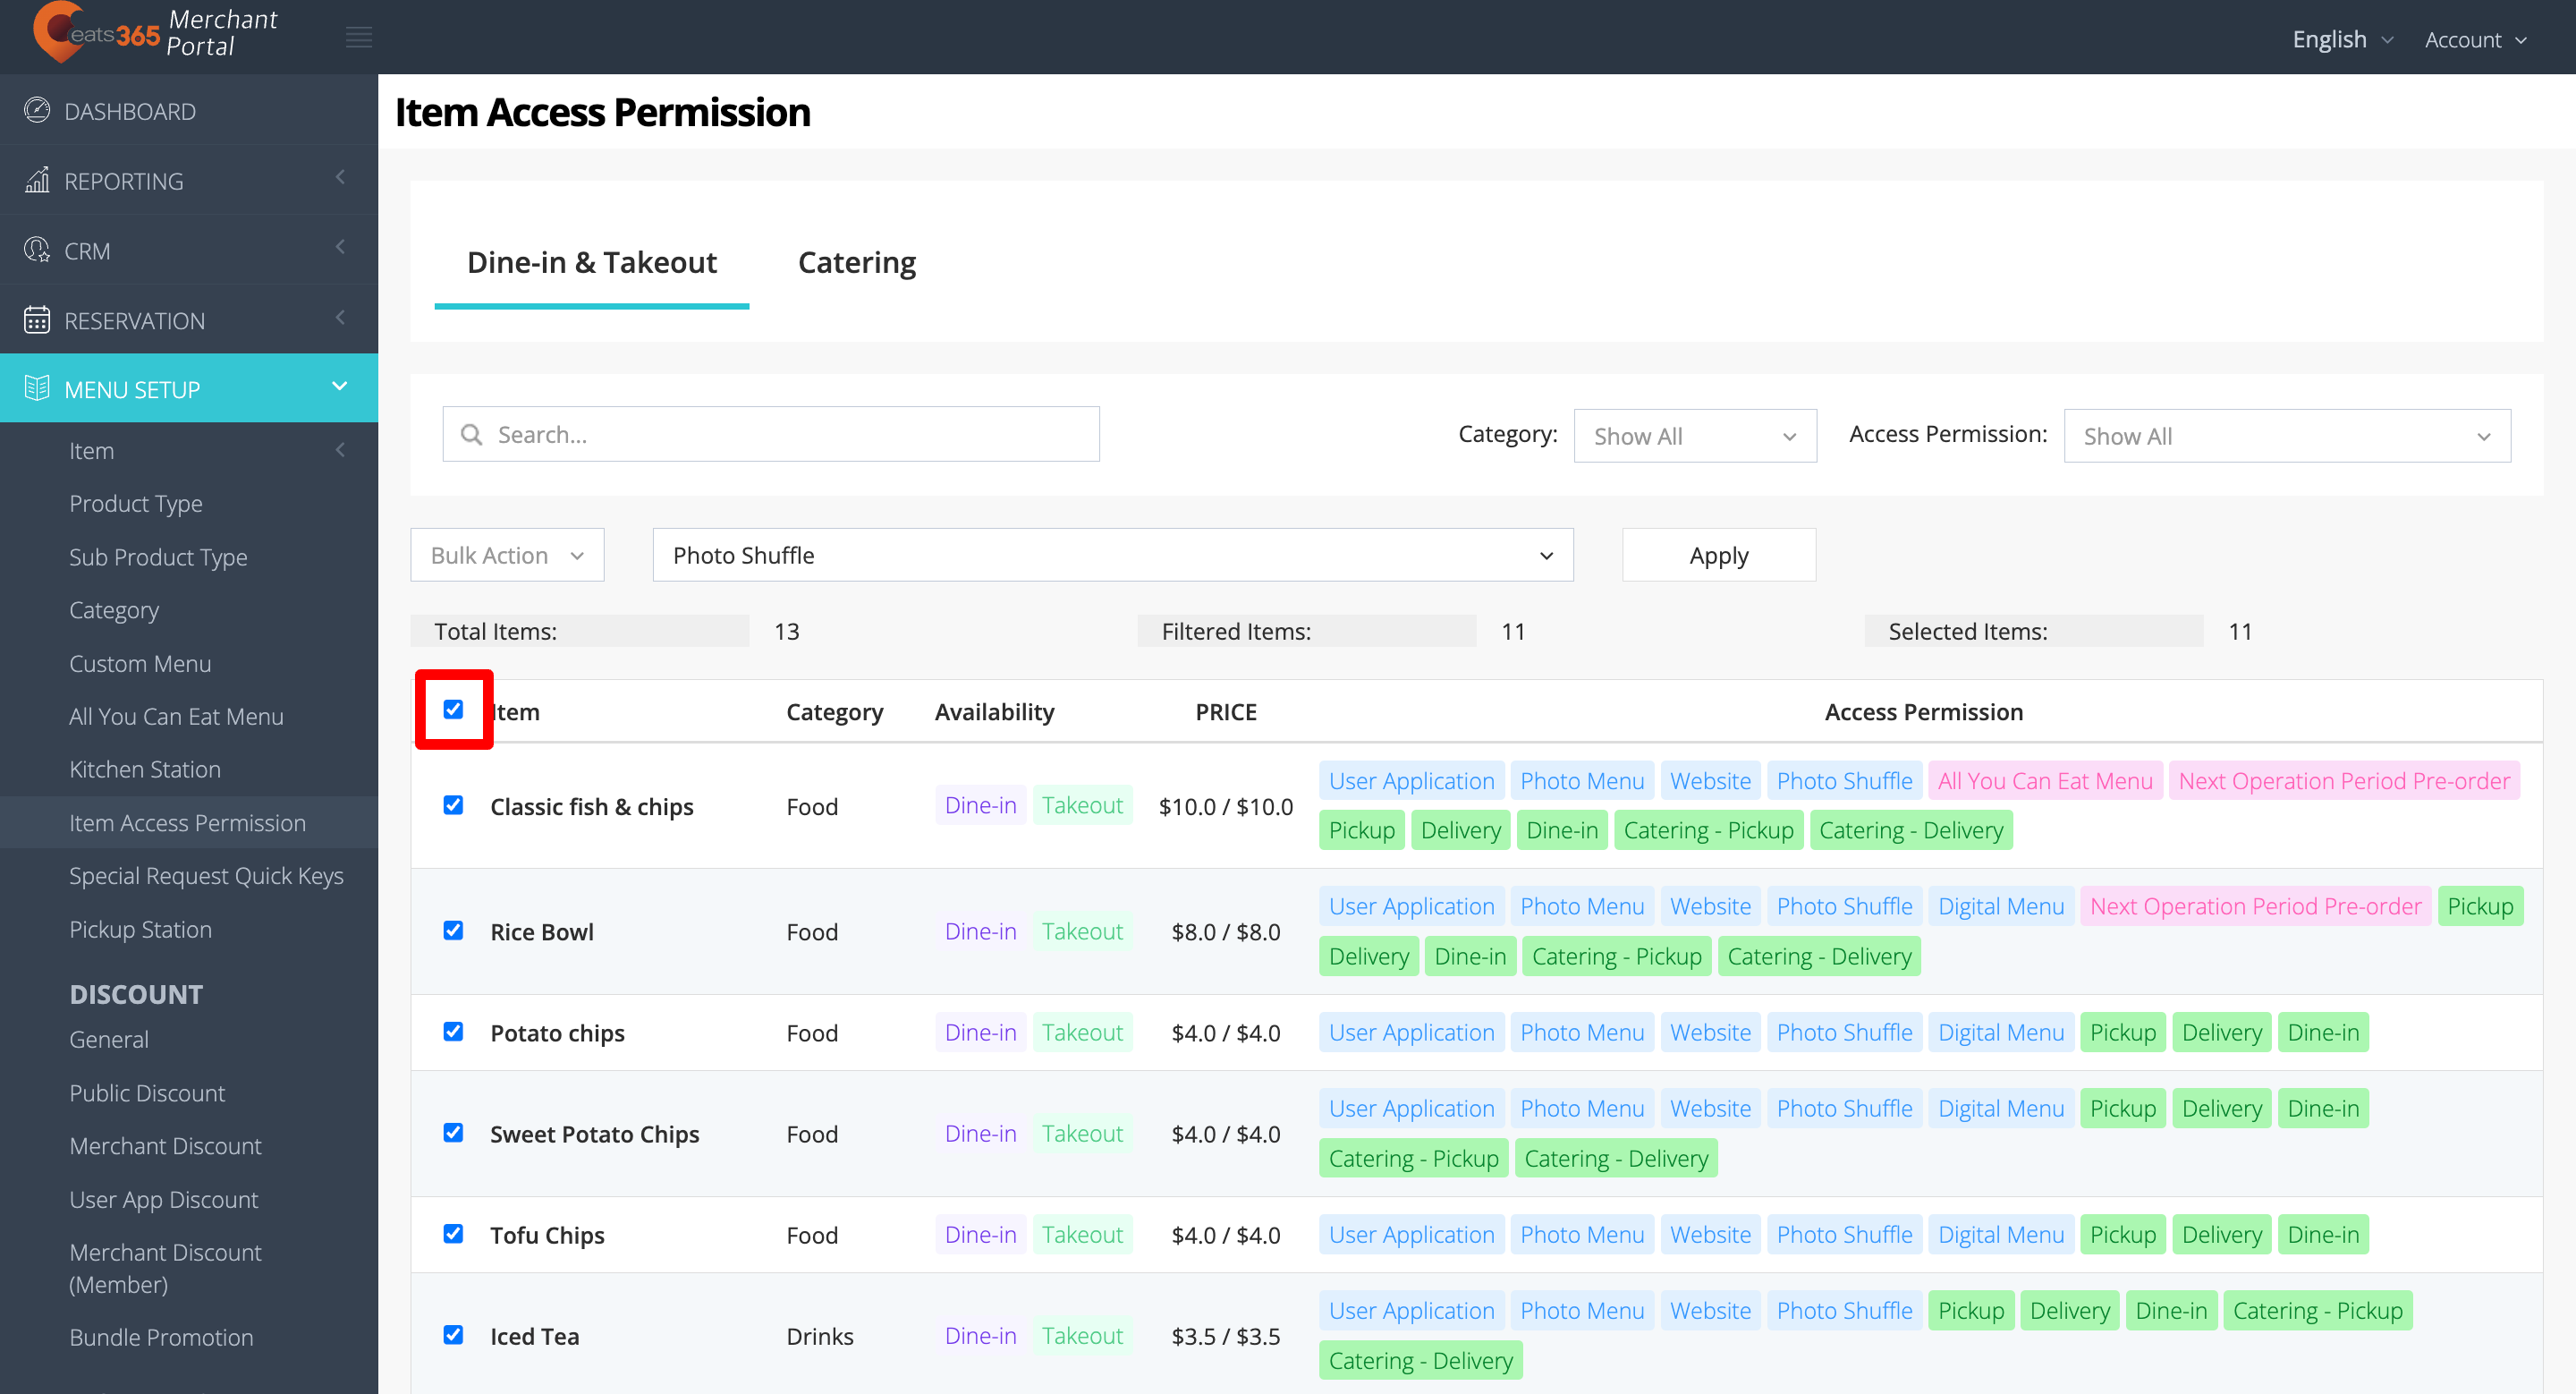
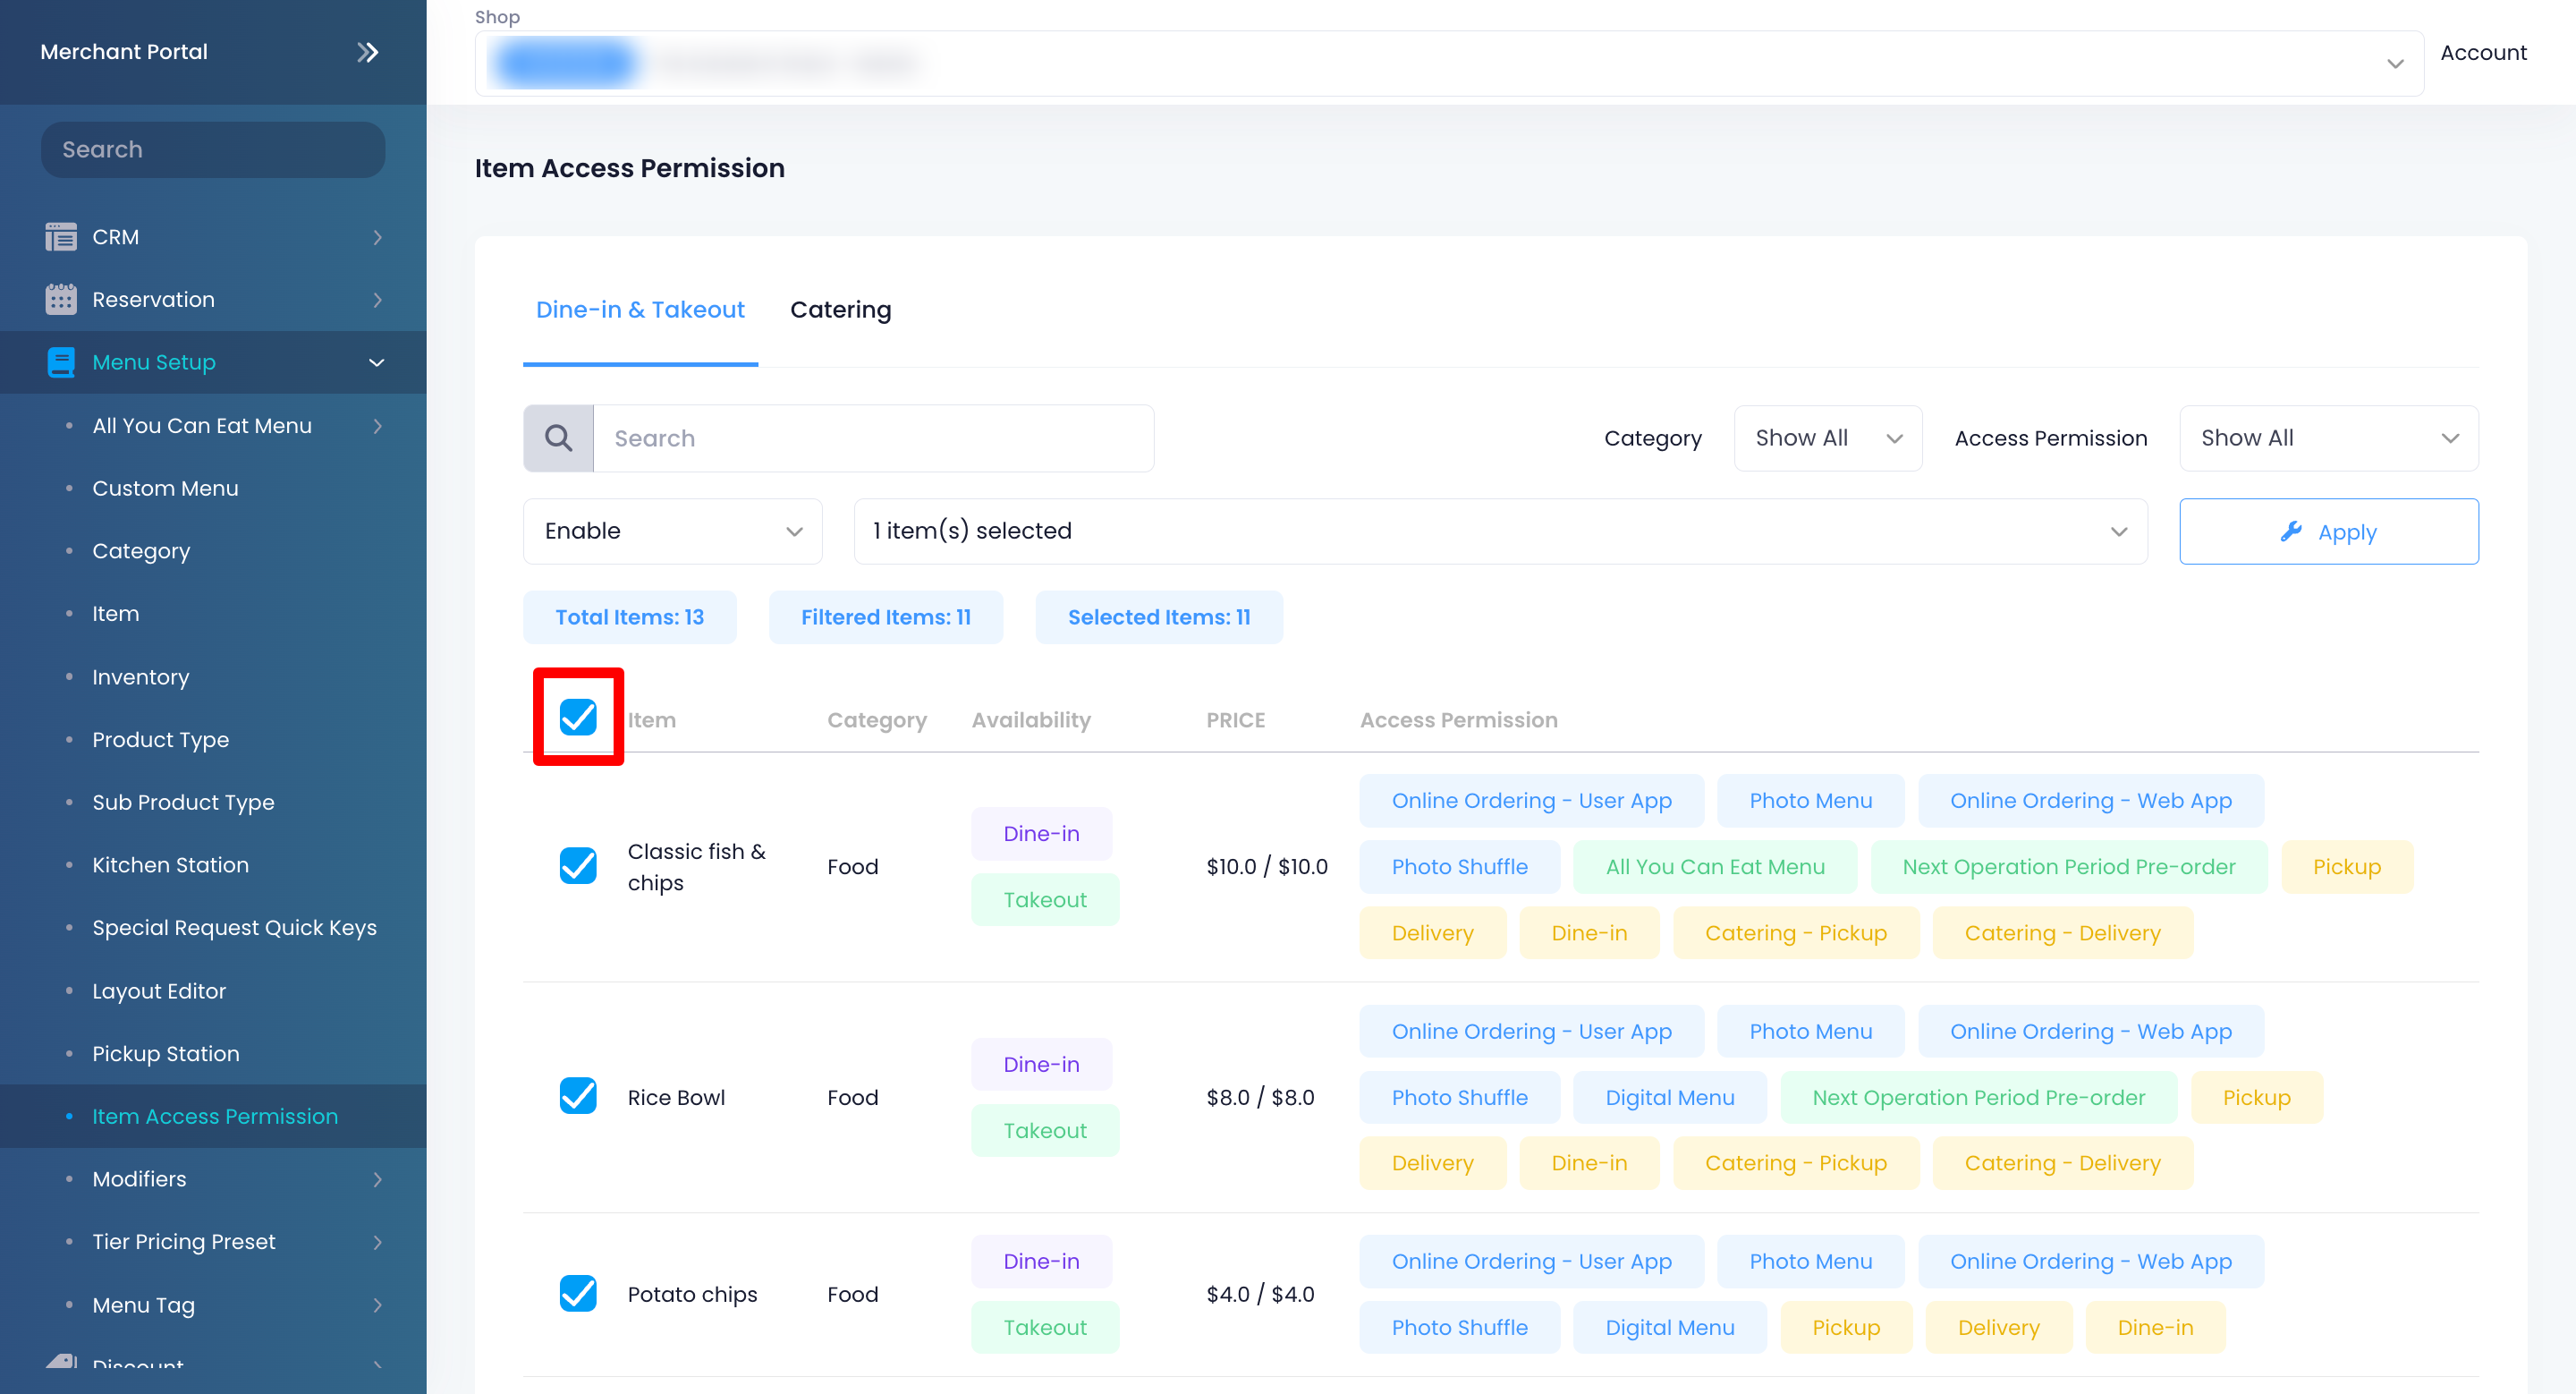
Tip:- To select all items simultaneously, at the top left, click on the checkbox beside Item.
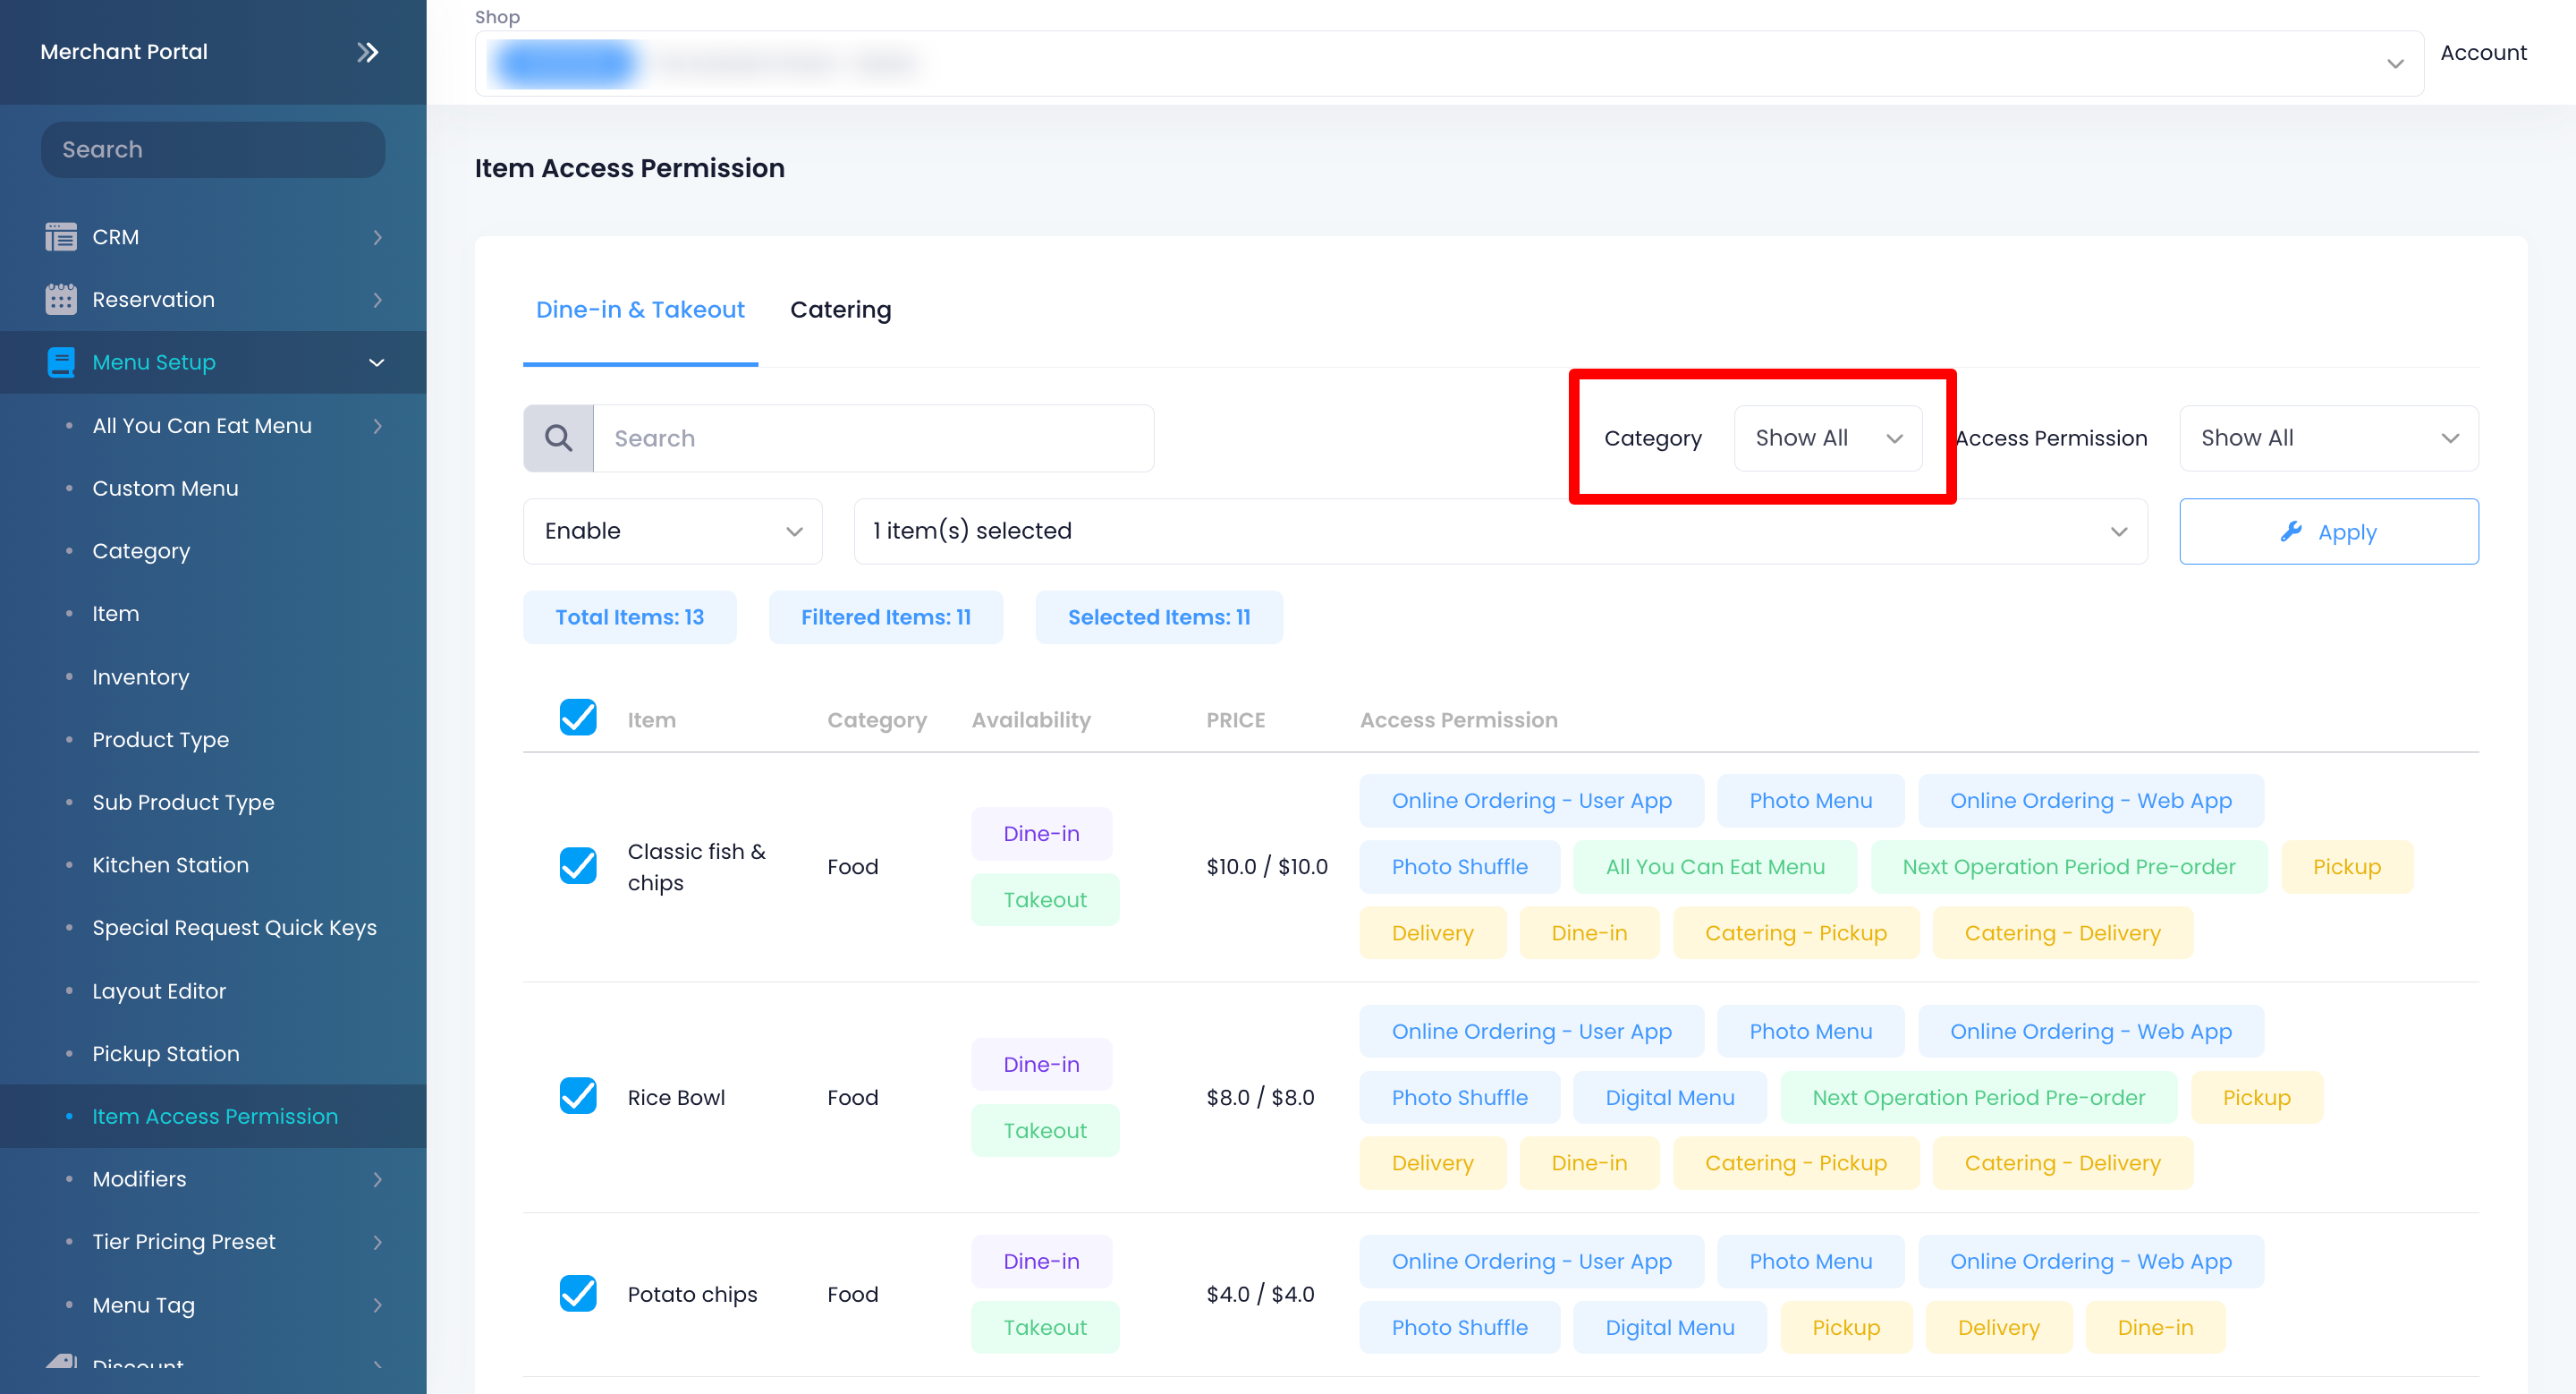
- To narrow down the item options, you can use the search filters available at the top of the page. For example, if you want to check all items under a specific category, next to the Category filter, click on the drop-down menu and select the category with the items that you want to appear.
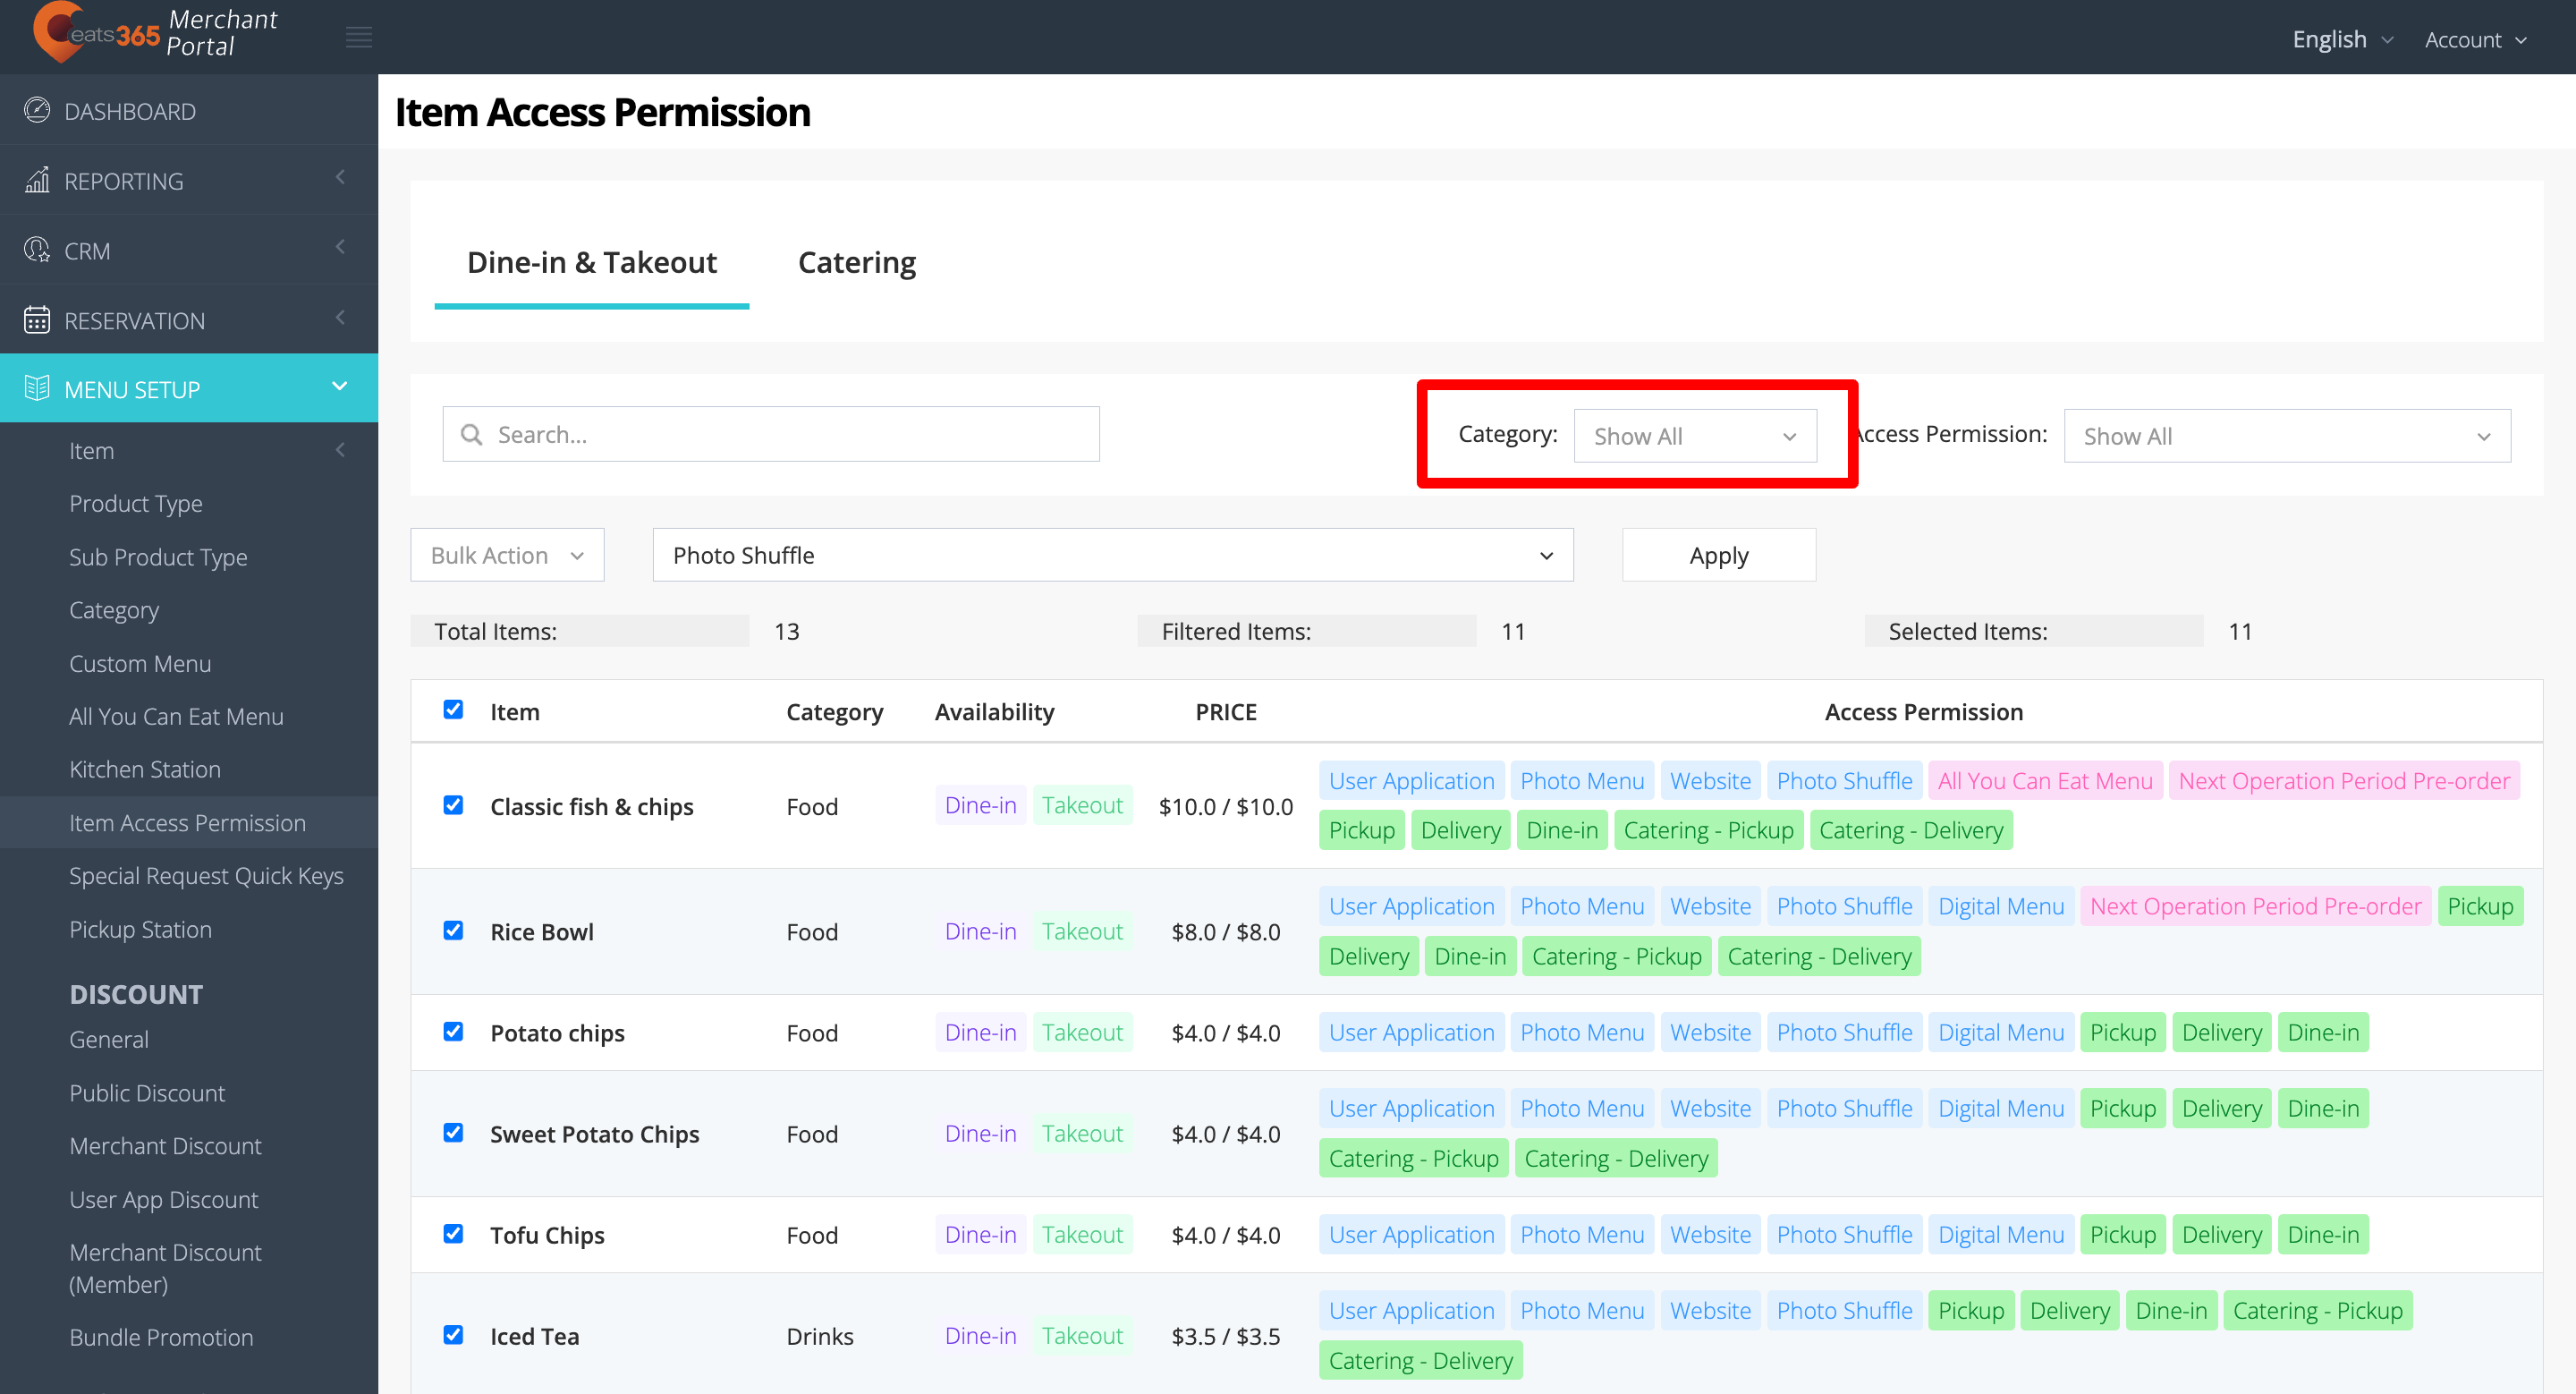
- To select all items simultaneously, at the top left, click on the checkbox beside Item.
- Click on Apply.
Once the permission modification has been applied, you’ll find the updated permissions for an item under Access Permission.
DeleteMerchant Portal 2.0
- Log in to the Merchant Portal.
- On the left panel, click on Menu Setup. Then, click on Item Access Permission.
- Click on Bulk Action, then choose whether you’d like to enable or disable the permissions for an Item.
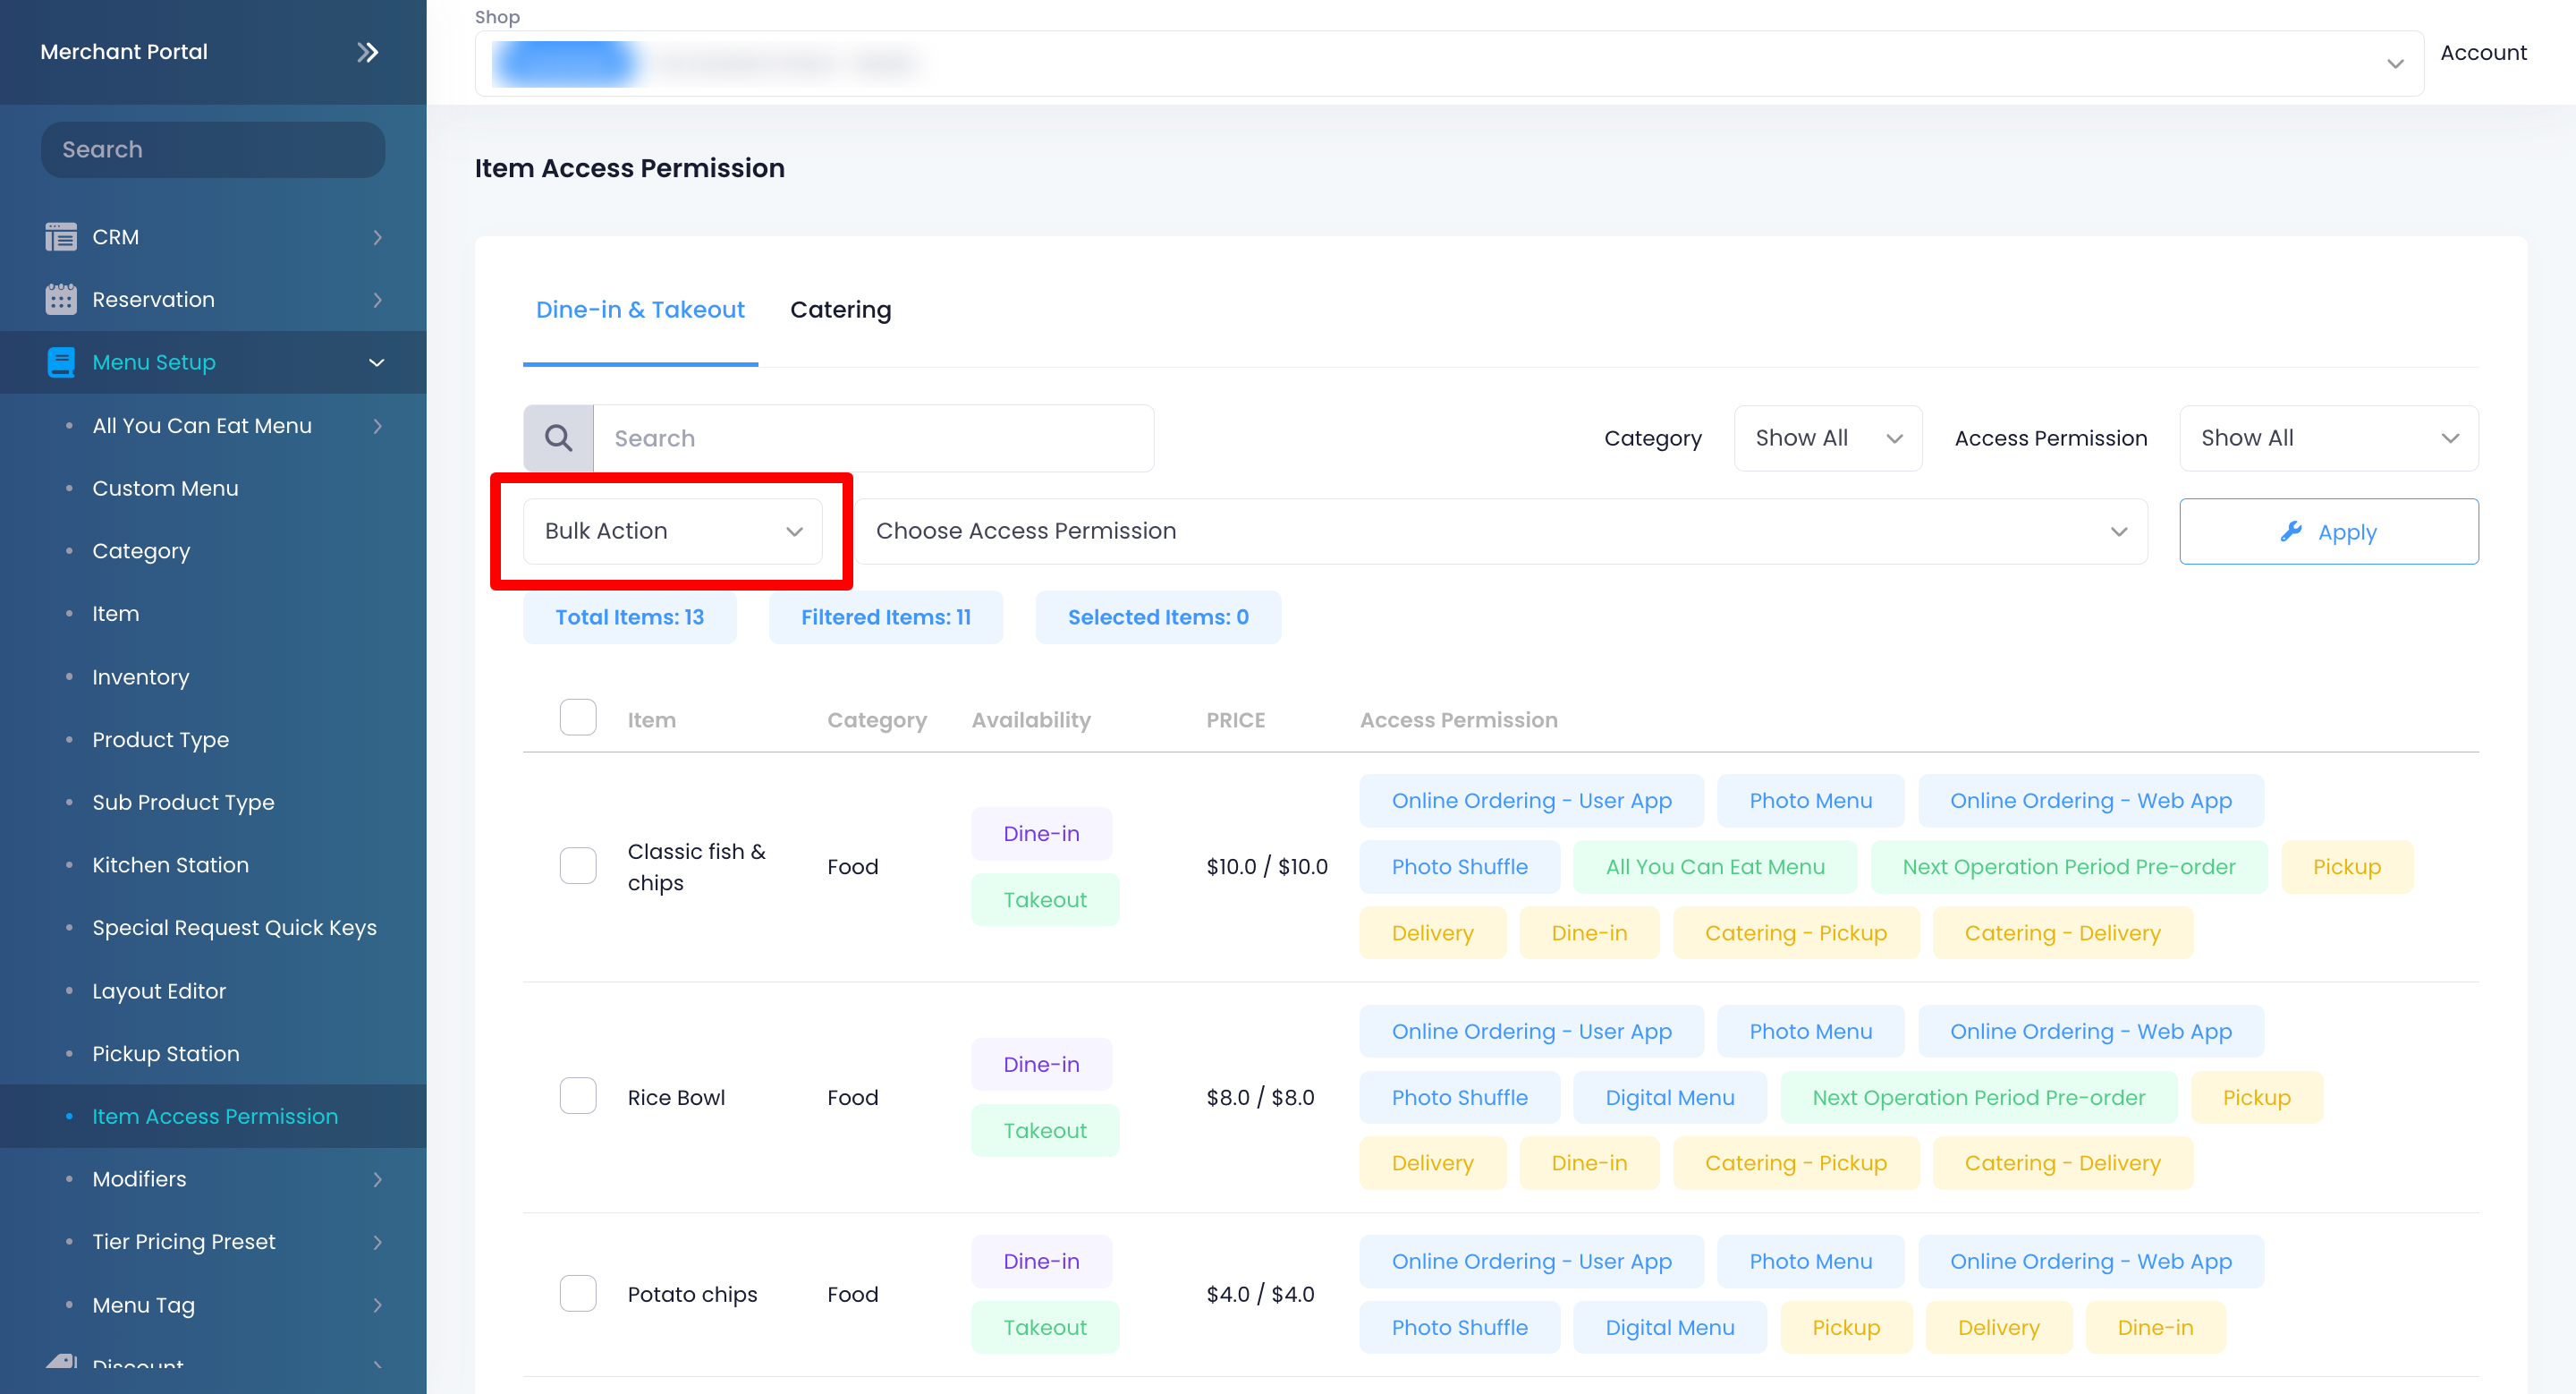
- Click on Choose Access Permission, then choose all of the permissions you’d like to enable or disable for an Item.
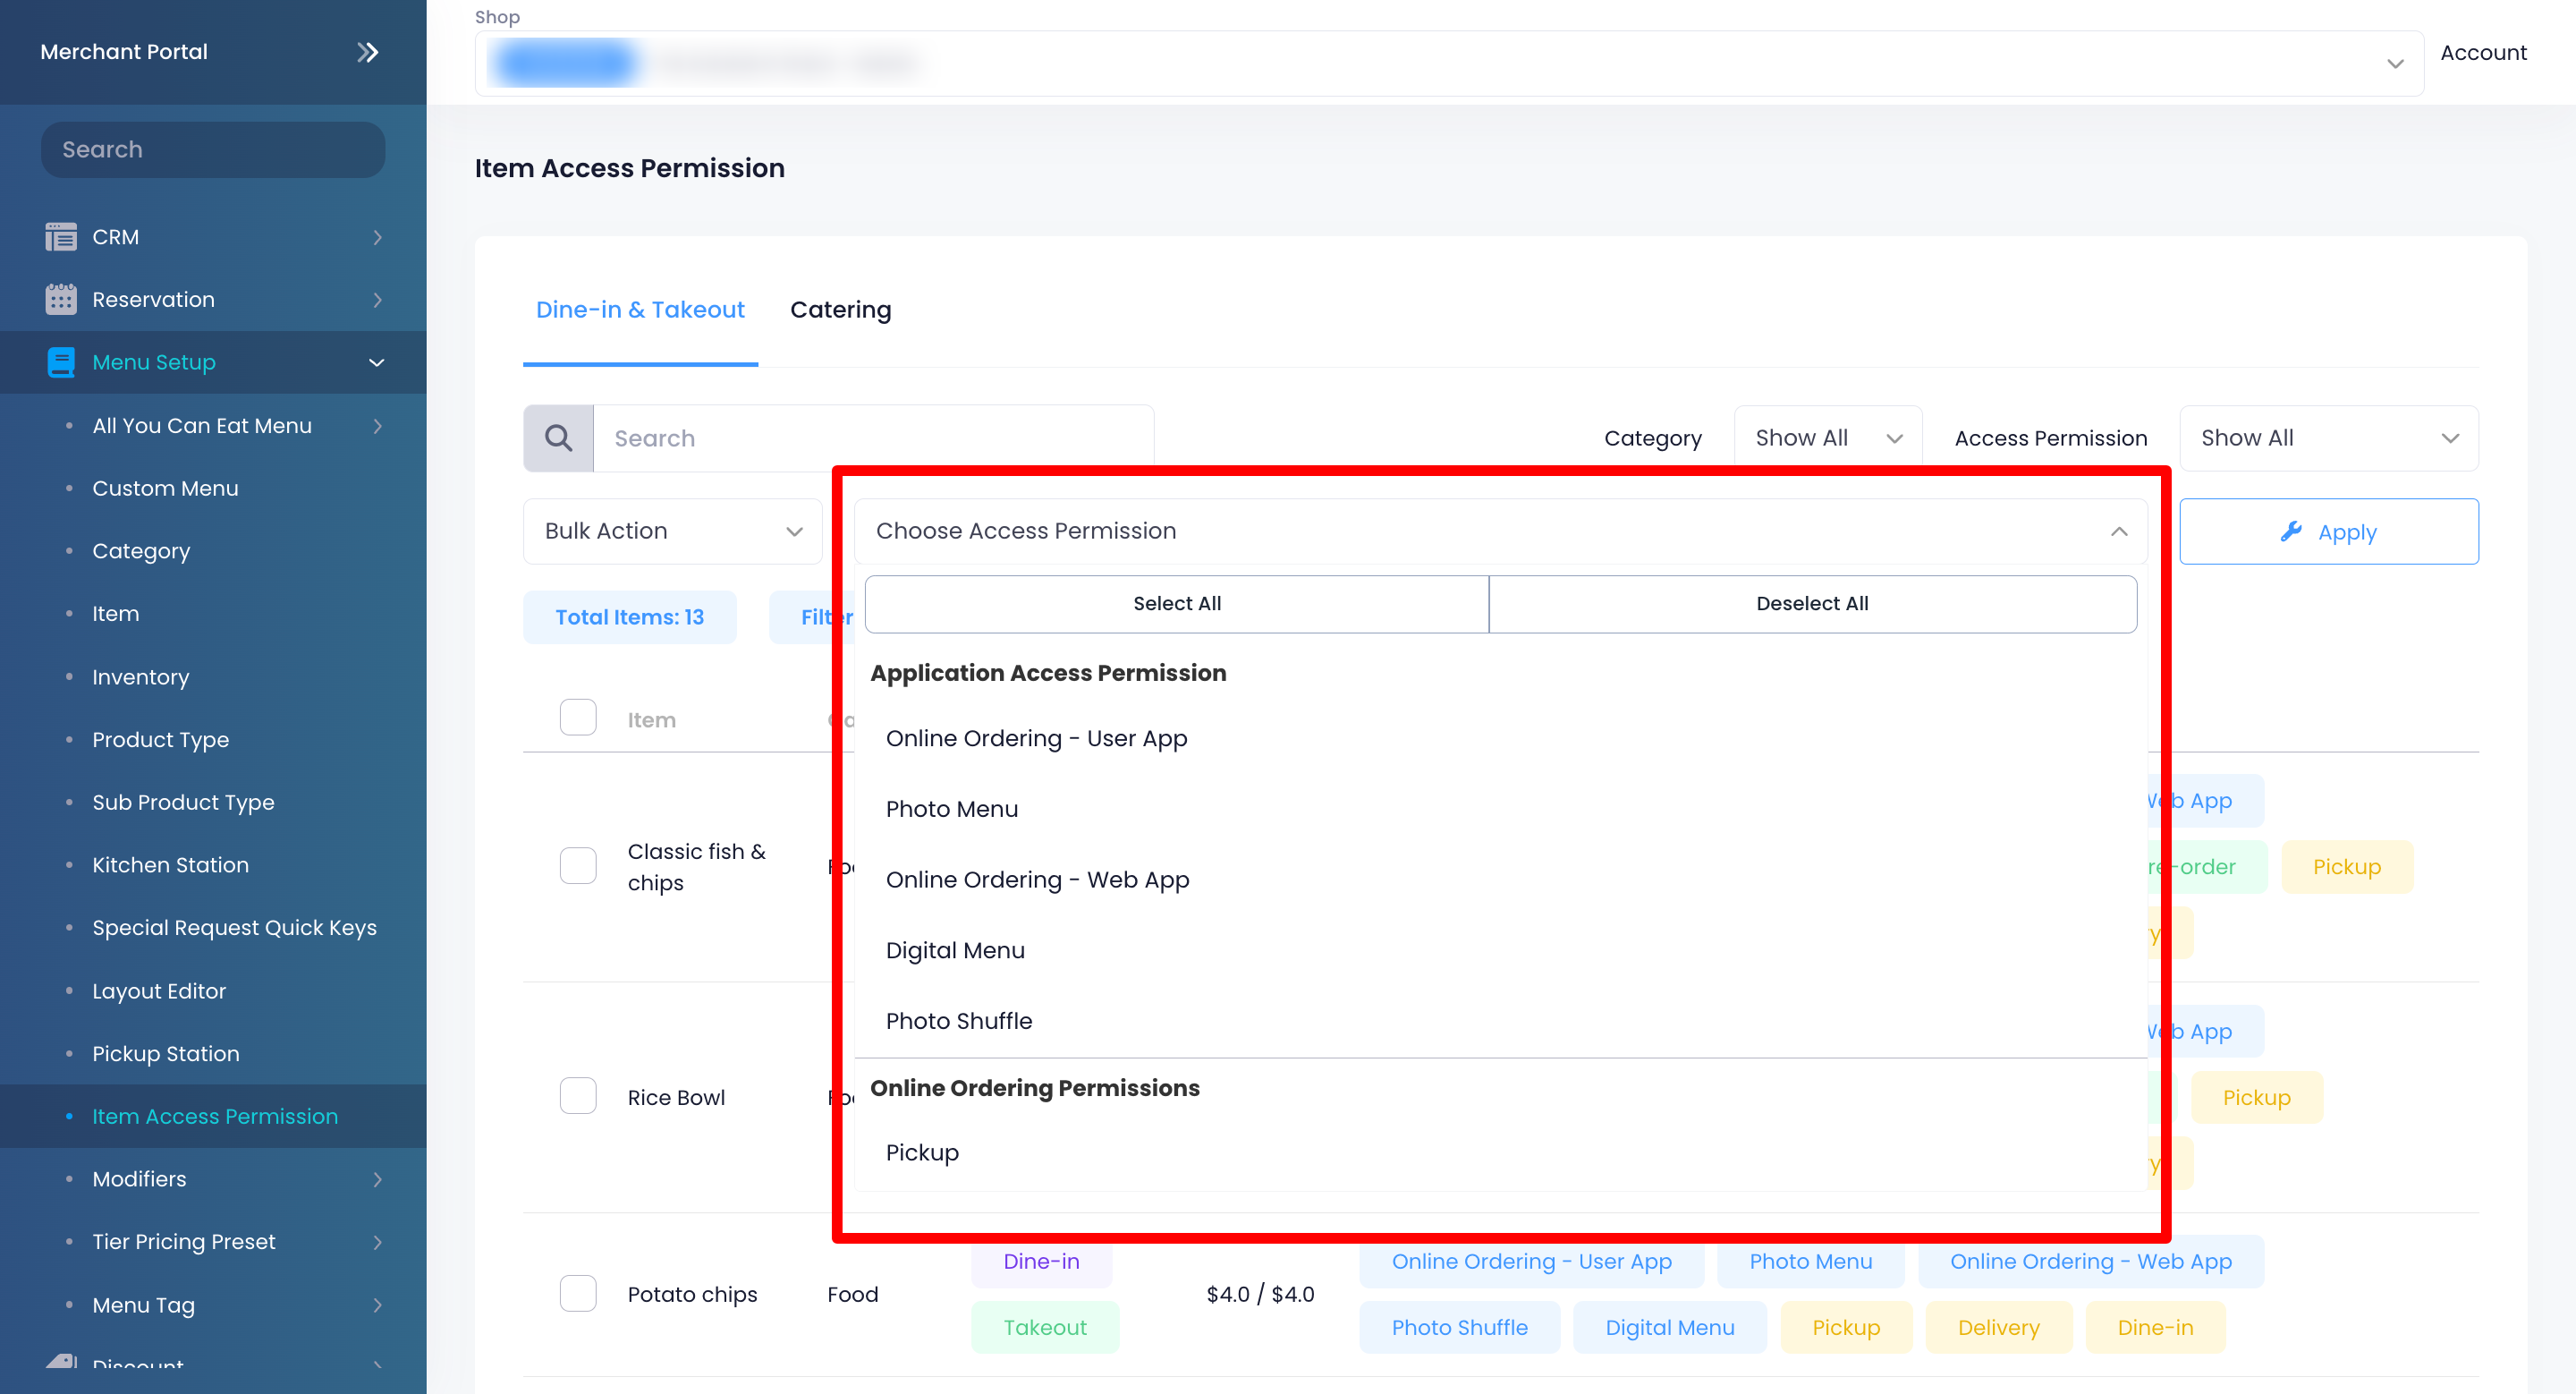
- Click on the checkbox beside the items that you’d like to apply the permission changes to.
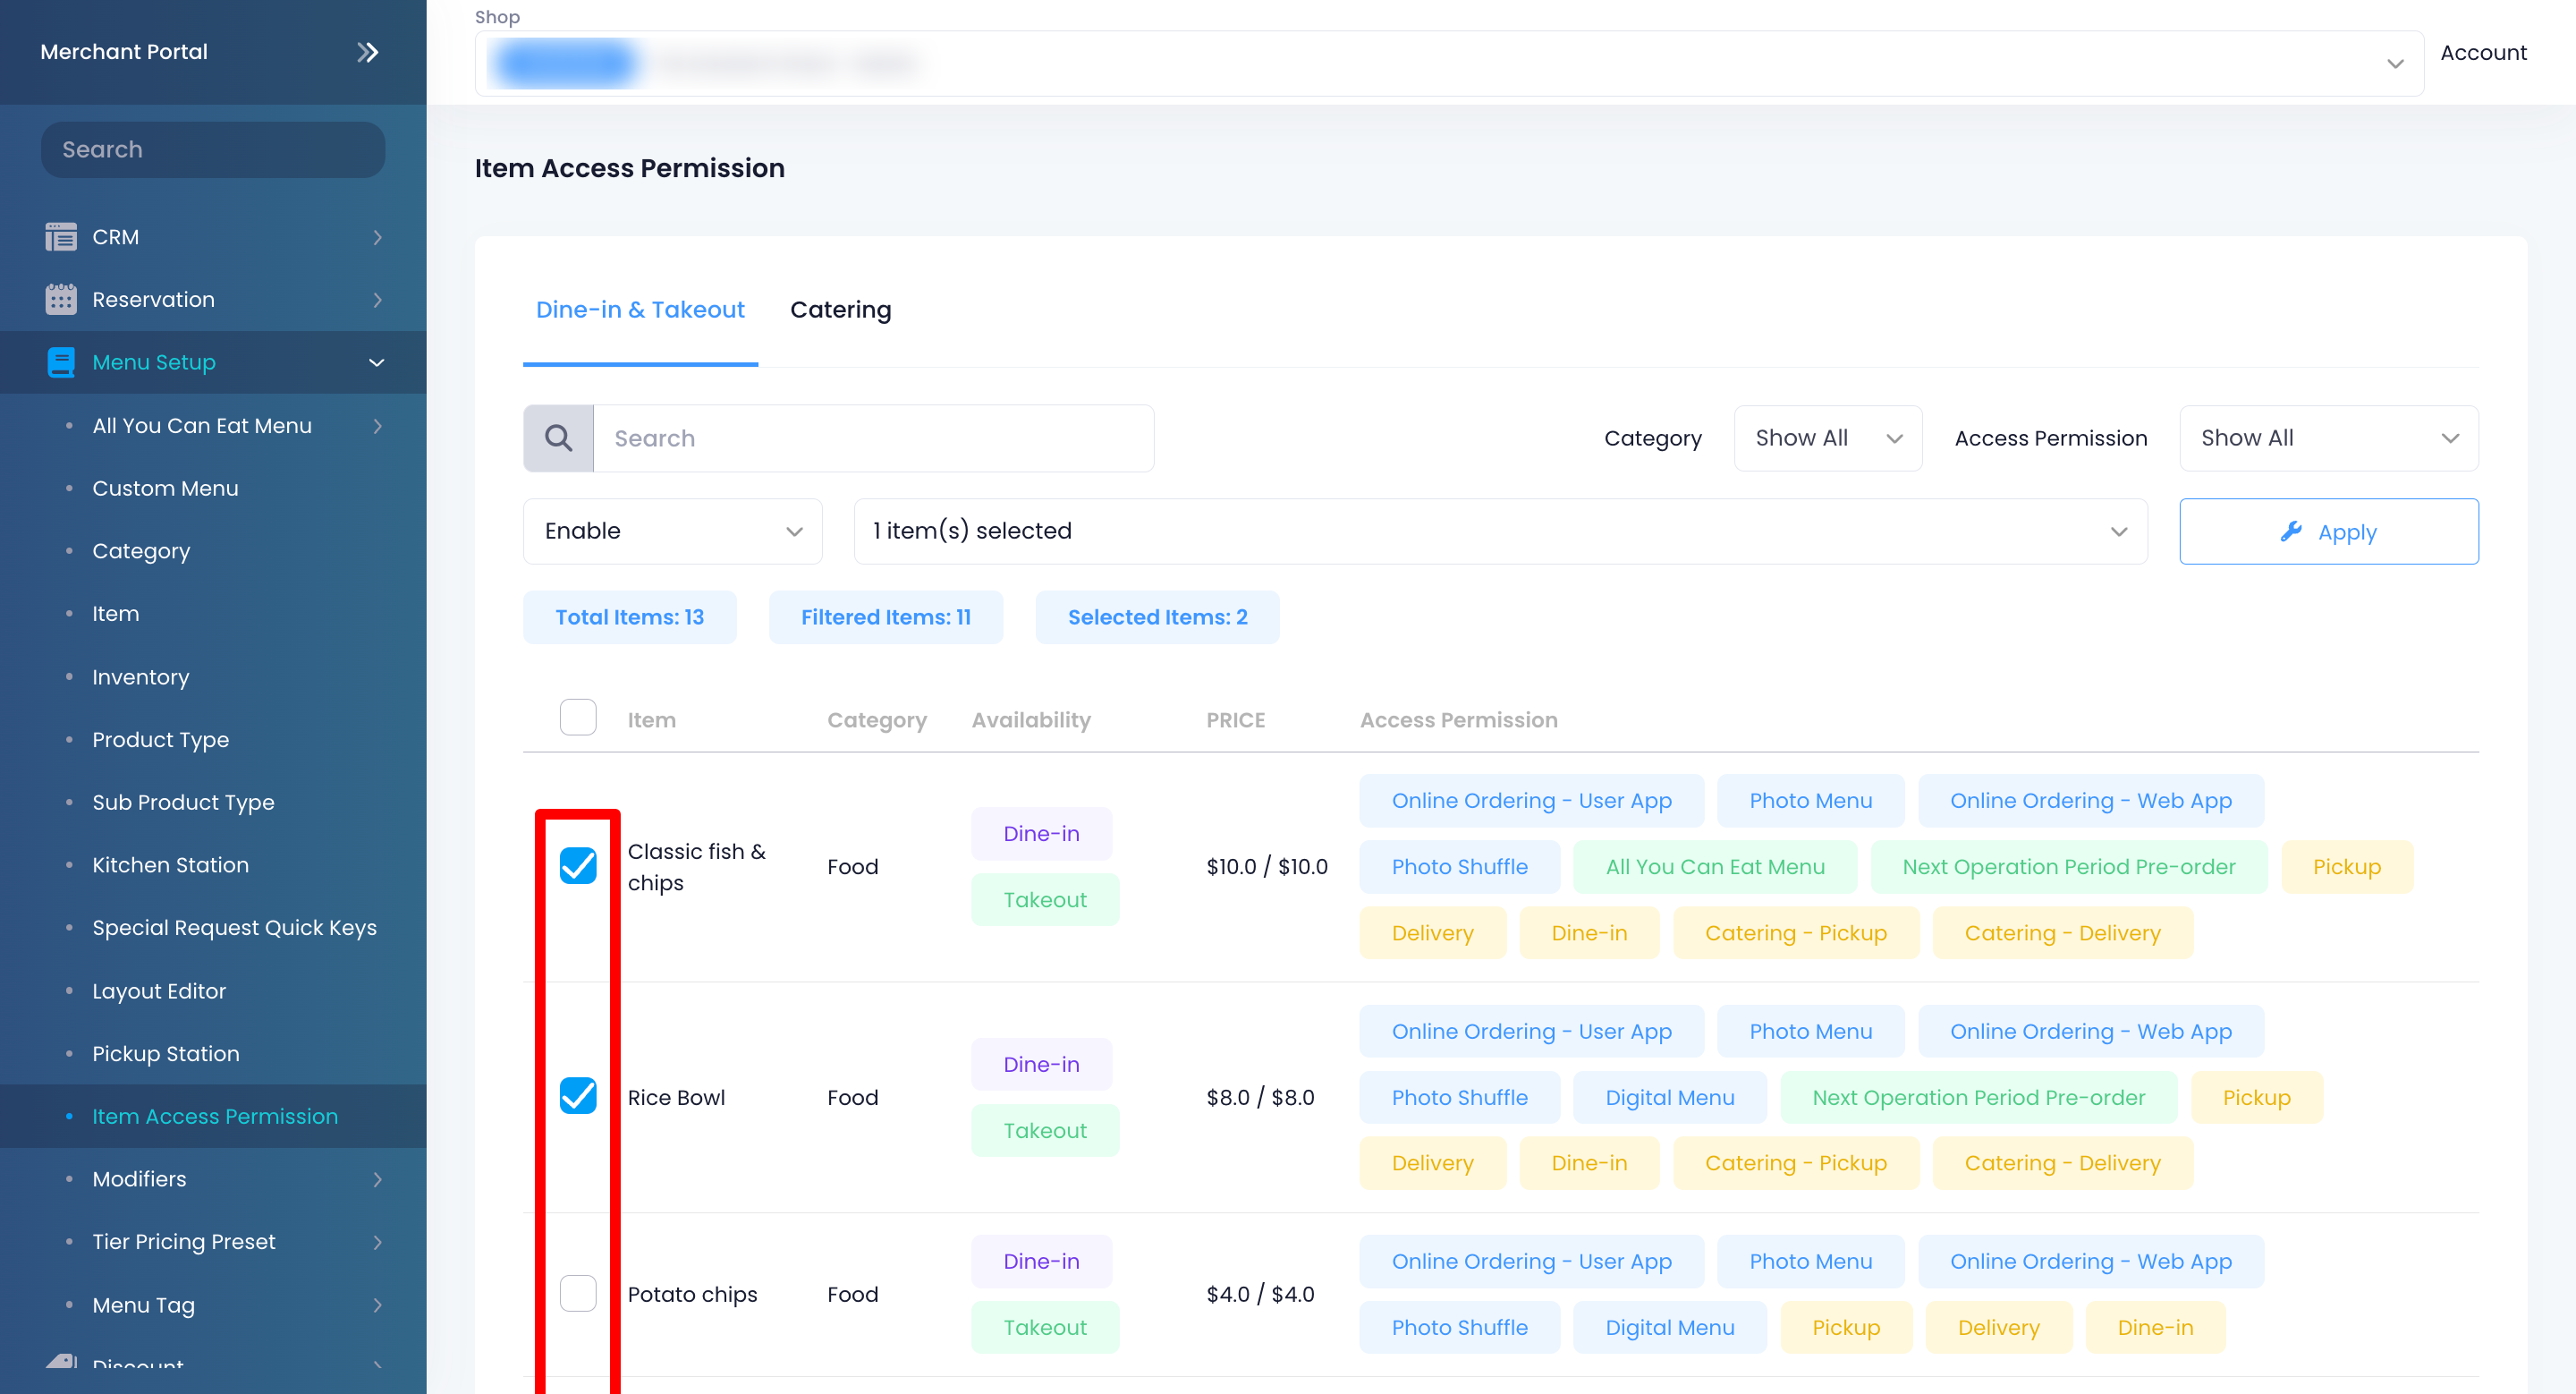
Tip:- To select all Items, at the top left, click on the checkbox beside Item.
- To narrow down the item options, you can use the search filters available at the top of the page. For example, if you want to check all items under a specific category, next to the Category filter, click on the drop-down menu and select the category with the items that you want to appear.
- To select all Items, at the top left, click on the checkbox beside Item.
- Click on Apply.
Once the permission modification has been applied, you’ll find the updated permissions for an item under Access Permission.
Delete Eats365 Products
 Merchant Guide
 Modules
 Membership
 Integrations
 Hardware
 Staff Operations
 Roles & Permissions
 Payments
 Reports
 What’s New
 Release Notes
 Troubleshooting
 Simulators
 Glossary
 Troubleshooter
 System Status