mPOS
Table of Contents
Manage orders in the mPOS app
Learn how to add, edit, remove, and customize orders in the mPOS app.
The mPOS module acts as a mobile POS terminal that wait staff can use to take tableside orders and process payments.
In this article, you’ll learn how to add, edit, remove, and customize orders in the mPOS app.
Order Management
Use the mPOS to take and modify customer orders.
Add items to an order
To add items to an order, follow the steps below:
- Open the mPOS app.
- Select a table and enter the party size. Tap Confirm to proceed.
- If you’ve enabled Order Display By Seat, tap the seat option to change the seat to the appropriate seat number.
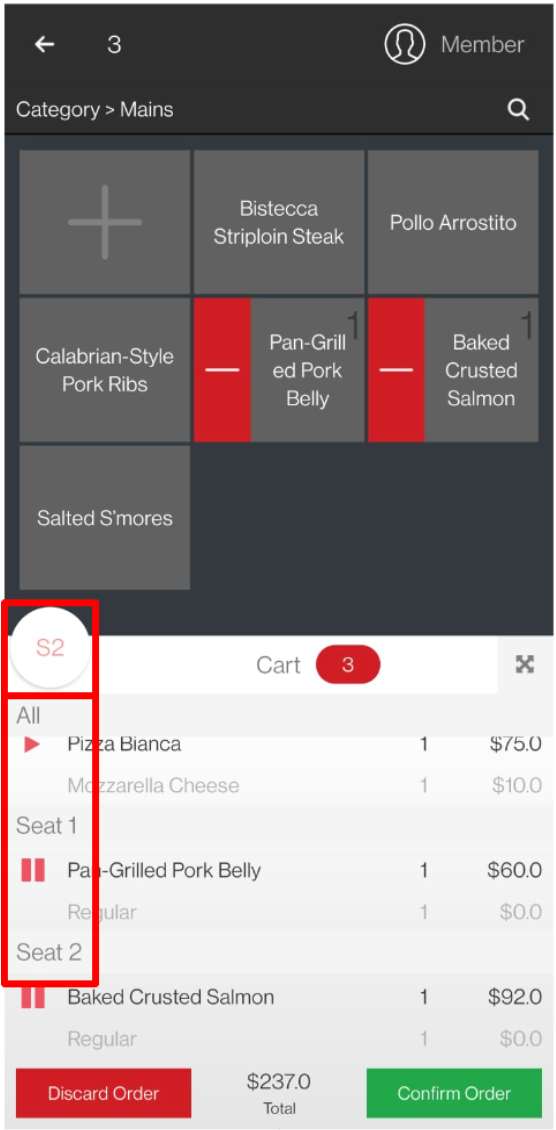
- On the order-taking screen, select the items and applicable modifiers that you want to add to the customer's order.
Note: If you’ve enabled Quick Mode, tap and hold on an item to display the Modifiers page. For more information on how to enable or disable Quick Mode, refer to Configure mPOS settings. - When you’ve completed adding the items to the customer’s cart, tap Confirm Order.
Place a Combo Item order
Combo Item orders can be placed through the mPOS app. To configure combo menu items, refer to Set up and manage a Combo Item.
To add a Combo Item, follow the steps below:
- Open the mPOS app.
- From the order-taking screen, choose a Combo Item.
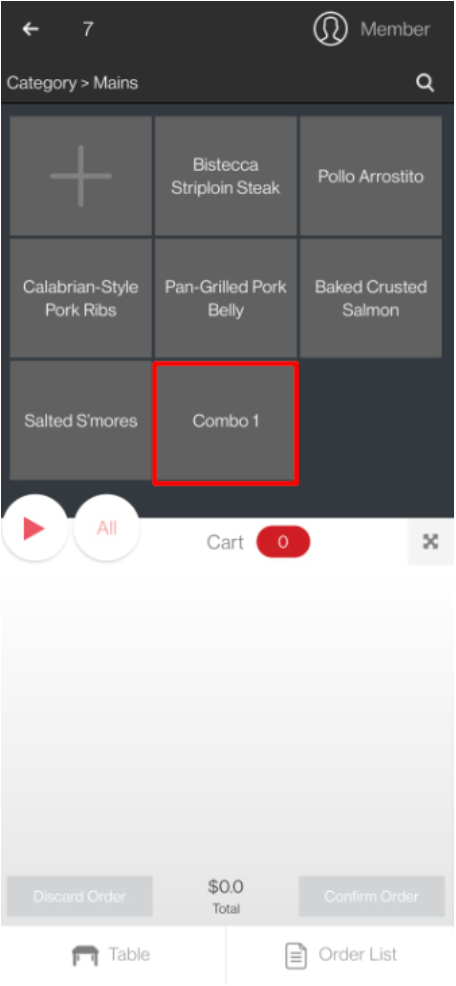
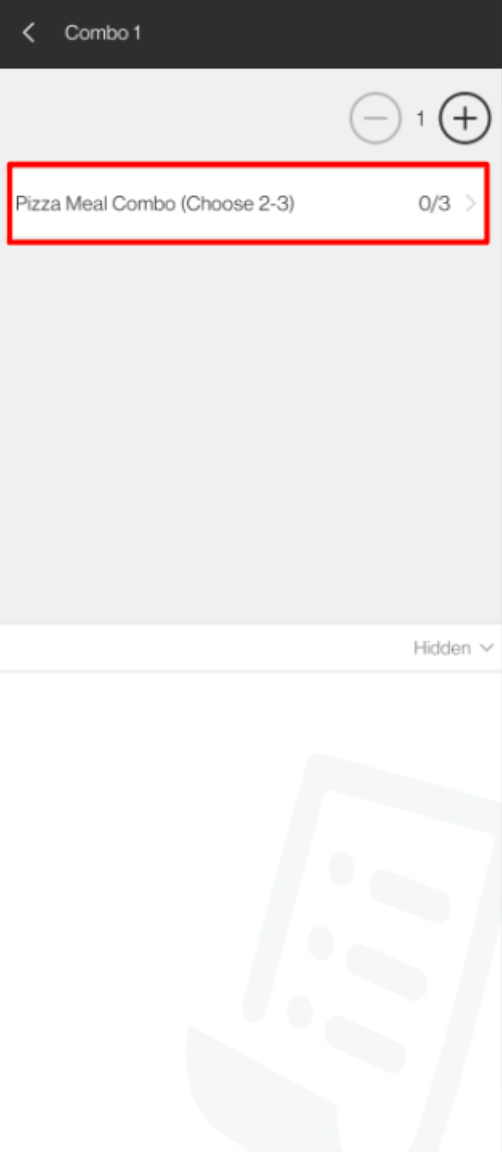
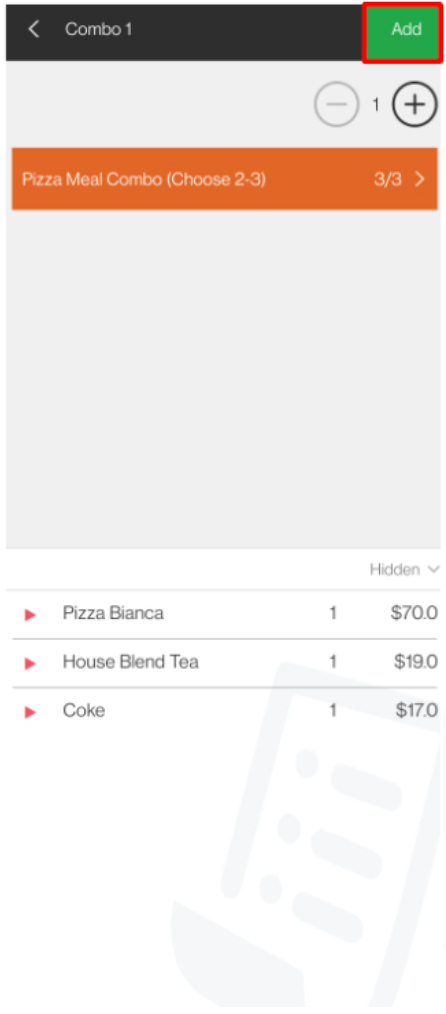
- Select a Combo Item option, then choose from the available menu items included in the Combo.
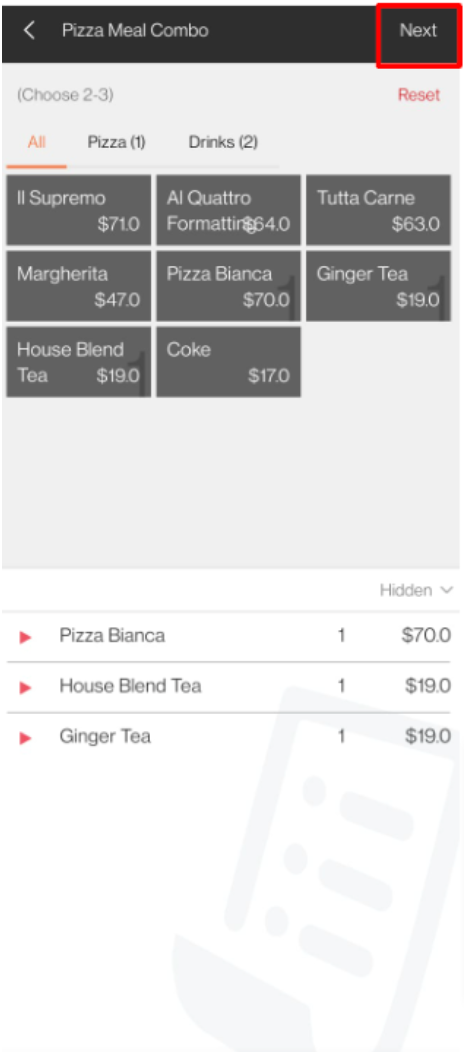
- To review the selected menu items that have been added to the Combo, tap Next.
- Tap Add to confirm.
Change item quantity
Depending on whether you’ve enabled Quick Mode in the mPOS settings, the method to change a menu item’s quantity can change based on the selected setting. For more information on how to enable or disable Quick Mode, refer to Configure mPOS settings.
Change quantity from the order-taking screen
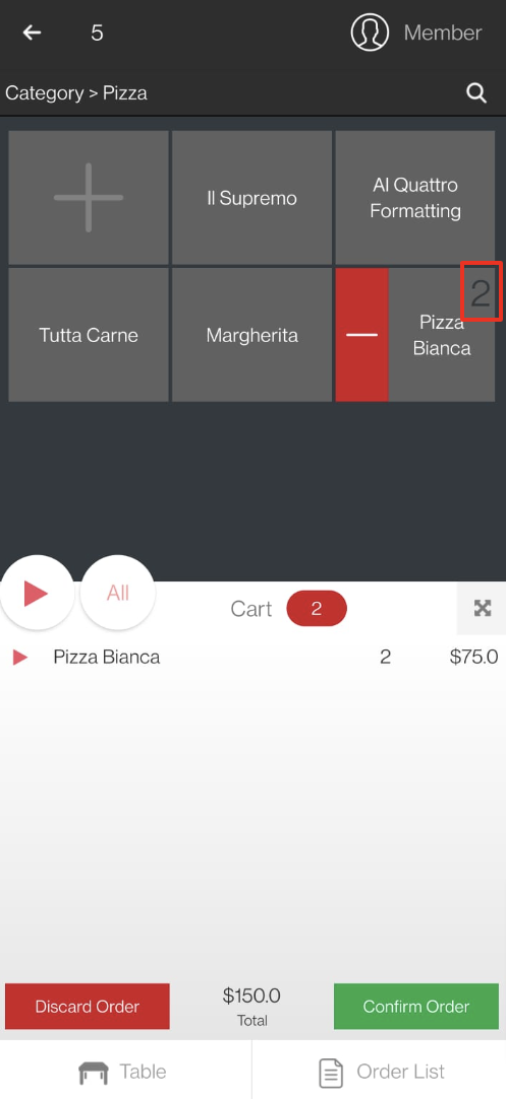
If Quick Mode is enabled, you can modify an item’s quantity directly from the order-taking screen.
To modify the quantity, tap a menu item to increase the quantity of the item in the cart. To decrease the quantity, tap the minus symbol  beside the selected menu item.
Change quantity from the Modifiers screen
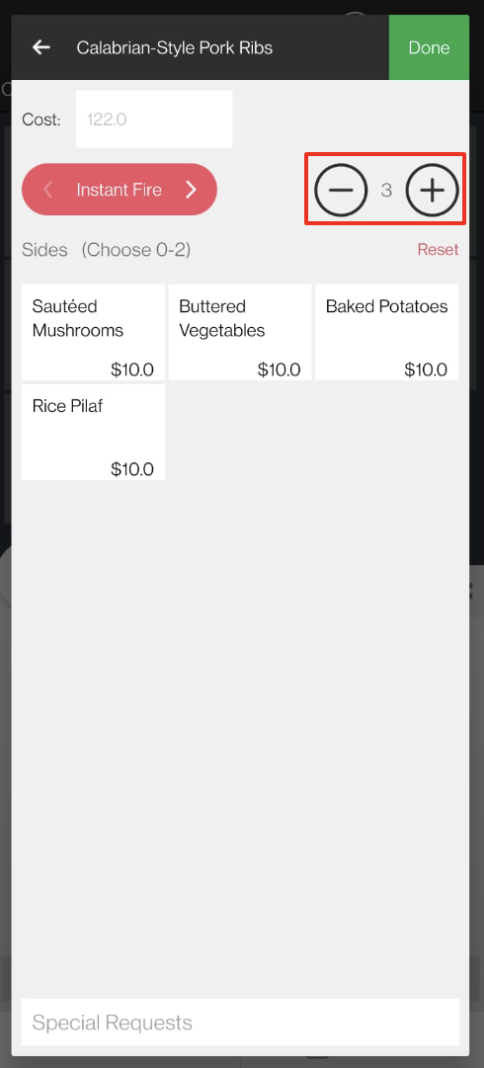
If Quick Mode is disabled, you can modify an item’s quantity from the Modifiers screen.
To modify the quantity, from the Modifiers screen, tap add  to increase the quantity and tap minus
 ![]() to decrease the quantity.
to decrease the quantity.
Search item by Product Code
Use an item’s Product Code or Stock Keeping Unit (SKU) to search for an item.
To find an item using the Product Code, follow the steps below:
- Open the mPOS app.
- At the top right of the order-taking screen, tap Search
 .
. - Enter the Product Code.
- Tap Add
 . The Item is added automatically to the cart.
 - If the item has modifiers, the screen prompts you to select the item’s modifiers. At the top right, tap Done.
Add a member to an order
To create an order for a member, follow the steps below:
- Open the mPOS app.
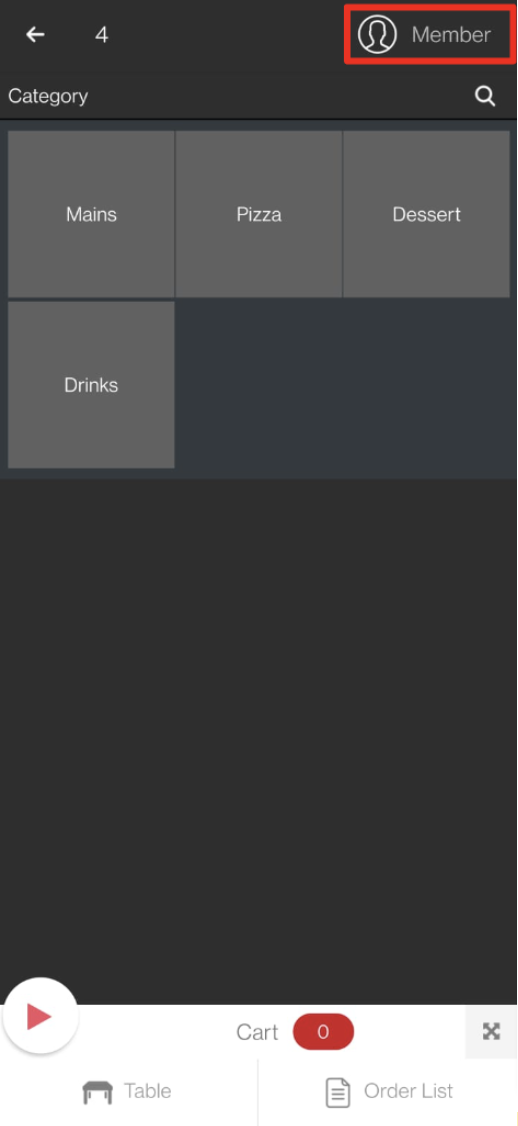
- At the top right of the order-taking screen, tap Member
 .
.
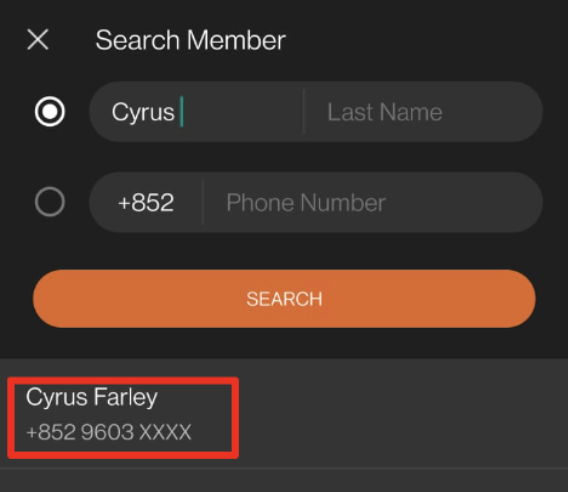
- To find a member’s record, enter the member’s First or Last Name, or Phone Number. Then, tap Search.
- From the search results, tap the member record. The Member Overview appears on the screen.
- Confirm if the selected record matches the member’s details.
- To add the member to the order, tap Add to Order.
Tip: This option changes to Remove from Order once a member has been added.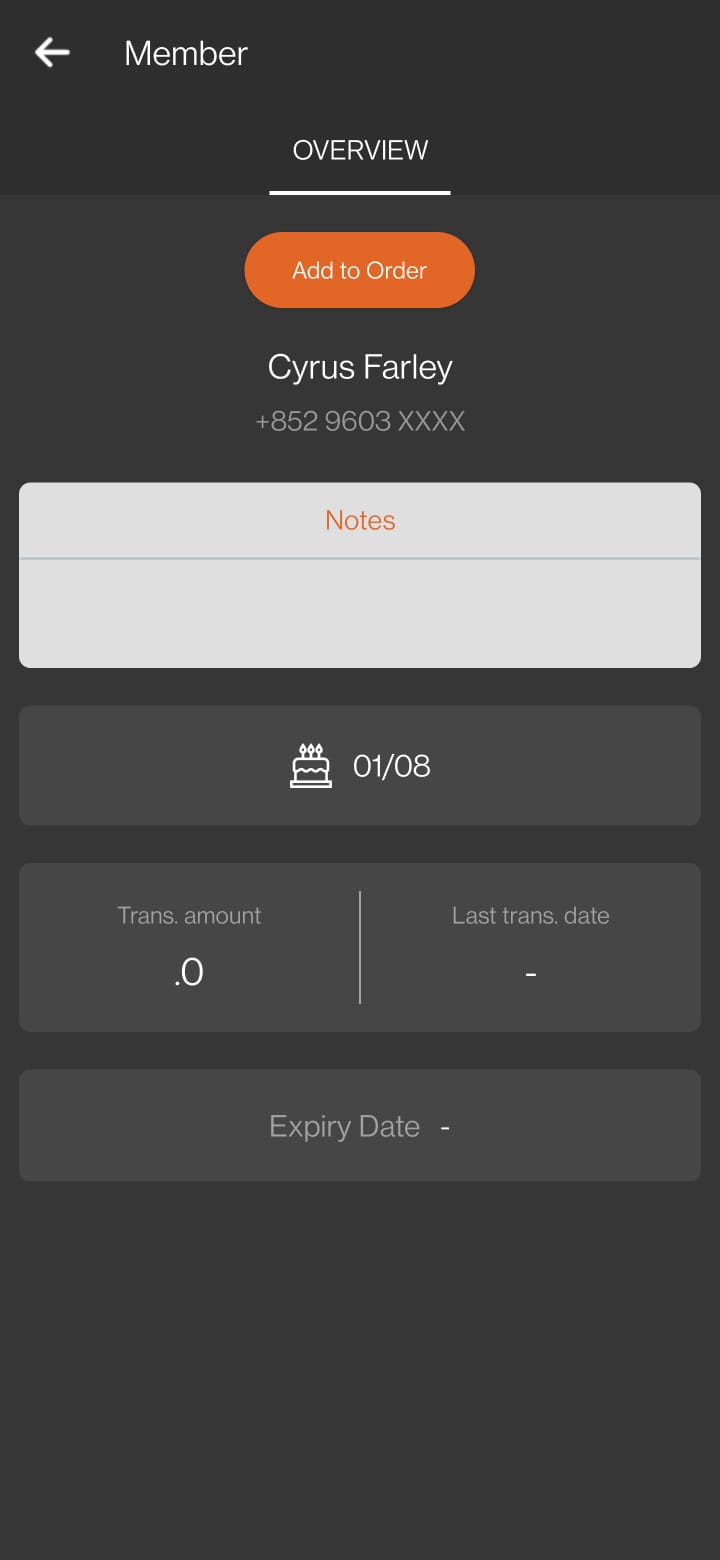
Tap Back
 to return to the order-taking screen.
Once a member has been added to an order, the member’s name is displayed at the top right of the order-taking screen to indicate that the order is now associated with the member.
 Eats365 Products
 Merchant Guide
 Modules
 Membership
 Integrations
 Hardware
 Staff Operations
 Roles & Permissions
 Payments
 Reports
 What’s New
 Release Notes
 Troubleshooting
 Simulators
 Glossary
 Troubleshooter
 System Status