 Eats365 Products
 Merchant Guide
 Modules
 Membership
 Integrations
 Hardware
 Staff Operations
 Roles & Permissions
 Payments
 Reports
 What’s New
 Release Notes
 Troubleshooting
 Simulators
 Glossary
 Troubleshooter
 System Status
All You Can Eat Menu
Table of Contents
Create an All You Can Eat Menu
Learn how to create items intended for an All You Can Eat Menu in the Eats365 POS app or on the Merchant Portal.
The “All You Can Eat Menu” feature allows your restaurant to offer all-you-can-eat services wherein customers enjoy unlimited dining. You can create menu tiers to distinguish between higher-priced items and lower-priced items and restrict customers from ordering from a different menu tier. All-you-can-eat orders can be placed through various Eats365 modules, such as the POS, the PhotoMenu, and the customer’s own mobile device (Scan to Order).
In this article, you’ll learn about how to create items for your All You Can Eat Menu and how to manage them on the Eats365 POS and Merchant Portal.
For information about how the feature works and how to configure the settings, refer to the following articles:
| Setup | Set up a Menu Tier for All You Can Eat Menu |
| Settings and Configuration | Configure general All You Can Eat Menu settings |
| Operation |
Before you start
- All You Can Eat ordering can be performed on various Eats365 modules. You’ll need a separate license for each module you intend to use:
- Eats365 POS: If only staff can place All You Can Eat orders using the POS, no additional license is required.
-
Scan to Order: If you want to allow customers to place All You Can Eat orders using their mobile devices, your restaurant must have a Branded Online Store and a BYOD license to set up an All You Can Eat Menu.
- You must set up Scan to Order settings from the Merchant Portal. For more information, refer to Configure Scan to Order settings.
- Eats365 PhotoMenu: If you want to allow customers to place All You Can Eat orders using a digital menu, you may affix a PhotoMenu to a table or hand out a PhotoMenu to dining customers as needed. Each PhotoMenu device requires its own PhotoMenu license.
- All You Can Eat Menu is only available for dine-in orders in Full Service restaurants.
Create items for an All You Can Eat Menu
To add items to an All You Can Eat Menu, follow the steps below:
Eats365 POS
- Open the Eats365 POS.
- At the top left, tap Settings
 .
. - Under “General,” tap Menu Setup, then select Category.
- Create the category where you want to intend the All You Can Eat Menu items to appear. For more information on creating categories, refer to Set up and manage a Category (Full Service).
- On the left panel, tap Item.
- At the top right, tap Add Item. Then, create your item. Refer to Set up and manage a Single Item and Combo Item (Full Service).
Important:- For the category selection part, make sure to choose the category that you created for the All You Can Eat Menu. Items can no longer be moved to a different category once saved.

- Enable the “All You Can Eat Menu Item” setting to identify the item as an All You Can Eat Menu item.
Note: When this setting is enabled, the item only becomes visible when the POS is in “All You Can Eat Mode.”
- Make sure to create a “representing item” that customers can select to activate the All You Can Eat Menu mode. This item should indicate the price of the All You Can Eat Menu. For example: All-You-Can-Eat Beef priced at $100.

- When creating All You Can Eat Menu items, set the price of included All You Can Eat items to zero (0), to ensure that customers don’t pay additional costs, unless they are items intended to have an additional fee when ordered. For example, under the “All-You-Can-Eat Beef” promo, you can include items such as, "Ribeye," "Striploin," and "Flank" all priced at $0, as well as "Wagyu" priced at $5.

- For the category selection part, make sure to choose the category that you created for the All You Can Eat Menu. Items can no longer be moved to a different category once saved.
- Once you’re done creating the item, tap Save to confirm.
Merchant Portal 2.0
- Log in to the Merchant Portal.
- On the left panel, click on Menu Setup. Then, select Category.
- Create the category where you want to intend the All You Can Eat Menu items to appear. For more information on creating categories, refer to Set up and manage a Category (Full Service).
- On the left panel, click on Item.
- Select Dine-in & Takeout.
- At the top right, click on +Single Item or +Combo Item. Then, create your item. Refer to Set up and manage a Single Item and Combo Item (Full Service).
Important:- For the category selection part, make sure to choose the category that you created for the All You Can Eat Menu. Items can no longer be moved to a different category once saved.

- Enable the “All You Can Eat Menu Item” setting to identify the item as an All You Can Eat Menu item.
Note: When this setting is enabled, the item only becomes visible when the POS is in “All You Can Eat Mode.”
- Make sure to create a “representing item” that customers can select to activate the All You Can Eat Menu mode. This item should indicate the price of the All You Can Eat Menu. For example: All-You-Can-Eat Beef priced at $100.

- When creating All You Can Eat Menu items, set the price of included All You Can Eat items to zero (0), to ensure that customers don’t pay additional costs, unless they are items intended to have an additional fee when ordered. For example, under the “All-You-Can-Eat Beef” promo, you can include items such as, "Ribeye," "Striploin," and "Flank" all priced at $0, as well as "Wagyu" priced at $5.

- For the category selection part, make sure to choose the category that you created for the All You Can Eat Menu. Items can no longer be moved to a different category once saved.
- Once you’re done creating the item, click on Save to confirm.
Merchant Portal (Classic Theme)
- Log in to the Merchant Portal.
- On the left panel, click on Menu Setup. Then, select Category.
- Create the category where you want to intend the All You Can Eat Menu items to appear. For more information on creating categories, refer to Set up and manage a Category (Full Service).
- On the left panel, click on Item.
- Select Dine-in & Takeout.
- At the top right, click on +Single Item or +Combo Item. Then, create your item. Refer to Set up and manage a Single Item and Combo Item (Full Service).
Important:- For the category selection part, make sure to choose the category that you created for the All You Can Eat Menu. Items can no longer be moved to a different category once saved.
- Enable the “All You Can Eat Menu Item” setting to identify the item as an All You Can Eat Menu item.
Note: When this setting is enabled, the item only becomes visible when the POS is in “All You Can Eat Mode.” - Make sure to create a “representing item” that customers can select to activate the All You Can Eat Menu mode. This item should indicate the price of the All You Can Eat Menu. For example: All-You-Can-Eat Beef priced at $100.
- When creating All You Can Eat Menu items, set the price of included All You Can Eat items to zero (0), to ensure that customers don’t pay additional costs, unless they are items intended to have an additional fee when ordered. For example, under the “All-You-Can-Eat Beef” promo, you can include items such as, "Ribeye," "Striploin," and "Flank" all priced at $0, as well as "Wagyu" priced at $5.
- Once you’re done creating the item, click on Save to confirm.
Set up an All You Can Eat Menu
After creating items for your All You Can Eat Menu, you can then proceed with setting up the menu.
To create an All You Can Eat Menu, follow the steps below:
Eats365 POS
- Open the Eats365 POS.
- At the top left, tap Settings .
- Under “General”, tap Menu Setup, then select All You Can Eat Menu.
- At the top right, tap Add Menu.
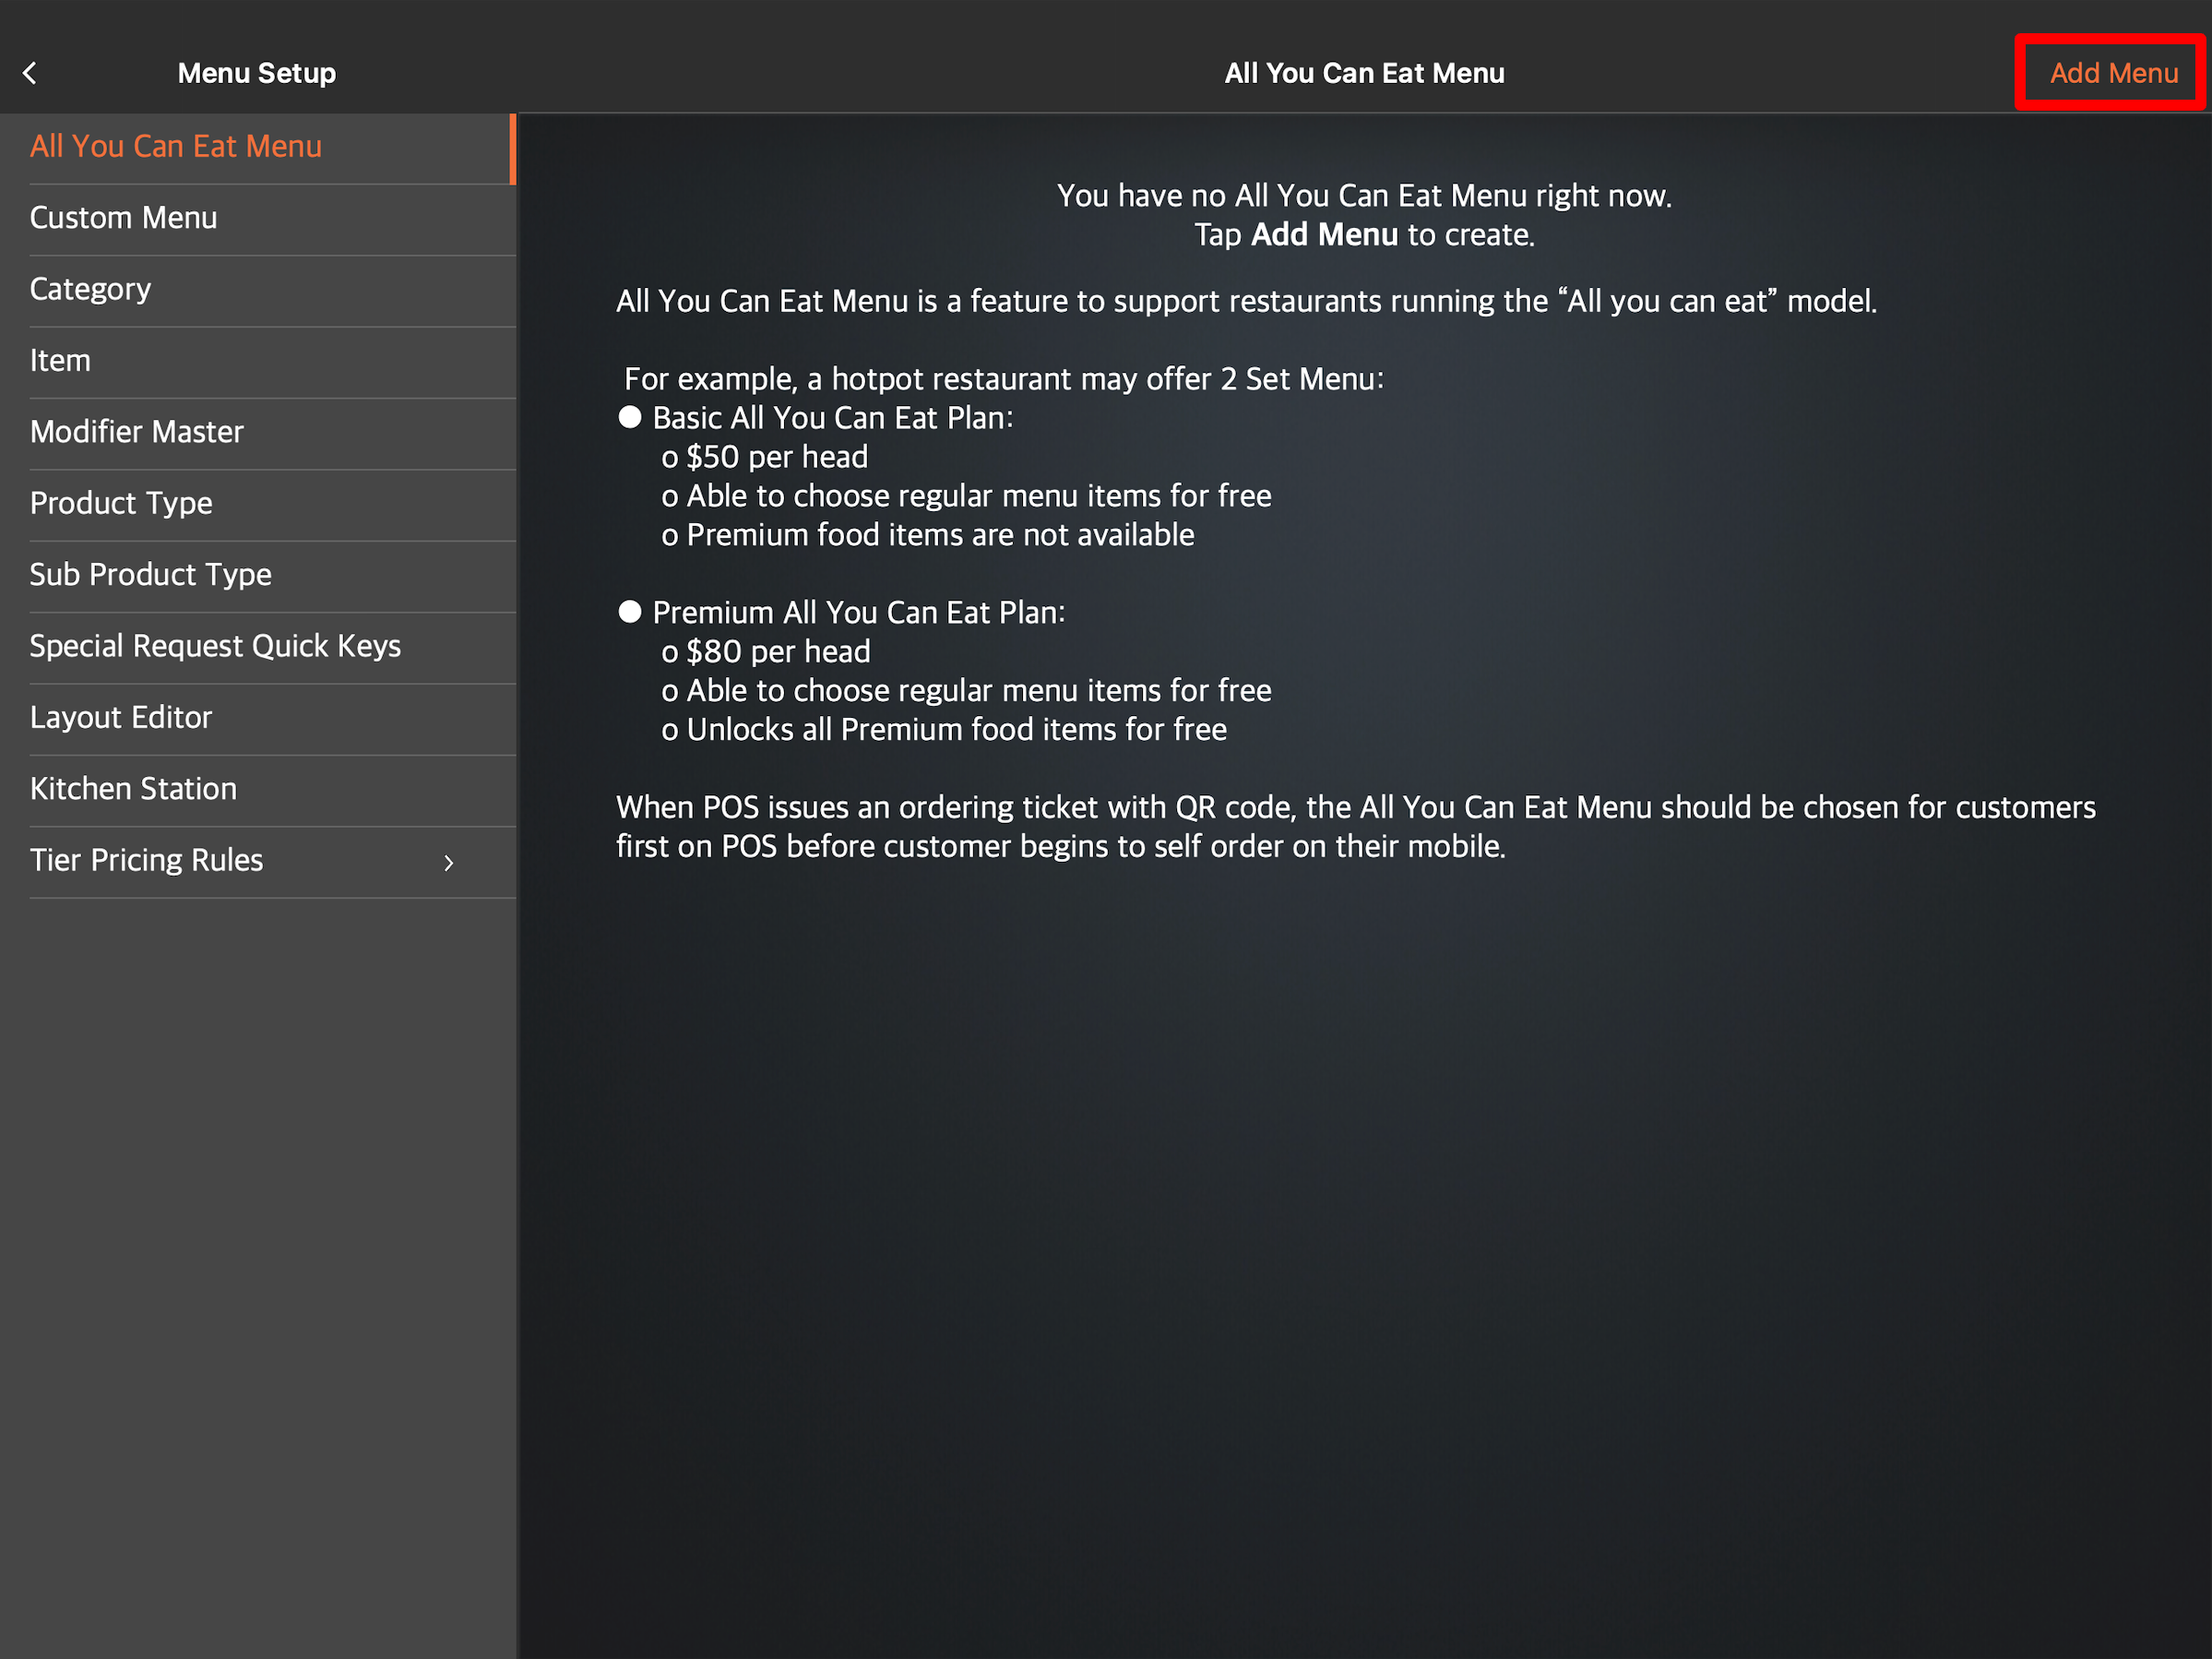
- Enter the All You Can Eat Menu’s information and configure your preferred settings.
- At the top right, tap Save to confirm.
You can configure these settings on the POS:
General
Menu Name & Description
Menu Name
Enter the All You Can Eat Menu’s name to easily identify the menu.
Menu Description
Enter the All You Can Eat Menu’s description to add more information about the menu.
Status
Enable this setting to activate the All You Can Eat Menu upon saving.
DeleteMenu Enabling
Select the items that will activate the All You Can Eat Menu. The combination you create activates the All You Can Eat Menu when selected. For example, you can create an item called “All-You-Can-Eat Premium”, and then set this item as the representative item in a combination. When a customer chooses this option, the All You Can Eat Menu will be activated automatically. The items included in this All You Can Eat menu set will then appear on the order-taking screen. For more information, refer to Enable All You Can Eat Menu Mode on the Eats365 POS.
To do this follow the steps below:
- Tap +Add Combination, then tap +Add Item.

- Choose the category of the item that you want to include in the combination.

- Select the item that would activate the All You Can Eat Menu.

- To add another combination, tap +Add Combination.
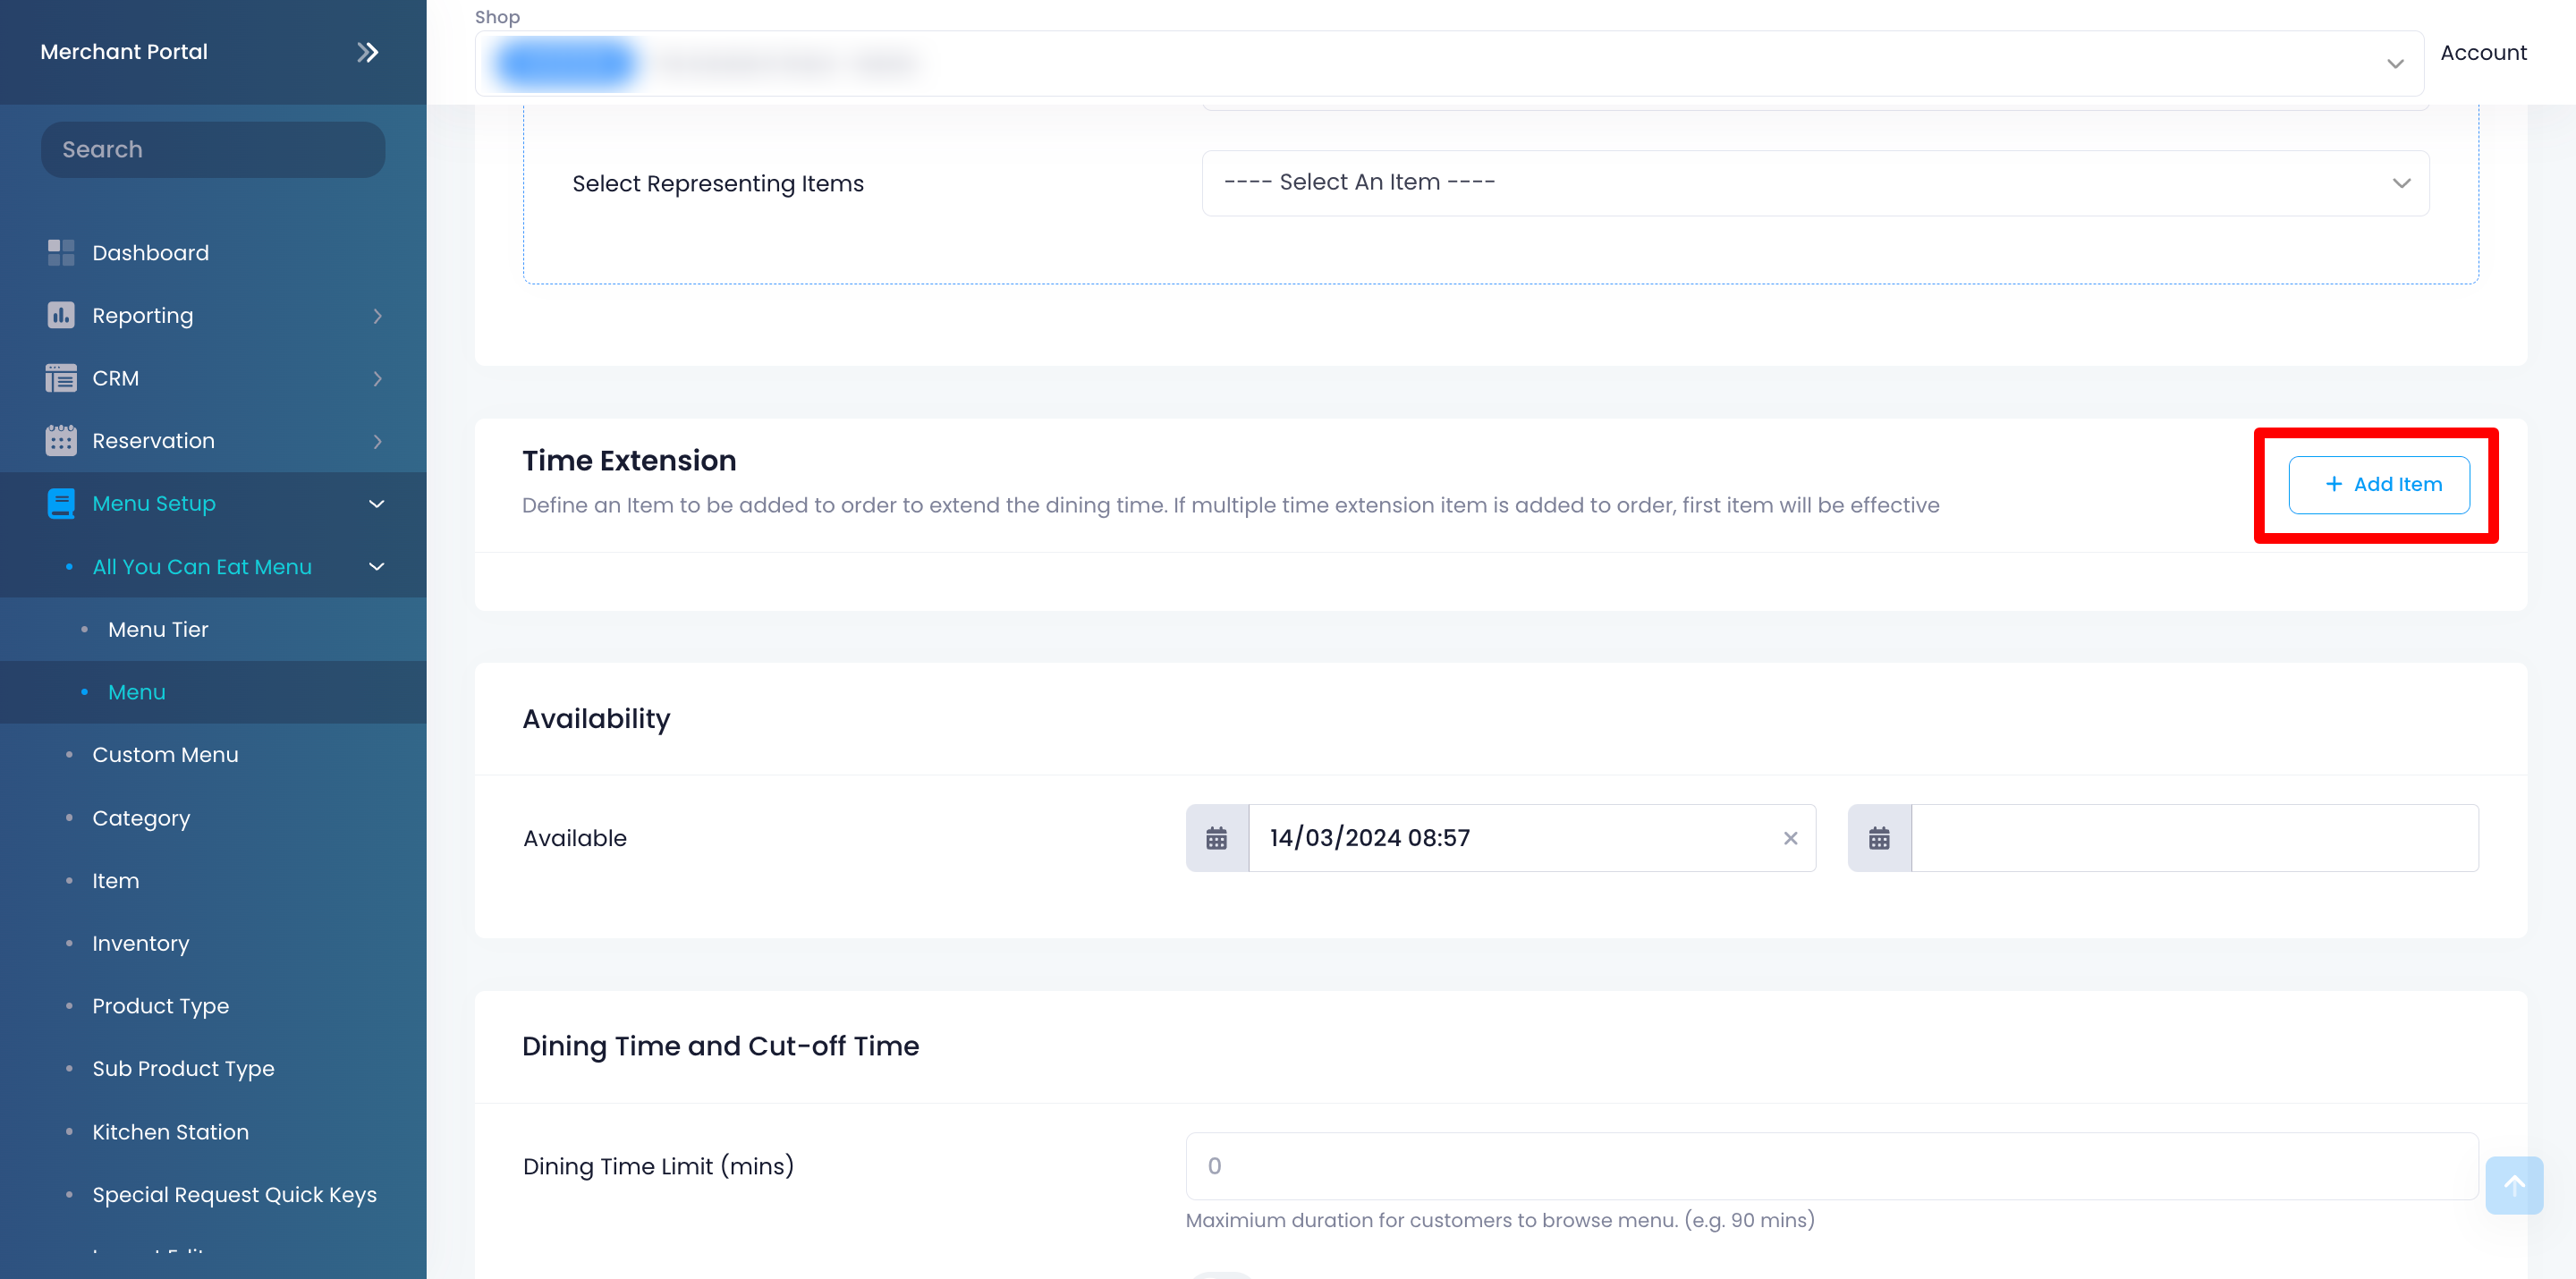
Time Extension
Select the item that will extend the dining time of customers upon adding the item to an order.
To set up a time extension item, follow the steps below:
- Tap +Select Representing Item.

- Configure the following settings:
-
Representing Item: Tap the “Choose Item” drop-down list, then choose the category and the item that would extend the customer’s dining time.

-
Duration (min): Enter the time extension that will be added to the customer’s dining time.
-
Representing Item: Tap the “Choose Item” drop-down list, then choose the category and the item that would extend the customer’s dining time.
- To add more time extension options, tap +Select Representing Item again.
Availability Period Settings
Start Time
Set the date and time when the All You Can Eat Menu will be available for ordering.
Has End Time
Enable this setting to make the All You Can Eat Menu available for a limited time only. You can then set “End Time” to the menu’s intended expiration.
DeleteDining Time and Cut-off Time
Dining Time Limit (mins)
Set how much time customers can dine at the restaurant. Once the dining time reaches its limit, the customer can no longer place additional orders.
Override Cut-off Time
Enable this setting to set a specific cut-off time for the All You Can Eat Menu. This overrides the cut-off time you set for all Scan to Order orders in the Dine-in settings.
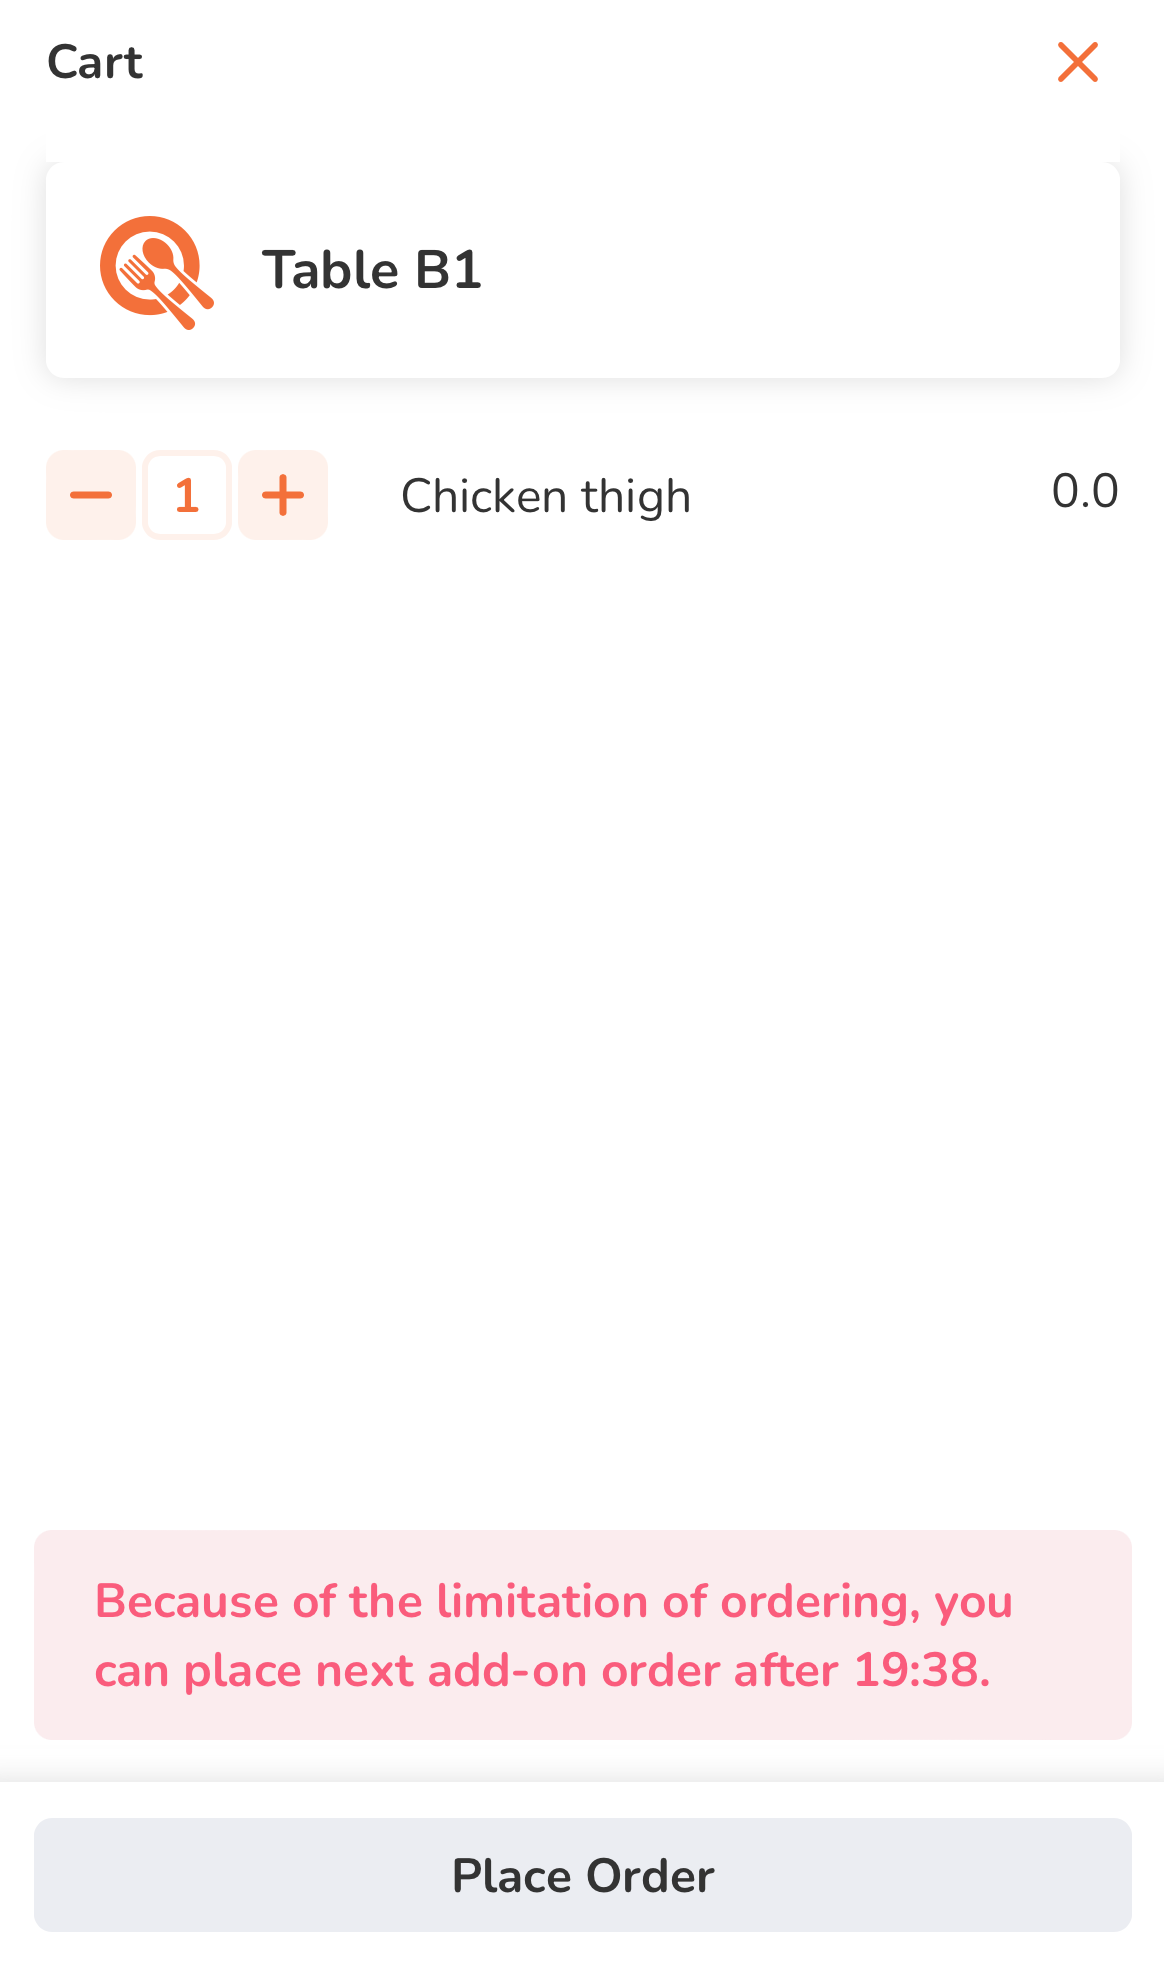
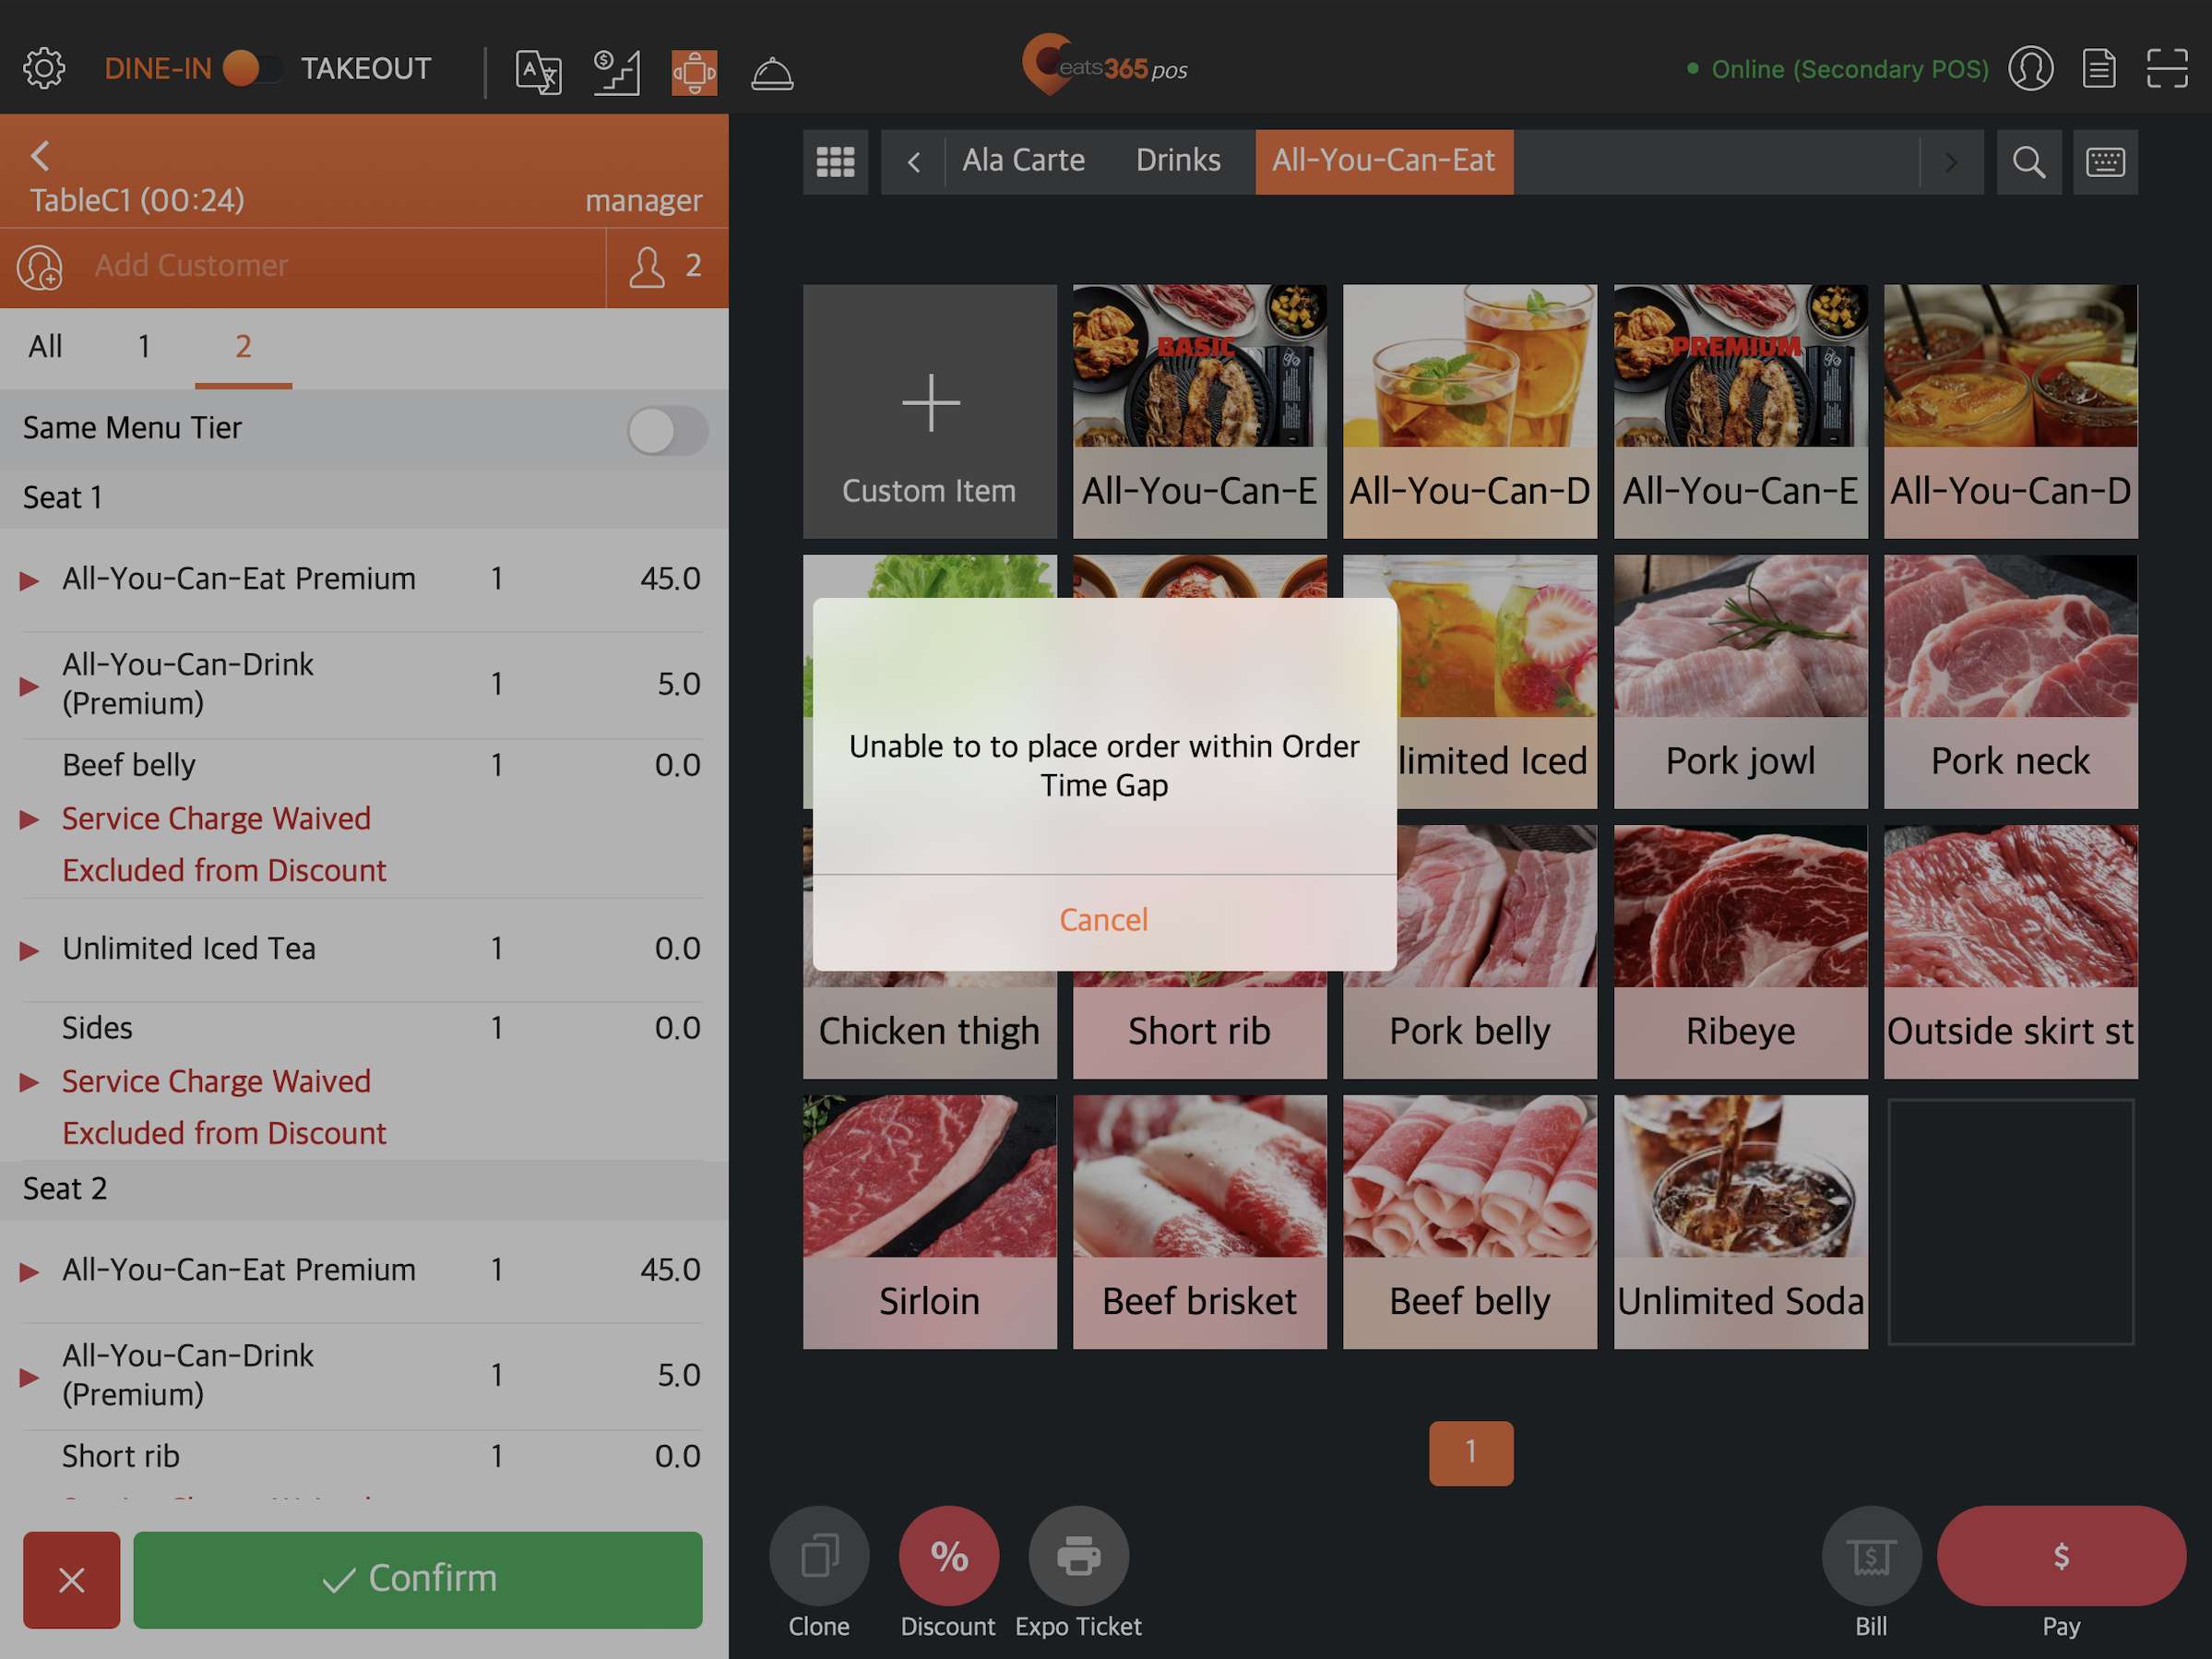
DeleteTime Gap Between Order (mins)
Override Time Gap Between Order
Enable this setting to set a different time gap duration specific to the All You Can Eat Menu you’re creating. This overrides the time gap duration you set for All You Can Eat Menu orders in the Dine-in settings.
Once enabled, you can configure the following settings:
-
Time Gap Between Order (mins): Set the duration that customers need to wait before they can order again.
.
- POS Orders Affect Time Gap Calculation: Enable this setting to start the time gap count from the last order on the POS. If you don’t want POS orders to trigger the Time Gap function, turn this setting off.
-
Time Gap Affects POS: By default, the Time Gap you set for your All You Can Eat Menu only affects orders placed on Scan to Order and PhotoMenu. Enable this setting to apply the Time Gap to orders placed on the POS.
Item Quantity Limit
Enable this setting to set a specific quantity limit on items that customers can add per order. This overrides the “Item Quantity Limit” you set for all orders placed through Scan to Order. You can then configure a different quantity limit for All You Can Eat Menu.
Included Categories & Items
Select all the items that are included in the All You Can Eat Menu you’re creating.
To add items, tap Expand![]() to select the items individually or tap the checkbox next to a category to include all items under that category.
to select the items individually or tap the checkbox next to a category to include all items under that category.
Merchant Portal 2.0
- Log in to the Merchant Portal.
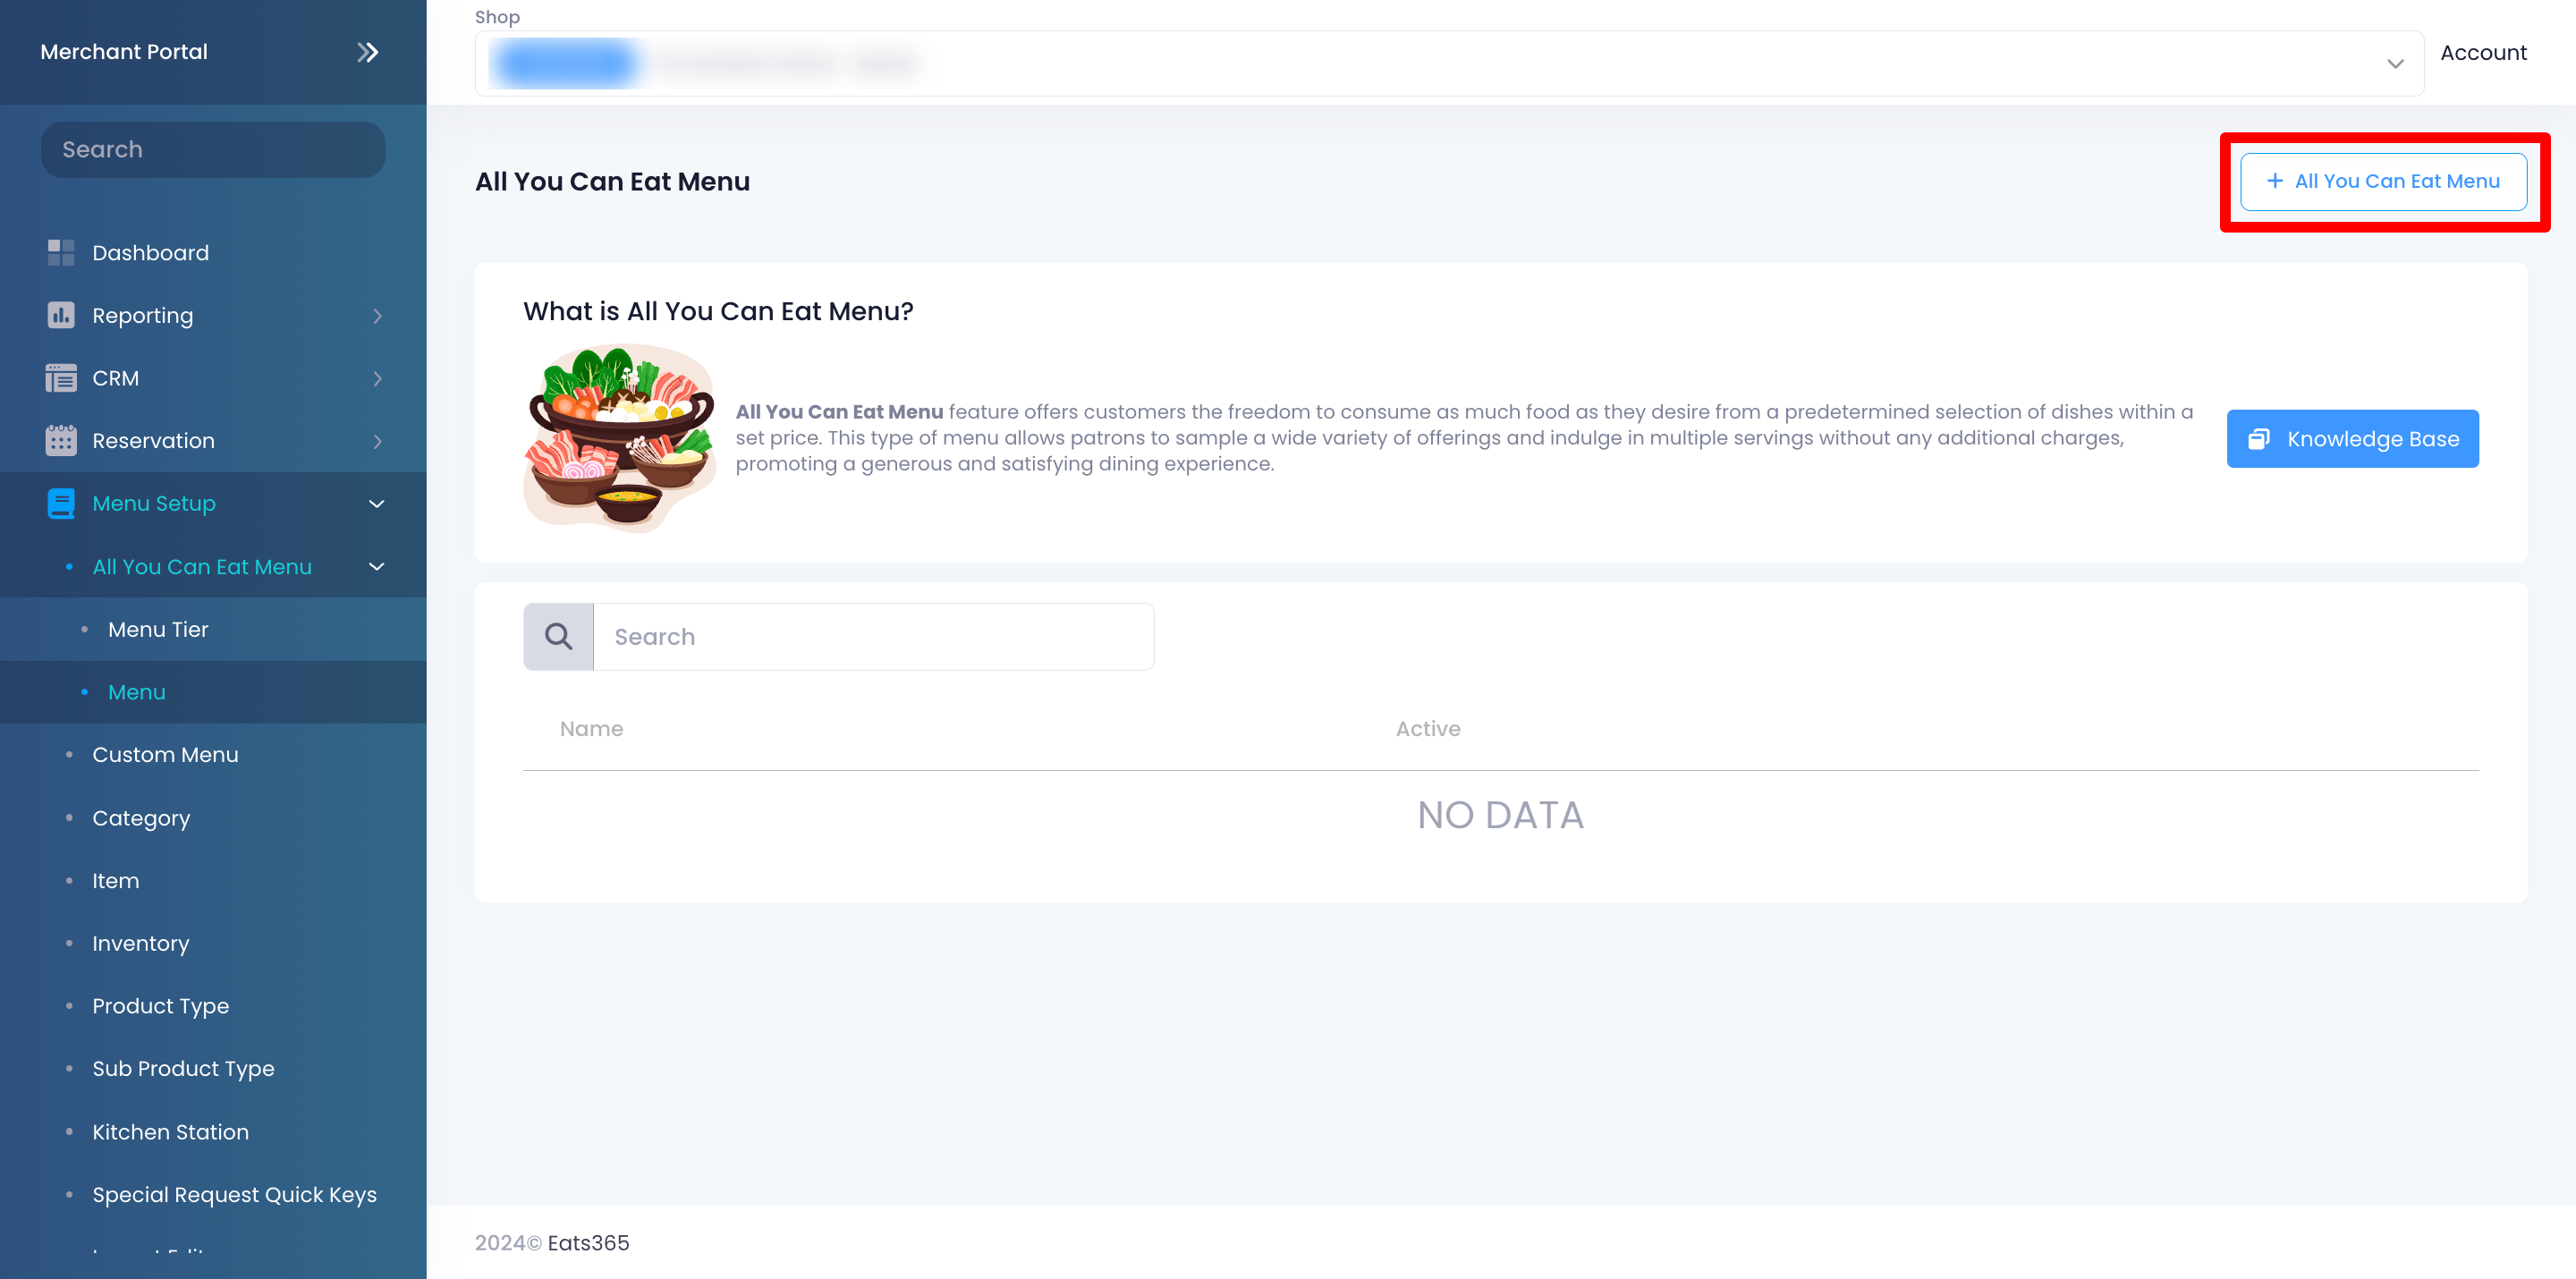
- On the left panel, click on Menu Setup. Then, click on All You Can Eat Menu.
- Click on Menu.
- At the top right, click on +All You Can Eat Menu.
- Enter the All You Can Eat Menu’s information and configure your preferred settings.
- At the top right, click on Save.
You can configure these settings on the POS:
General
General
Active
Enable this setting to activate the All You Can Eat Menu.
Menu Name
Enter the All You Can Eat Menu’s name to easily identify the menu.
Menu Description
Enter the All You Can Eat Menu’s description to add more information about the menu.
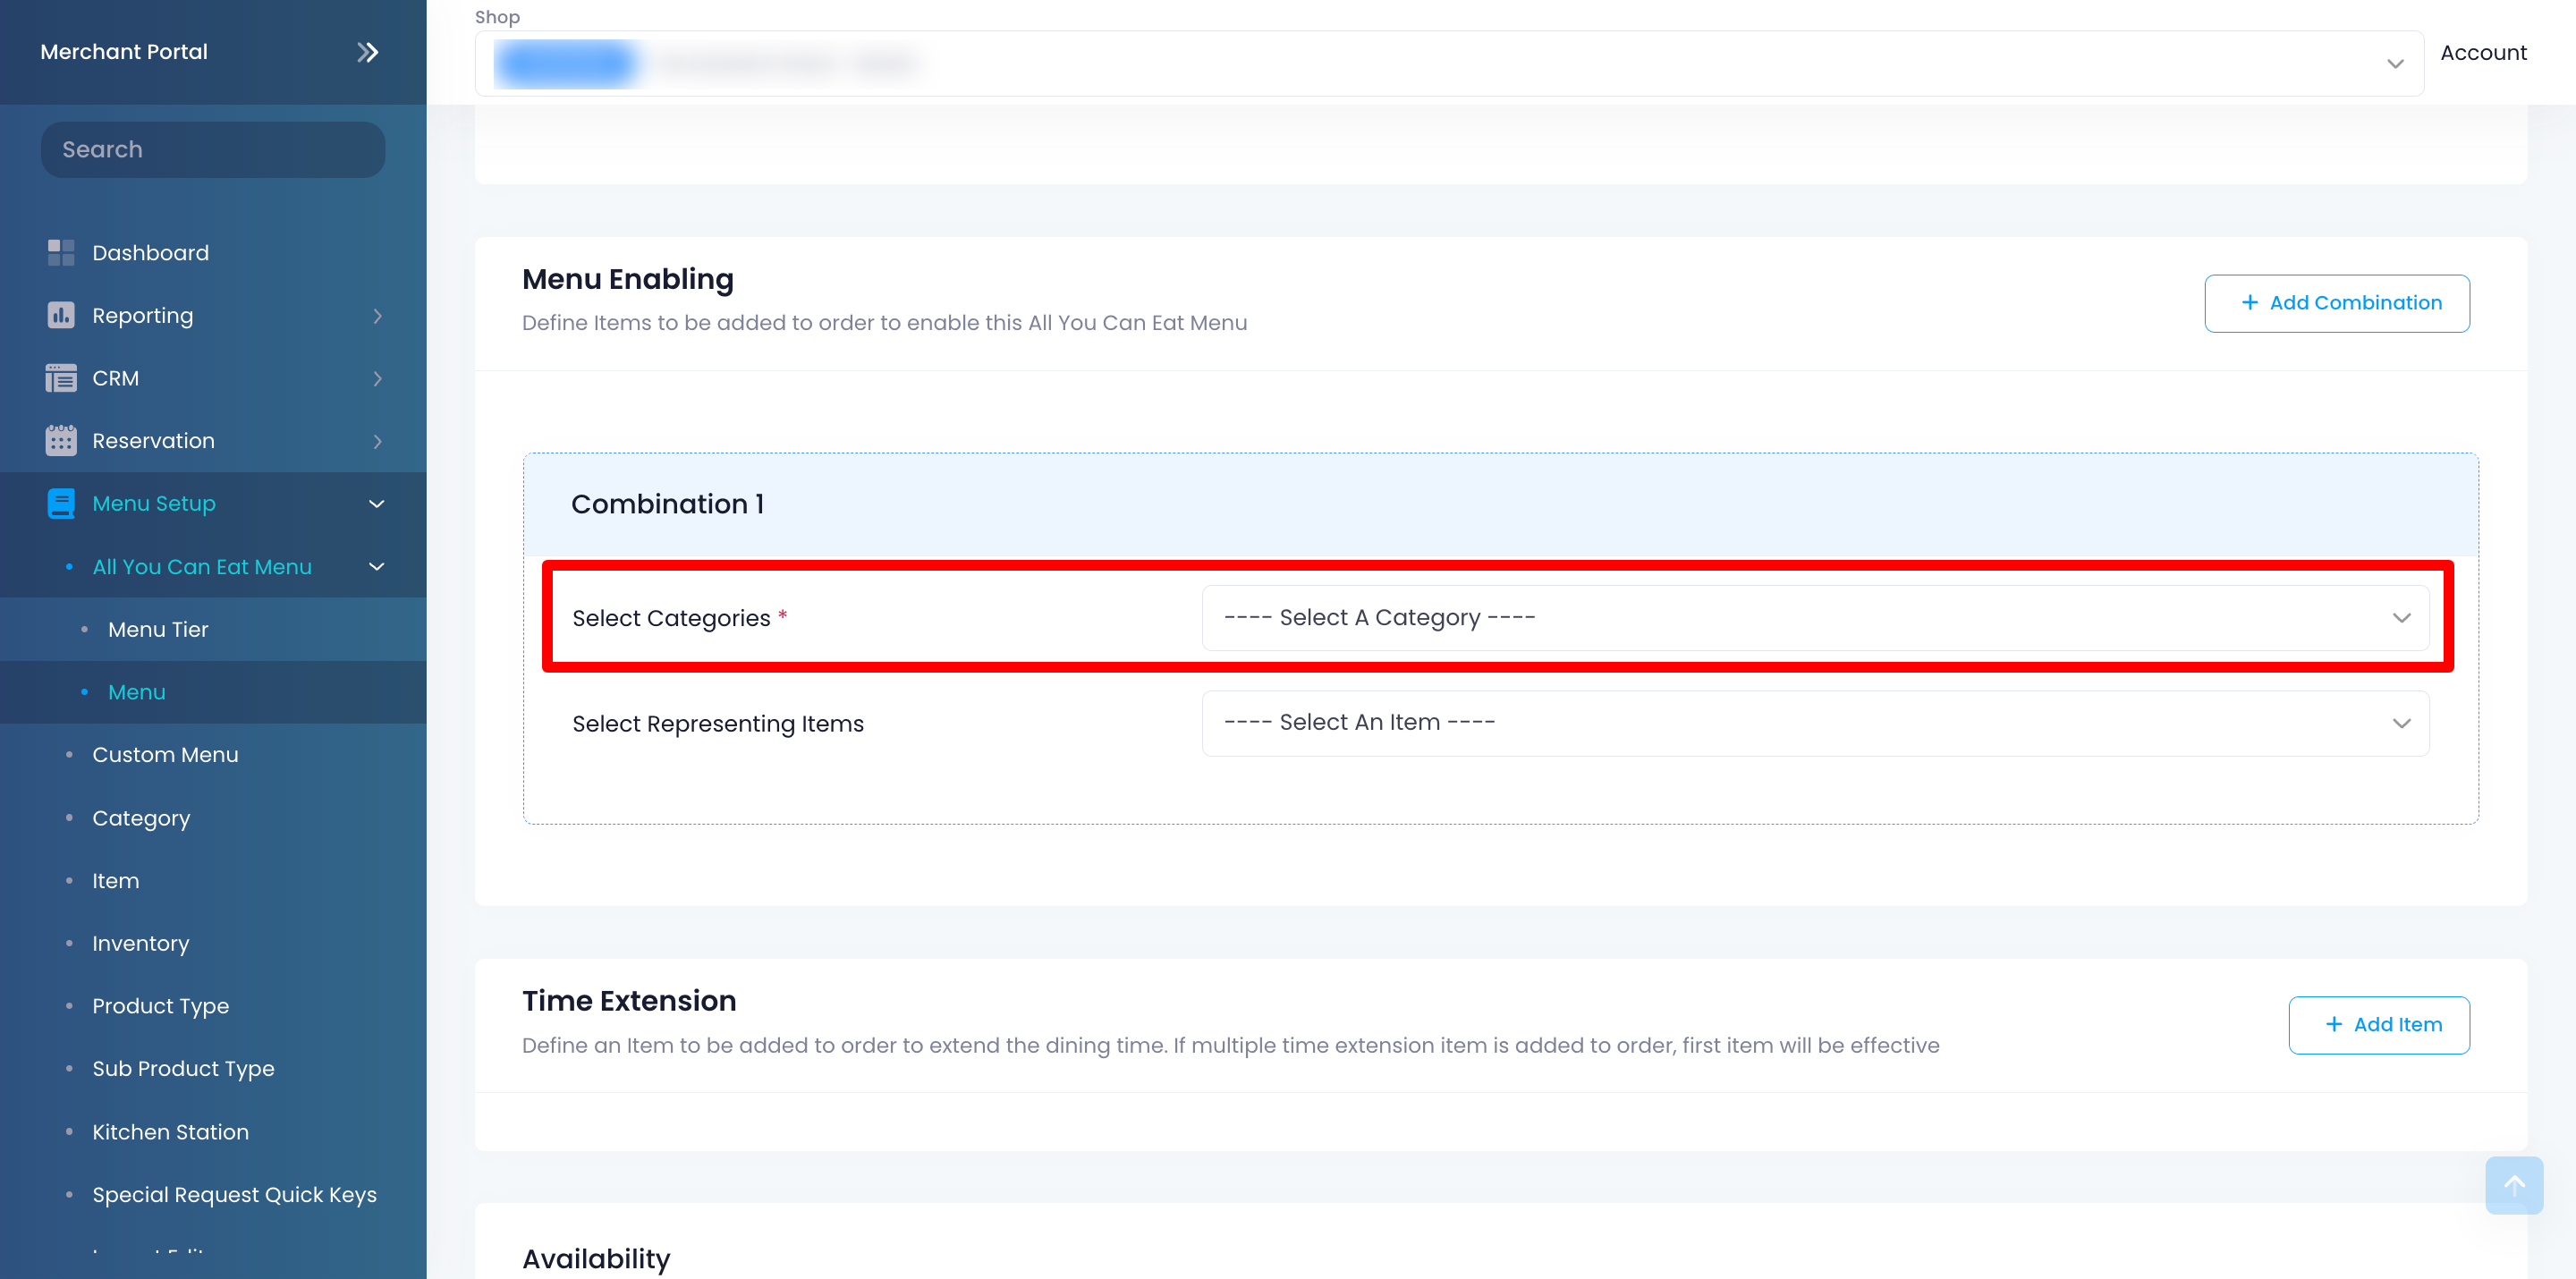
Menu Enabling
Select the items that will activate the All You Can Eat Menu.
The combination you create activates the All You Can Eat Menu when selected. For example, you can create an item called “All-You-Can-Eat Premium”, and then set this item as the representative item in a combination. When a customer chooses this option, the All You Can Eat Menu will be activated automatically. The items included in this All You Can Eat menu set will then appear on the order-taking screen. For more information, refer to Enable All You Can Eat Menu mode on the Eats365 POS.
To do this follow the steps below:
- Next to “Select Categories,” click on the drop down list and select category of the item that you want to include in the combination.
- Next to “Select Representing Items,” click on the drop down list and select the item that would activate the All You Can Eat Menu.
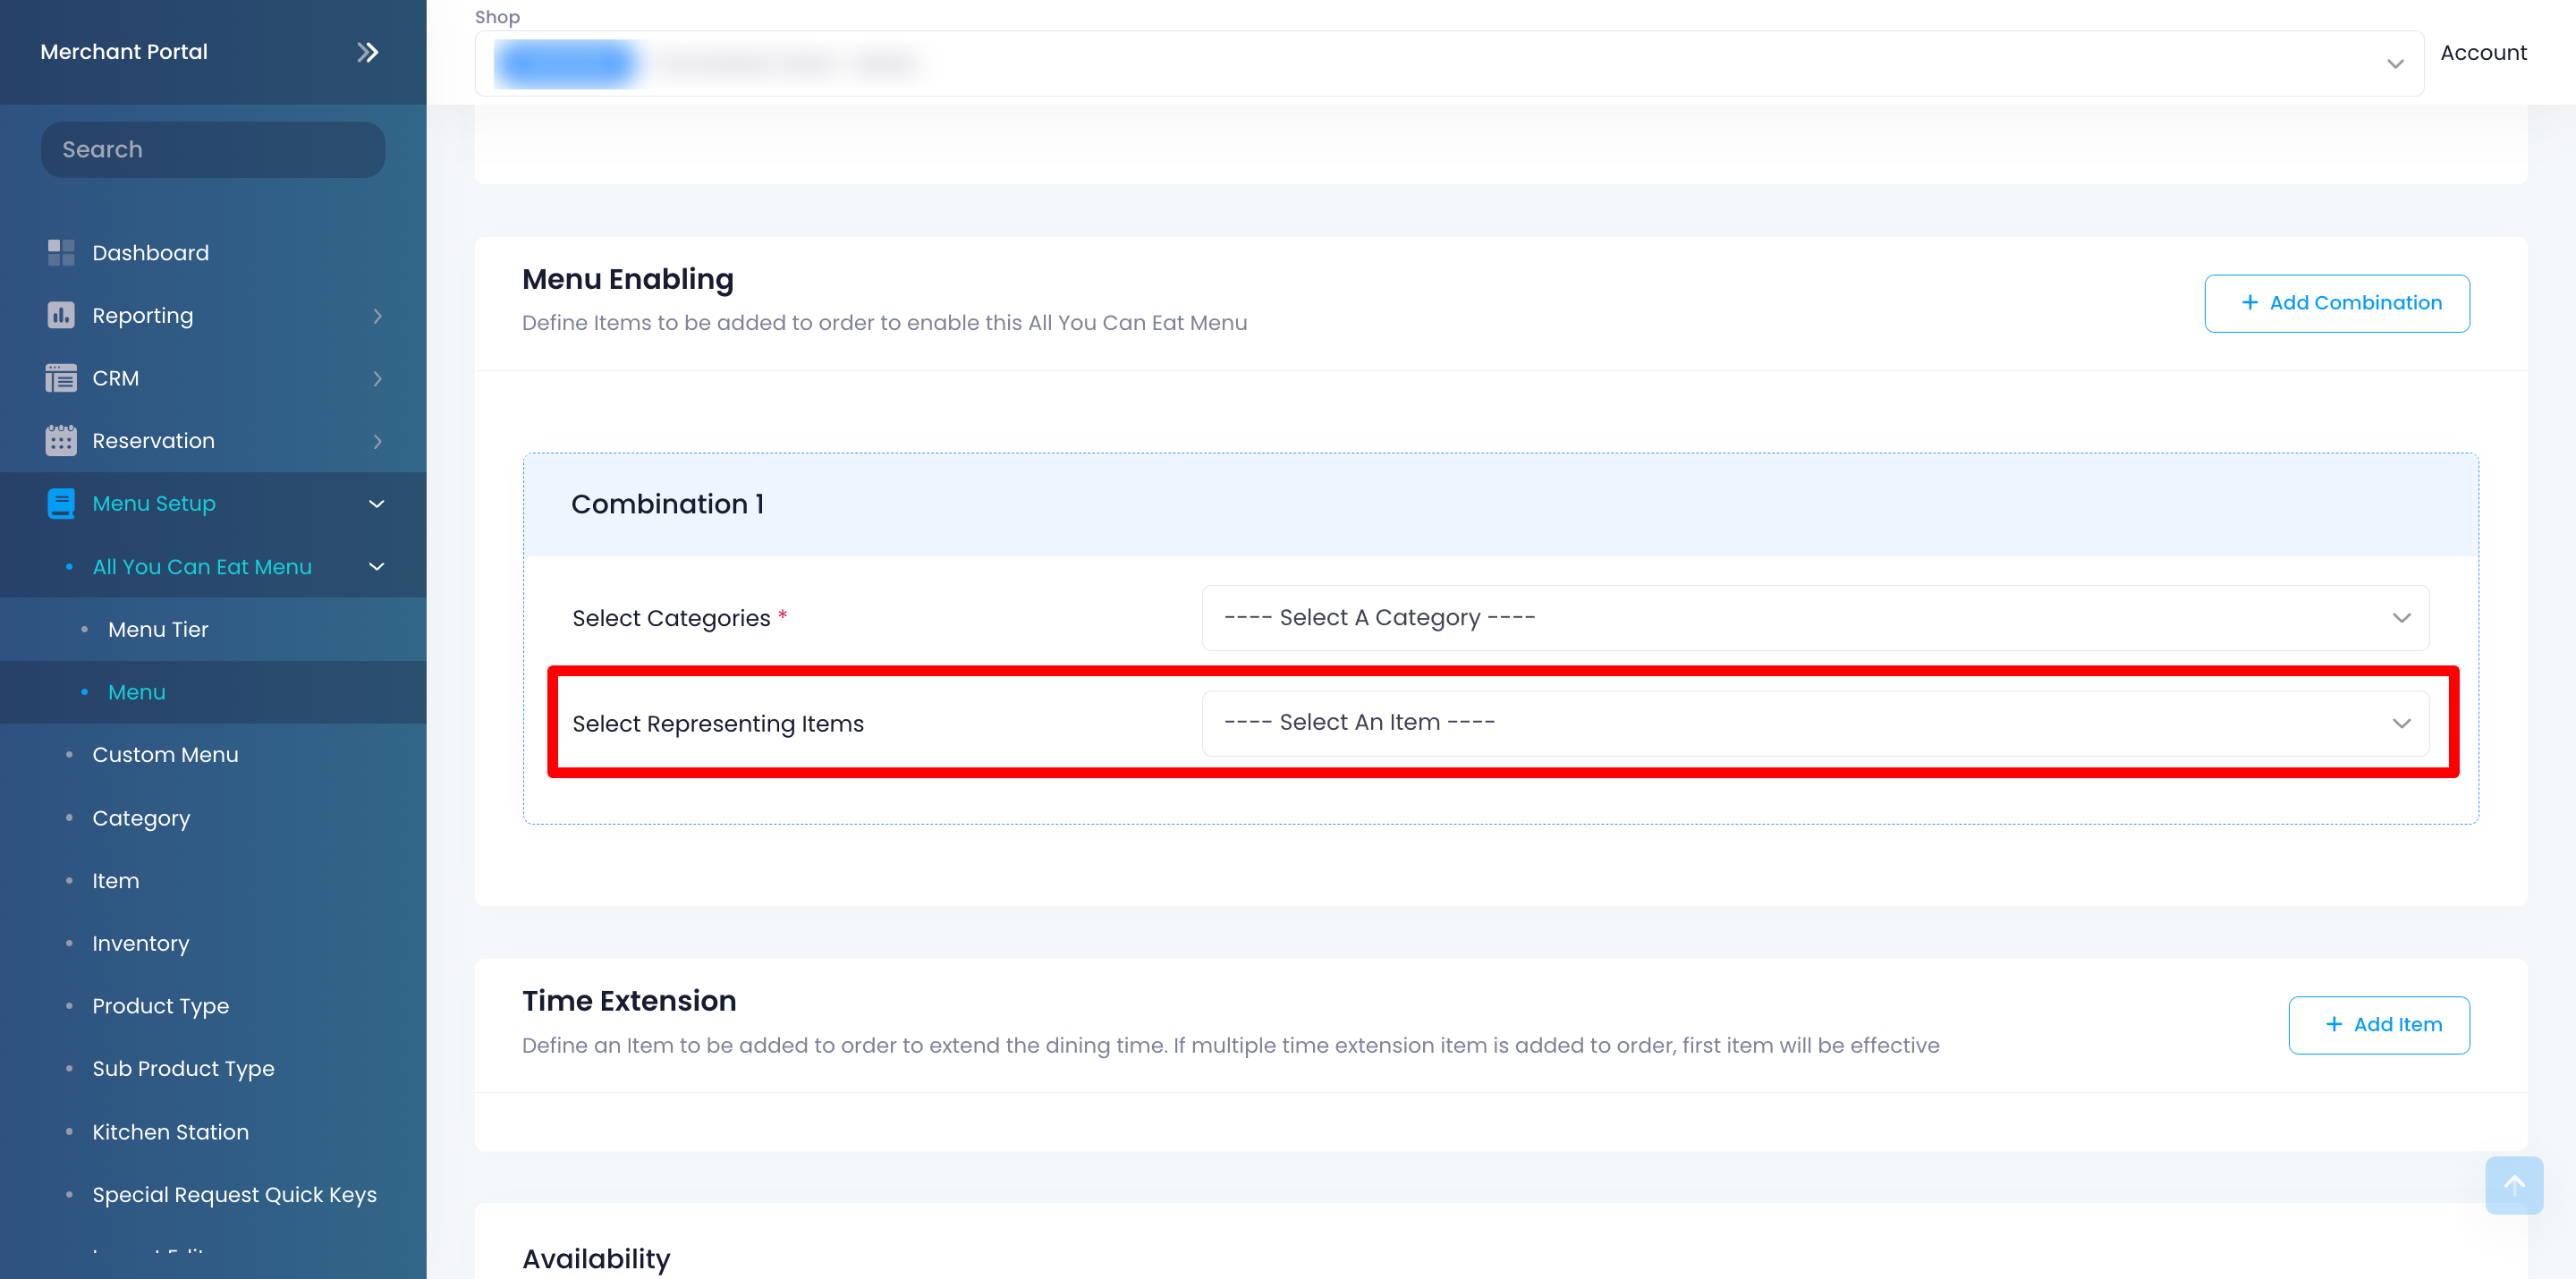
- To add another combination, click on +Add Combination again.
Time Extension
Select the item that will extend the dining time of customers upon adding the item to an order.
To set up a time extension item, follow the steps below:
- Click on +Add Item.
- Configure the following settings:
-
Select Representing Items: Click on the drop-down list, then select the item that would extend the customer’s dining time.

-
Duration (min): Enter the time extension that will be added to the customer’s dining time.
..
-
Select Representing Items: Click on the drop-down list, then select the item that would extend the customer’s dining time.
- To add more time extension options, click on +Add Item again.
Availability
Set the date and time when the All You Can Eat Menu will be available for ordering.
- If the menu is only available for a limited time, set the end time to the menu’s intended expiration.
- If the All You Can Eat Menu you’re creating doesn’t have an expiration, keep the end time blank.
Dining Time and Cut-off Time
Dining Time Limit (mins)
Set how much time customers can dine at the restaurant. Once the dining time reaches its limit, the customer can no longer place additional orders.
Override Cut-off Time
Enable this setting to set a specific cut-off time for the All You Can Eat Menu. This overrides the cut-off time you set for all Scan to Order orders in the Dine-in settings.
Time Gap Between Order
Override Time Gap Between Order
Enable this setting to set a different time gap duration specific to the All You Can Eat Menu you’re creating. This overrides the time gap duration you set for All You Can Eat Menu orders in the Dine-in settings.
Once enabled, you can configure the following settings:
-
Time Gap Between Order (mins): Set the duration that customers need to wait before they can order again.
.
- Effective from POS Order: Enable this setting to start the time gap count from the last order on the POS. If you don’t want POS orders to trigger the time gap function, turn this setting off.
-
Time Gap Affects POS: By default, the time gap you set for your All You Can Eat Menu only affects orders placed on Scan to Order and PhotoMenu. Enable this setting to apply the time gap to orders placed on the POS.
Item Quantity Limit
Override Item Quantity Limit
Enable this setting to set a specific quantity limit on items that customers can add per order. This overrides the “Item Quantity Limit” you set for all orders placed through Scan to Order. You can then configure a different quantity limit for All You Can Eat Menu.
Included Categories & Items
Select all the items that are included in the All You Can Eat Menu you’re creating.
To add items, click on Expand  to select the items individually or tap the checkbox next to a category to include all items under that category.
Ordering Quantity Limit
The “Ordering Quantity Limit” allows the system to limit the quantity of specific items allowed to be added per order. For example, you can set restrictions based on party size, quantity per table, order attempt, and more. For more information on creating an ordering quantity limit, refer to Set up and manage Ordering Quantity Limit.
Select all the relevant ordering quantity rules that you want to apply to the All You Can Eat Menu you’re creating.
Merchant Portal (Classic Theme)
- Log in to the Merchant Portal.
- On the left panel, click on Menu Setup. Then, click on All You Can Eat Menu.
- At the top right, click on +All You Can Eat Menu.
- Enter the All You Can Eat Menu’s information and configure your preferred settings.
- At the top right, click on Save.
You can configure these settings on the POS:
General
General
Status
Enable this setting to activate the All You Can Eat Menu.
Menu Name
Enter the All You Can Eat Menu’s name to easily identify the menu.
Menu Description
Enter the All You Can Eat Menu’s description to add more information about the menu.
DeleteMenu Enabling
Select the items that will activate the All You Can Eat Menu.
The combination you create activates the All You Can Eat Menu when selected. For example, you can create an item called “All-You-Can-Eat Premium”, and then set this item as the representative item in a combination. When a customer chooses this option, the All You Can Eat Menu will be activated automatically. The items included in this All You Can Eat menu set will then appear on the order-taking screen. For more information, refer to Enable All You Can Eat Menu mode on the Eats365 POS.
To do this follow the steps below:
- Next to “Select Categories,” click on the drop down list and select category of the item that you want to include in the combination.
- Next to “Select Representing Items,” click on the drop down list and select the item that would activate the All You Can Eat Menu.
- To add another combination, click on +Add Combination again.
Time Extension
Select the item that will extend the dining time of customers upon adding the item to an order.
To set up a time extension item, follow the steps below:
- Click on +Add Item.
- Configure the following settings:
- Representing Item: Click on the “Choose Item” drop-down list, then select the item that would extend the customer’s dining time.
- Duration (min): Enter the time extension that will be added to the customer’s dining time.
- To add more time extension options, click on +Add Item again.
Availability
Set the date and time when the All You Can Eat Menu will be available for ordering.
- If the menu is only available for a limited time, set “End” to the menu’s intended expiration.
- If the All You Can Eat Menu you’re creating doesn’t have an expiration, keep “End” as "Never.”
Dining Time and Cut-off Time
Dining Time Limit (mins)
Set how much time customers can dine at the restaurant. Once the dining time reaches its limit, the customer can no longer place additional orders.
Override Cut-off Time
Enable this setting to set a specific cut-off time for the All You Can Eat Menu. This overrides the cut-off time you set for all Scan to Order orders in the Dine-in settings.
DeleteTime Gap Between Order
Override Time Gap Between Order
Enable this setting to set a different time gap duration specific to the All You Can Eat Menu you’re creating. This overrides the time gap duration you set for All You Can Eat Menu orders in the Dine-in settings.
Once enabled, you can configure the following settings:
- Time Gap Between Order (mins): Set the duration that customers need to wait before they can order again.
- POS Orders Affect Time Gap Calculation: Enable this setting to start the time gap count from the last order on the POS. If you don’t want POS orders to trigger the Time Gap function, turn this setting off.
- Time Gap Affects POS: By default, the Time Gap you set for your All You Can Eat Menu only affects orders placed on Scan to Order and PhotoMenu. Enable this setting to apply the Time Gap to orders placed on the POS.
Item Quantity Limit
Override Item Quantity Limit
Enable this setting to set a specific quantity limit on items that customers can add per order. This overrides the “Item Quantity Limit” you set for all orders placed through Scan to Order. You can then configure a different quantity limit for All You Can Eat Menu.
DeleteIncluded Categories & Items
Select all the items that are included in the All You Can Eat Menu you’re creating.
To add items, click on Expand to select the items individually or tap the checkbox next to a category to include all items under that category.
DeleteManage All You Can Eat Menu
Edit an All You Can Eat Menu
To modify an All You Can Eat Menu, follow the steps below:
Eats365 POS
- Open the Eats365 POS.
- At the top left, tap Settings .
- Under “General,” tap Menu Setup. Then, tap All You Can Eat Menu.
- Select the menu that you want to modify.
- Update the All You Can Eat Menu.
Merchant Portal 2.0
- Log in to the Merchant Portal.
- On the left panel, click on Menu Setup. Then, click on All You Can Eat Menu.
- Click on Menu.
- Next to the All You Can Eat Menu that you want to modify, click on Edit
 .
.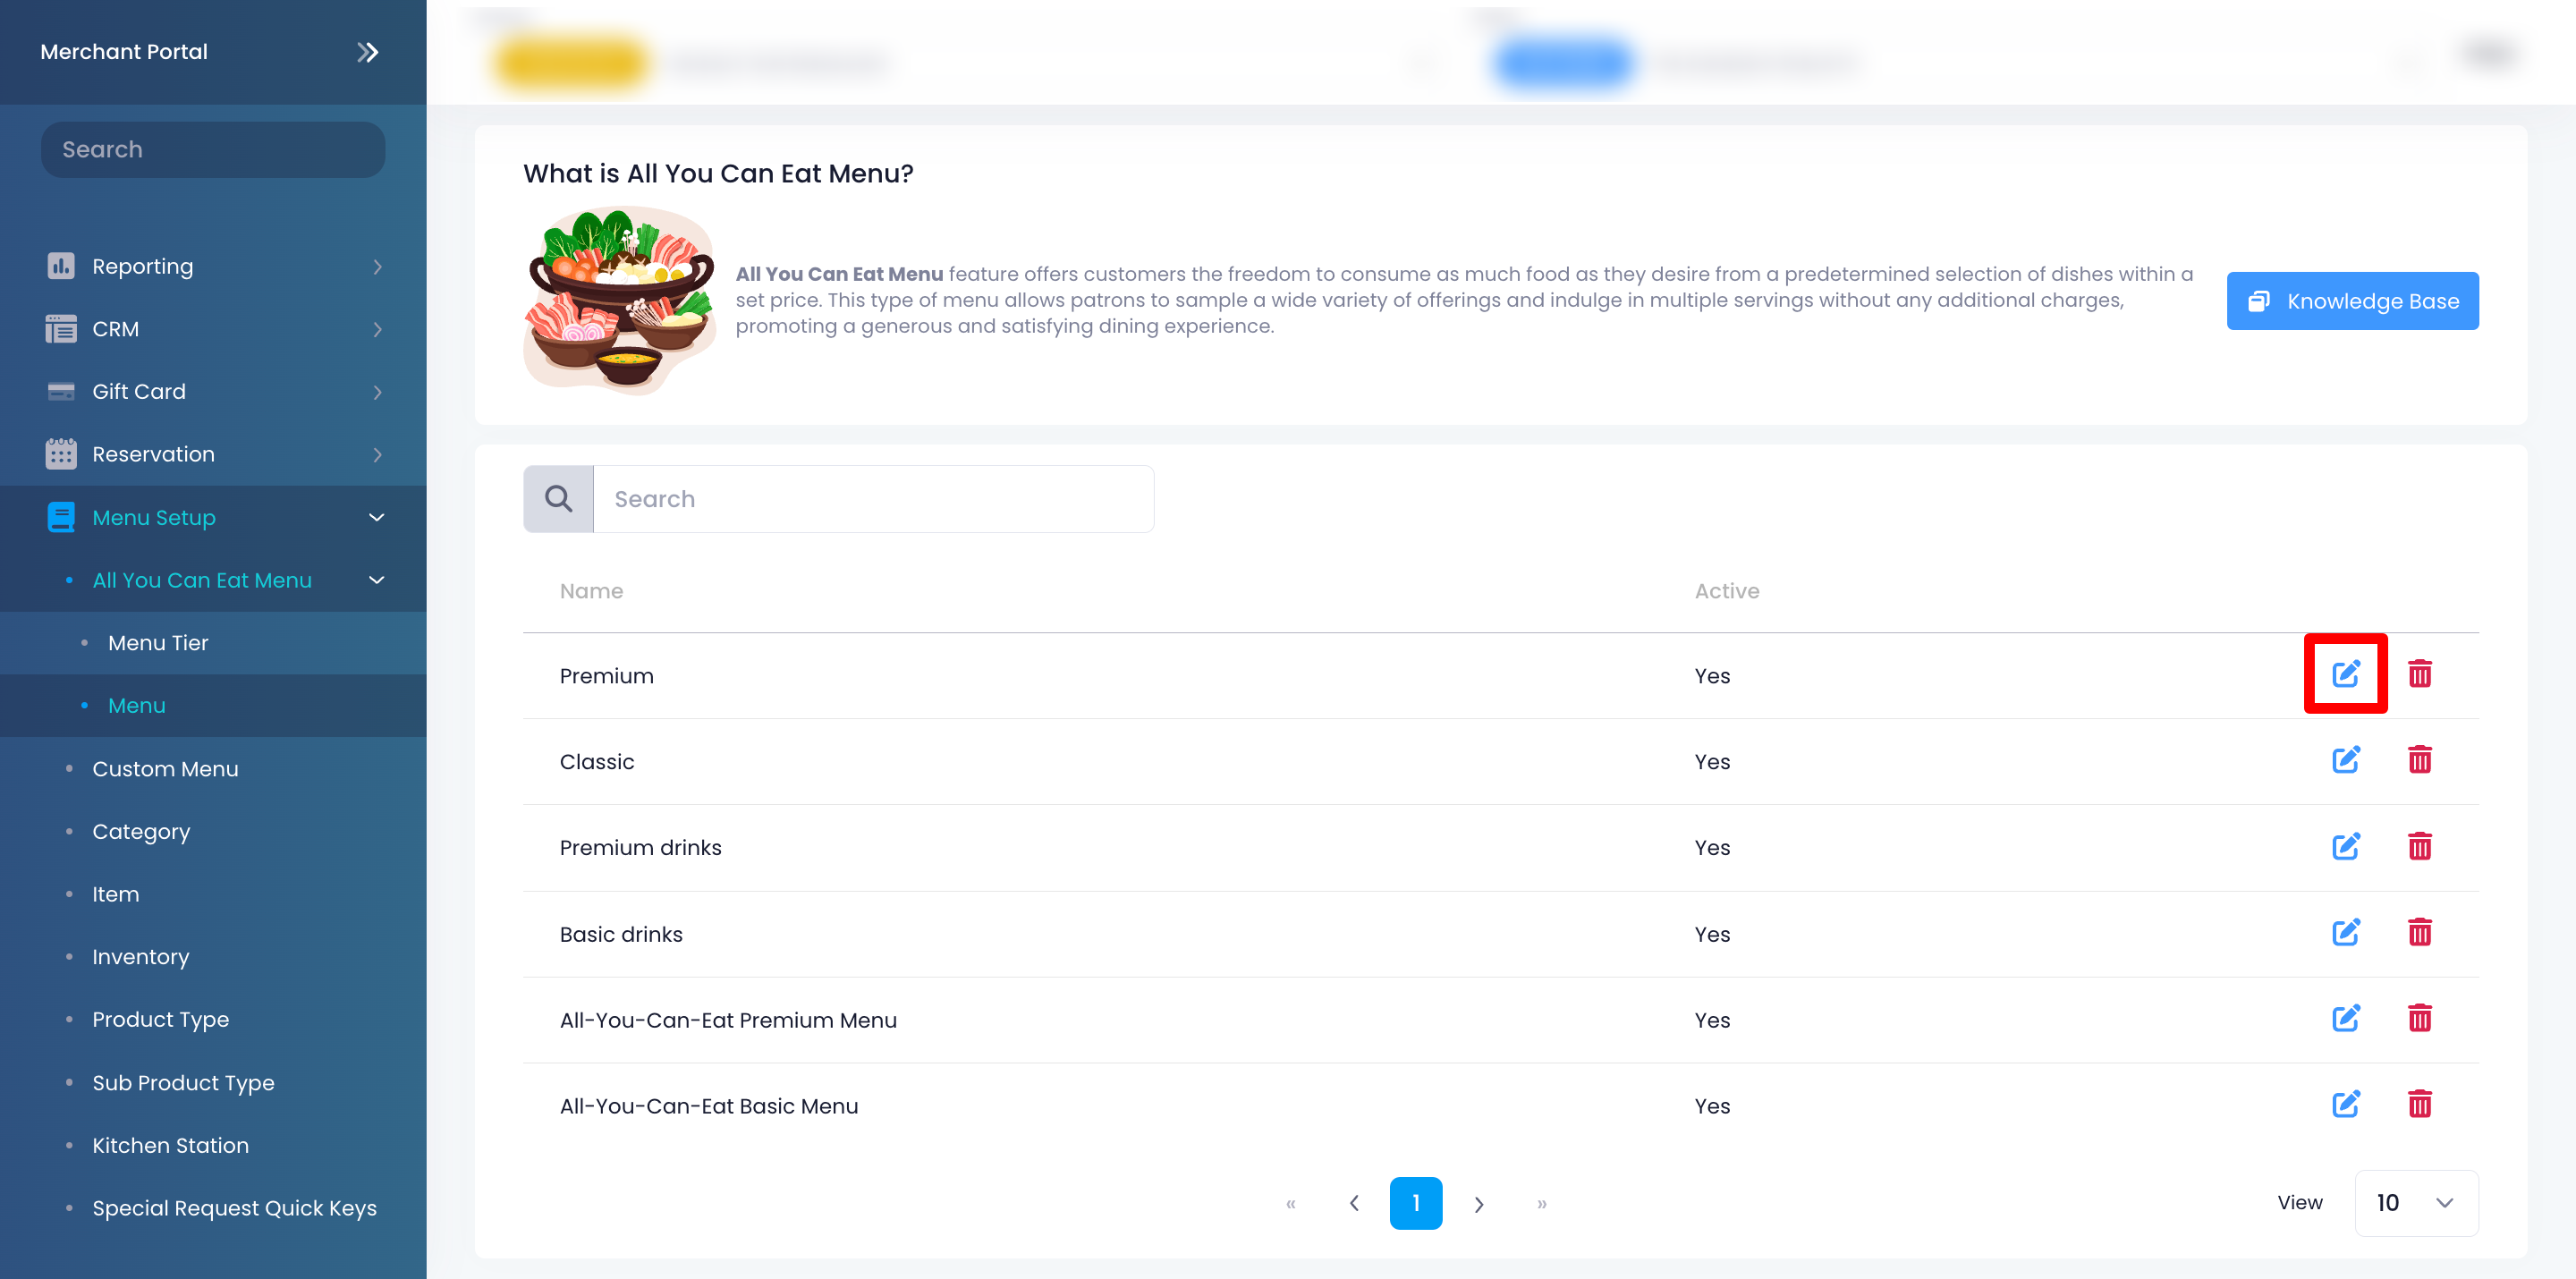
- Update the All You Can Eat Menu.
- At the top right, click on Save to confirm.
Merchant Portal (Classic Theme)
- Log in to the Merchant Portal.
- On the left panel, click on Menu Setup. Then, click on All You Can Eat Menu.
- Next to the All You Can Eat Menu that you’d like to modify, click on Edit
 .
. - Update the All You Can Eat Menu.
Delete an All You Can Eat Menu
To remove an All You Can Eat Menu, follow the steps below:
Eats365 POS
- Open the Eats365 POS.
- At the top left, tap Settings .
- Under “General,” tap Menu Setup, then tap All You Can Eat Menu.
- Select the menu that you want to delete.
- At the top right, tap Delete. A prompt appears to confirm if you want to delete the All You Can Eat Menu.
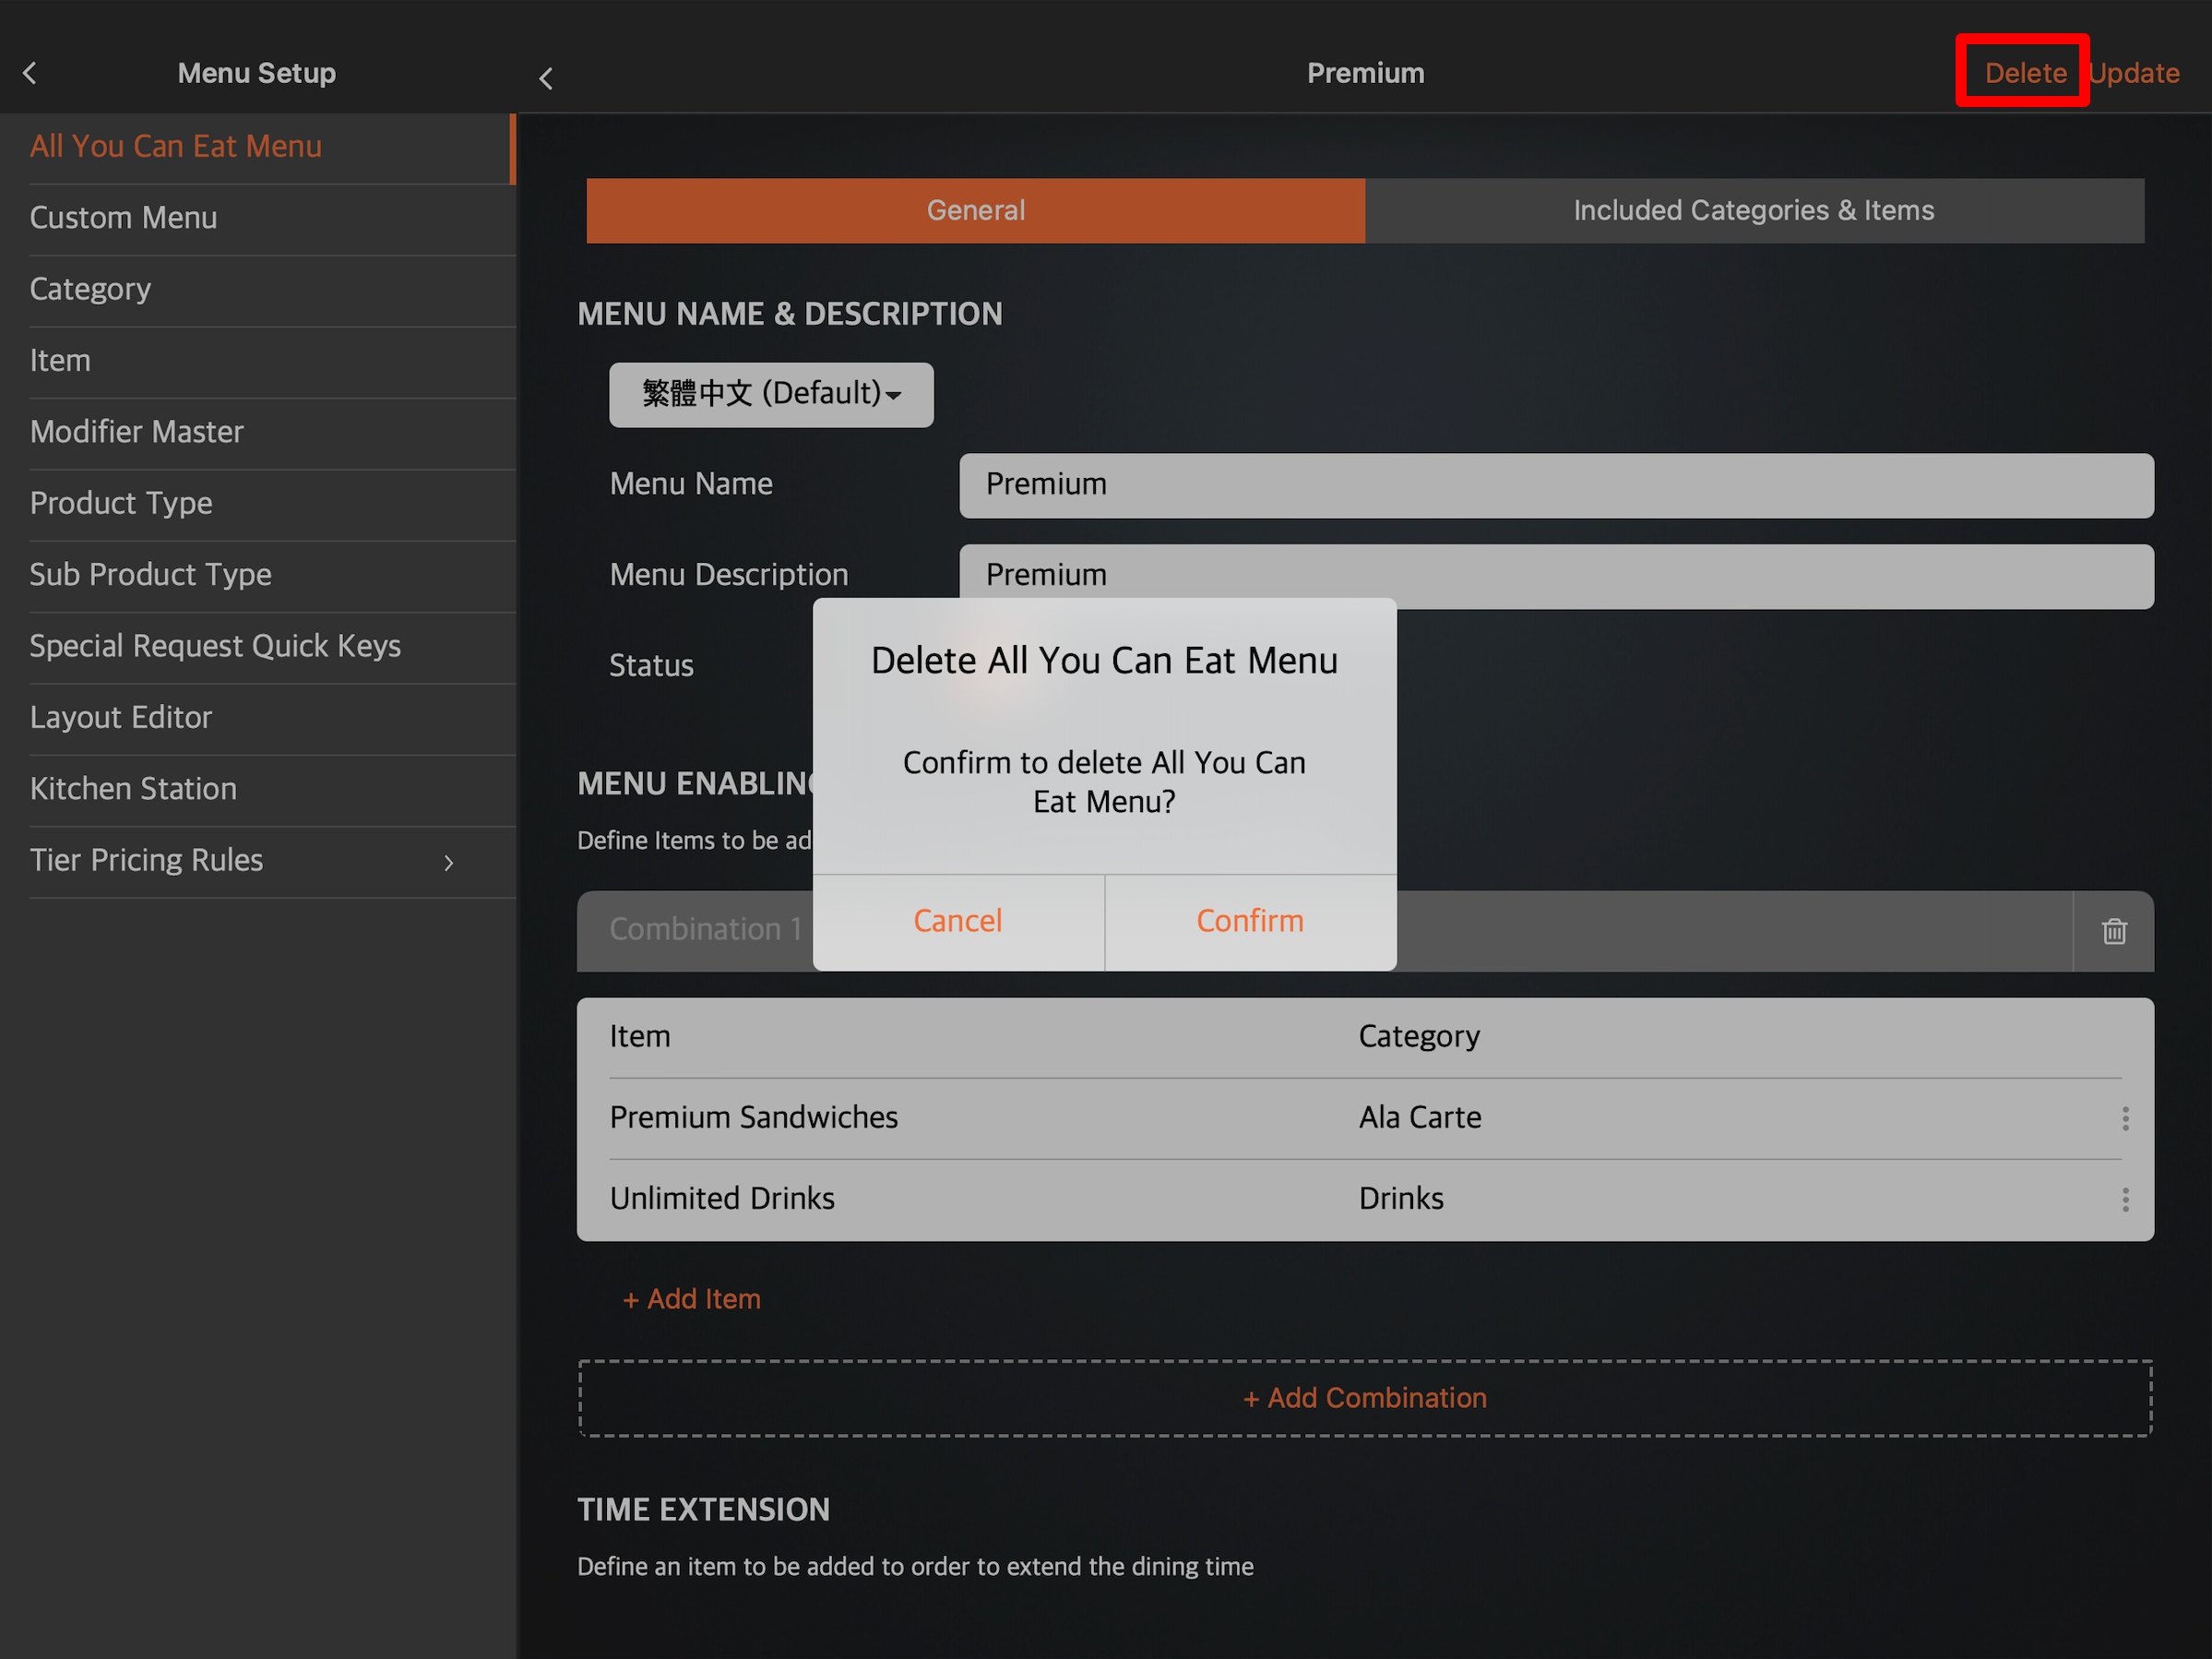
- Tap Confirm to delete.
Merchant Portal 2.0
- Log in to the Merchant Portal.
- On the left panel, click on Menu Setup. Then, click on All You Can Eat Menu.
- Click on Menu.
- Next to the All You Can Eat Menu that you’d like to delete, click on Delete
 . A prompt appears to confirm if you want to delete the All You Can Eat Menu.
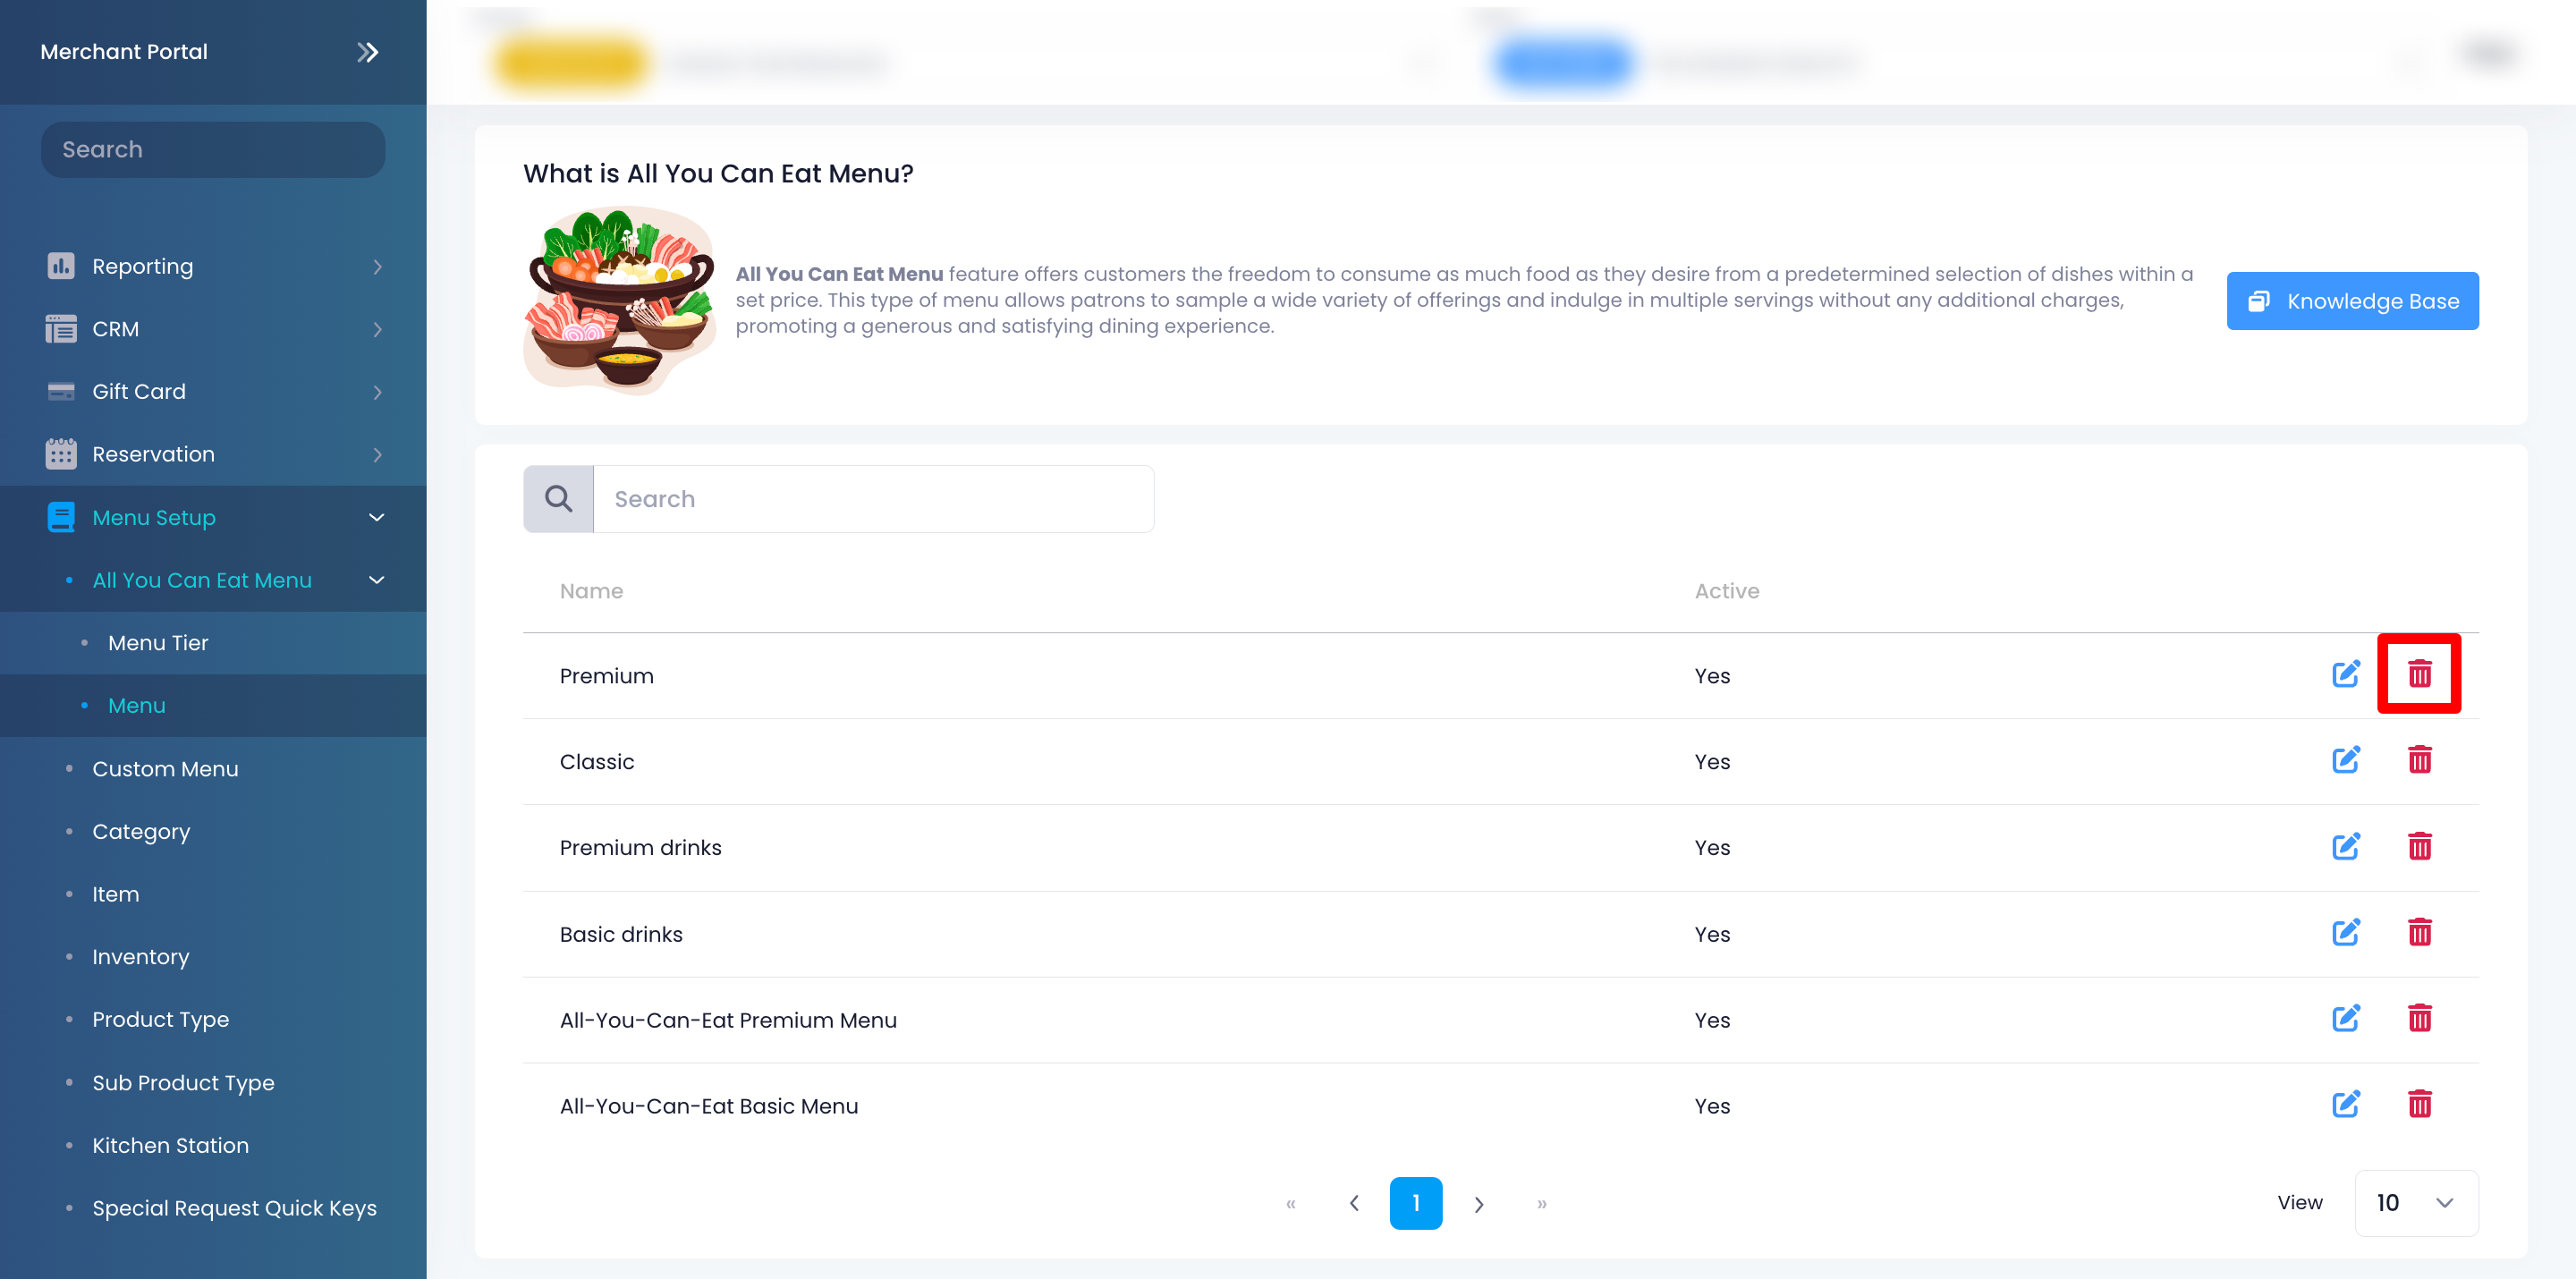
- Click on Confirm to delete.
Merchant Portal (Classic Theme)
- Log in to the Merchant Portal.
- On the left panel, click on Menu Setup. Then, click on All You Can Eat Menu.
- Next to the All You Can Eat Menu that you’d like to delete, click on Delete
 . A prompt appears to confirm if you want to delete the All You Can Eat Menu.
 - Click on Confirm to delete.