 Eats365 Products
 Merchant Guide
 Modules
 Membership
 Integrations
 Hardware
 Staff Operations
 Roles & Permissions
 Payments
 Reports
 What’s New
 Release Notes
 Troubleshooting
 Simulators
 Glossary
 Troubleshooter
 System Status
Menu Setup
Table of Contents
Customize the menu layout
Learn how to change your menu’s layout to how you want it to look on the Eats365 POS.
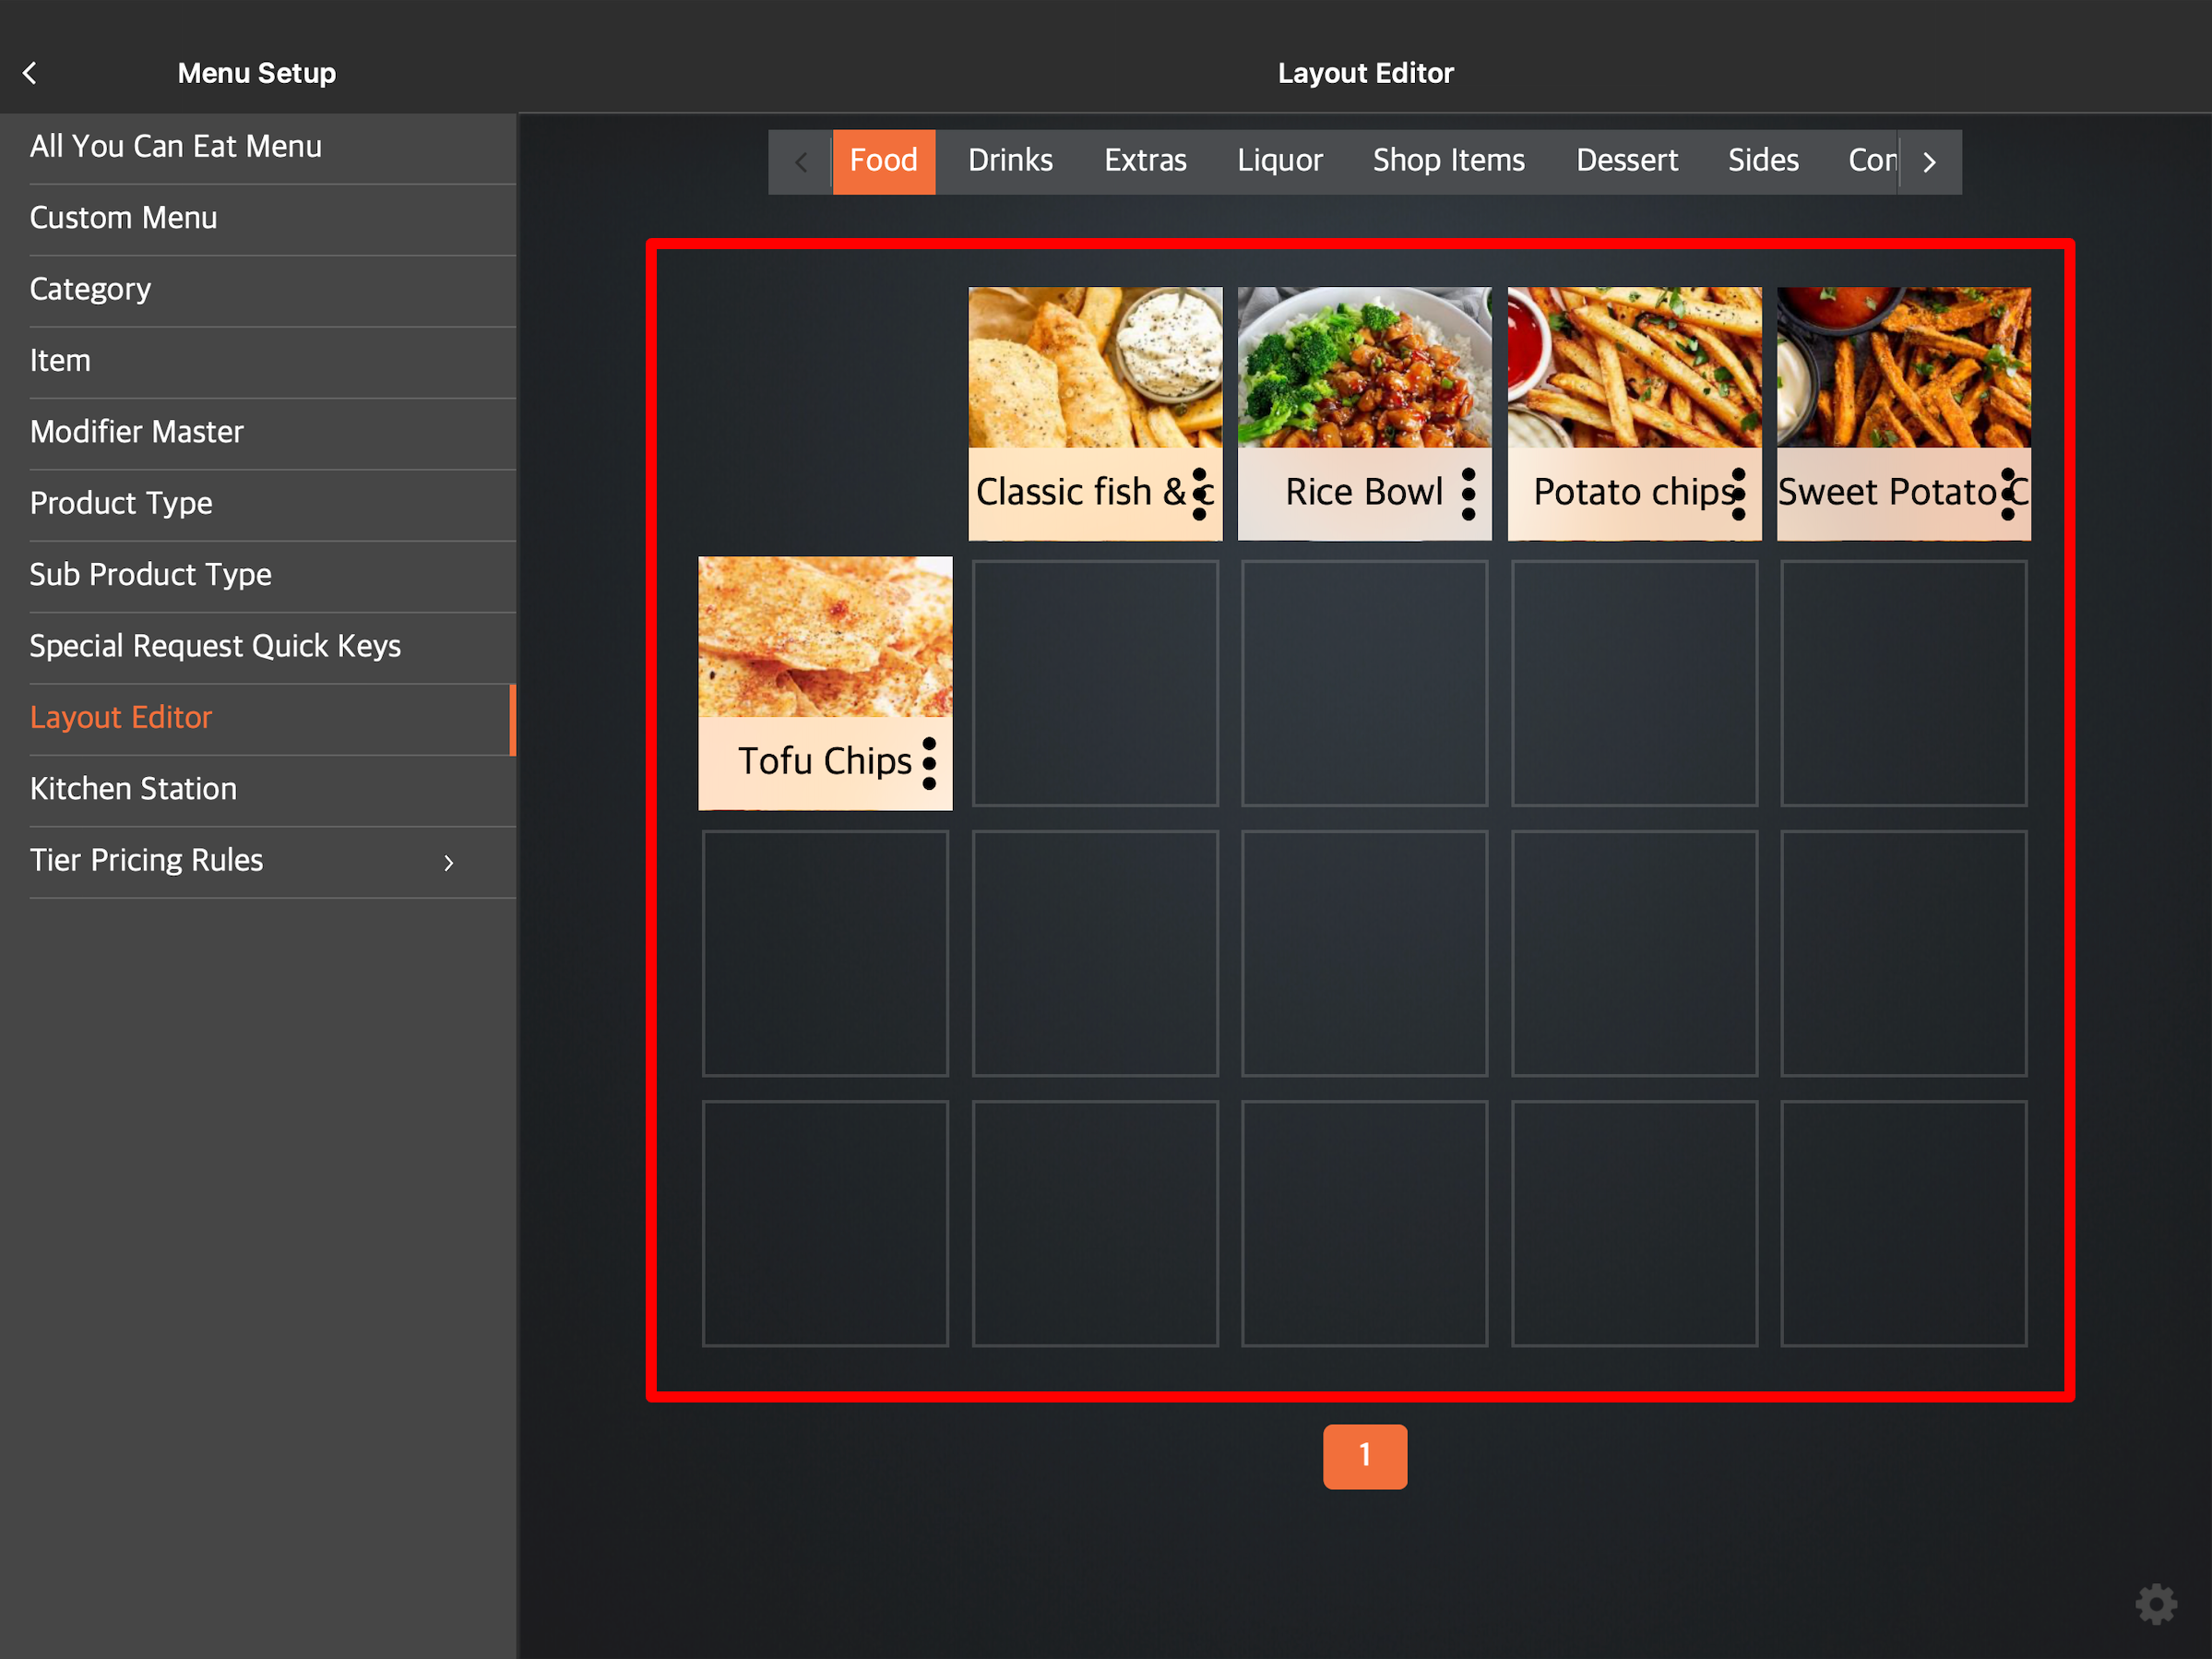
The "Layout Editor" allows you to customize your menu’s layout to your preferred order and appearance on the POS.
In this article, you’ll learn how to change your menu’s layout to how you want it to appear on the Eats365 POS.
Change item layout order
To change your menu items’ layout to your preferred order, follow the steps below:
Eats365 POS
- Log in to the Eats365 POS.
-
At the top left, tap Settings
 .
.
- Under "General," tap Menu Setup
 Layout Editor.
 -
Tap and hold on the item you want to move. Then, drag the item in the order that you want it to appear.
Merchant Portal (Classic Theme)
- Log in to the Merchant Portal.
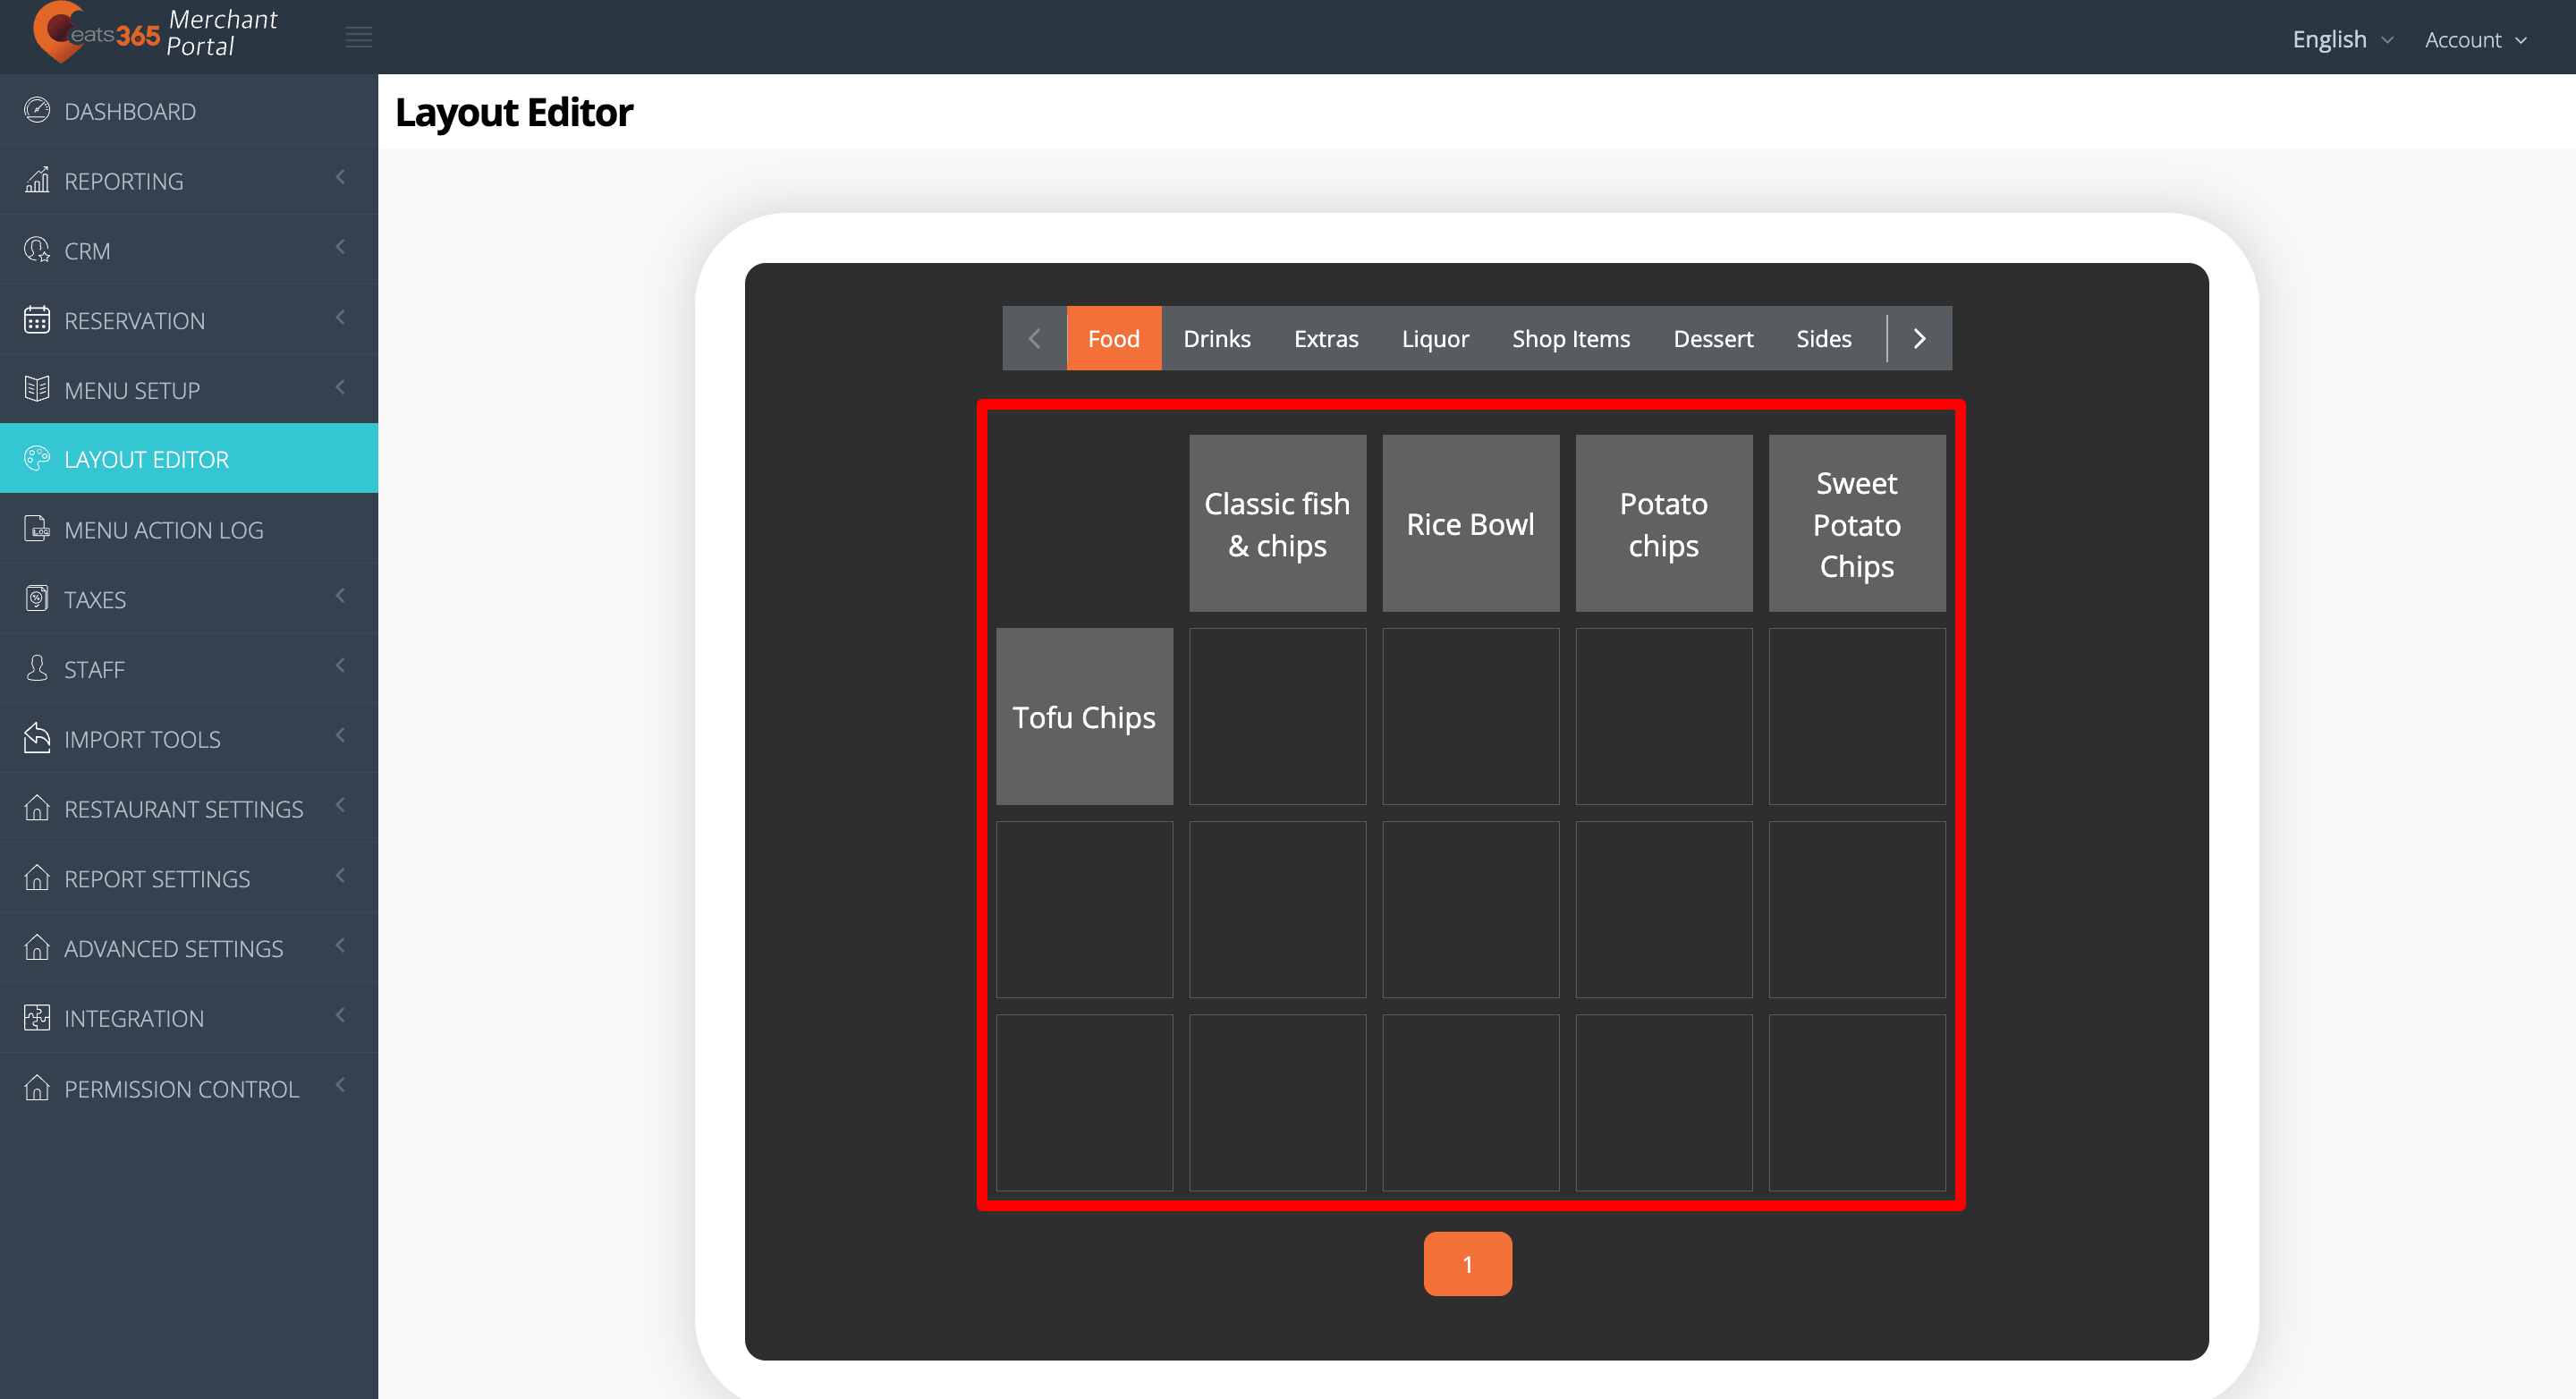
- On the left panel, click on Layout Editor.
-
Click and hold on the item you want to move. Then, drag the item in the order that you want it to appear.
Merchant Portal 2.0
- Log in to the Merchant Portal.
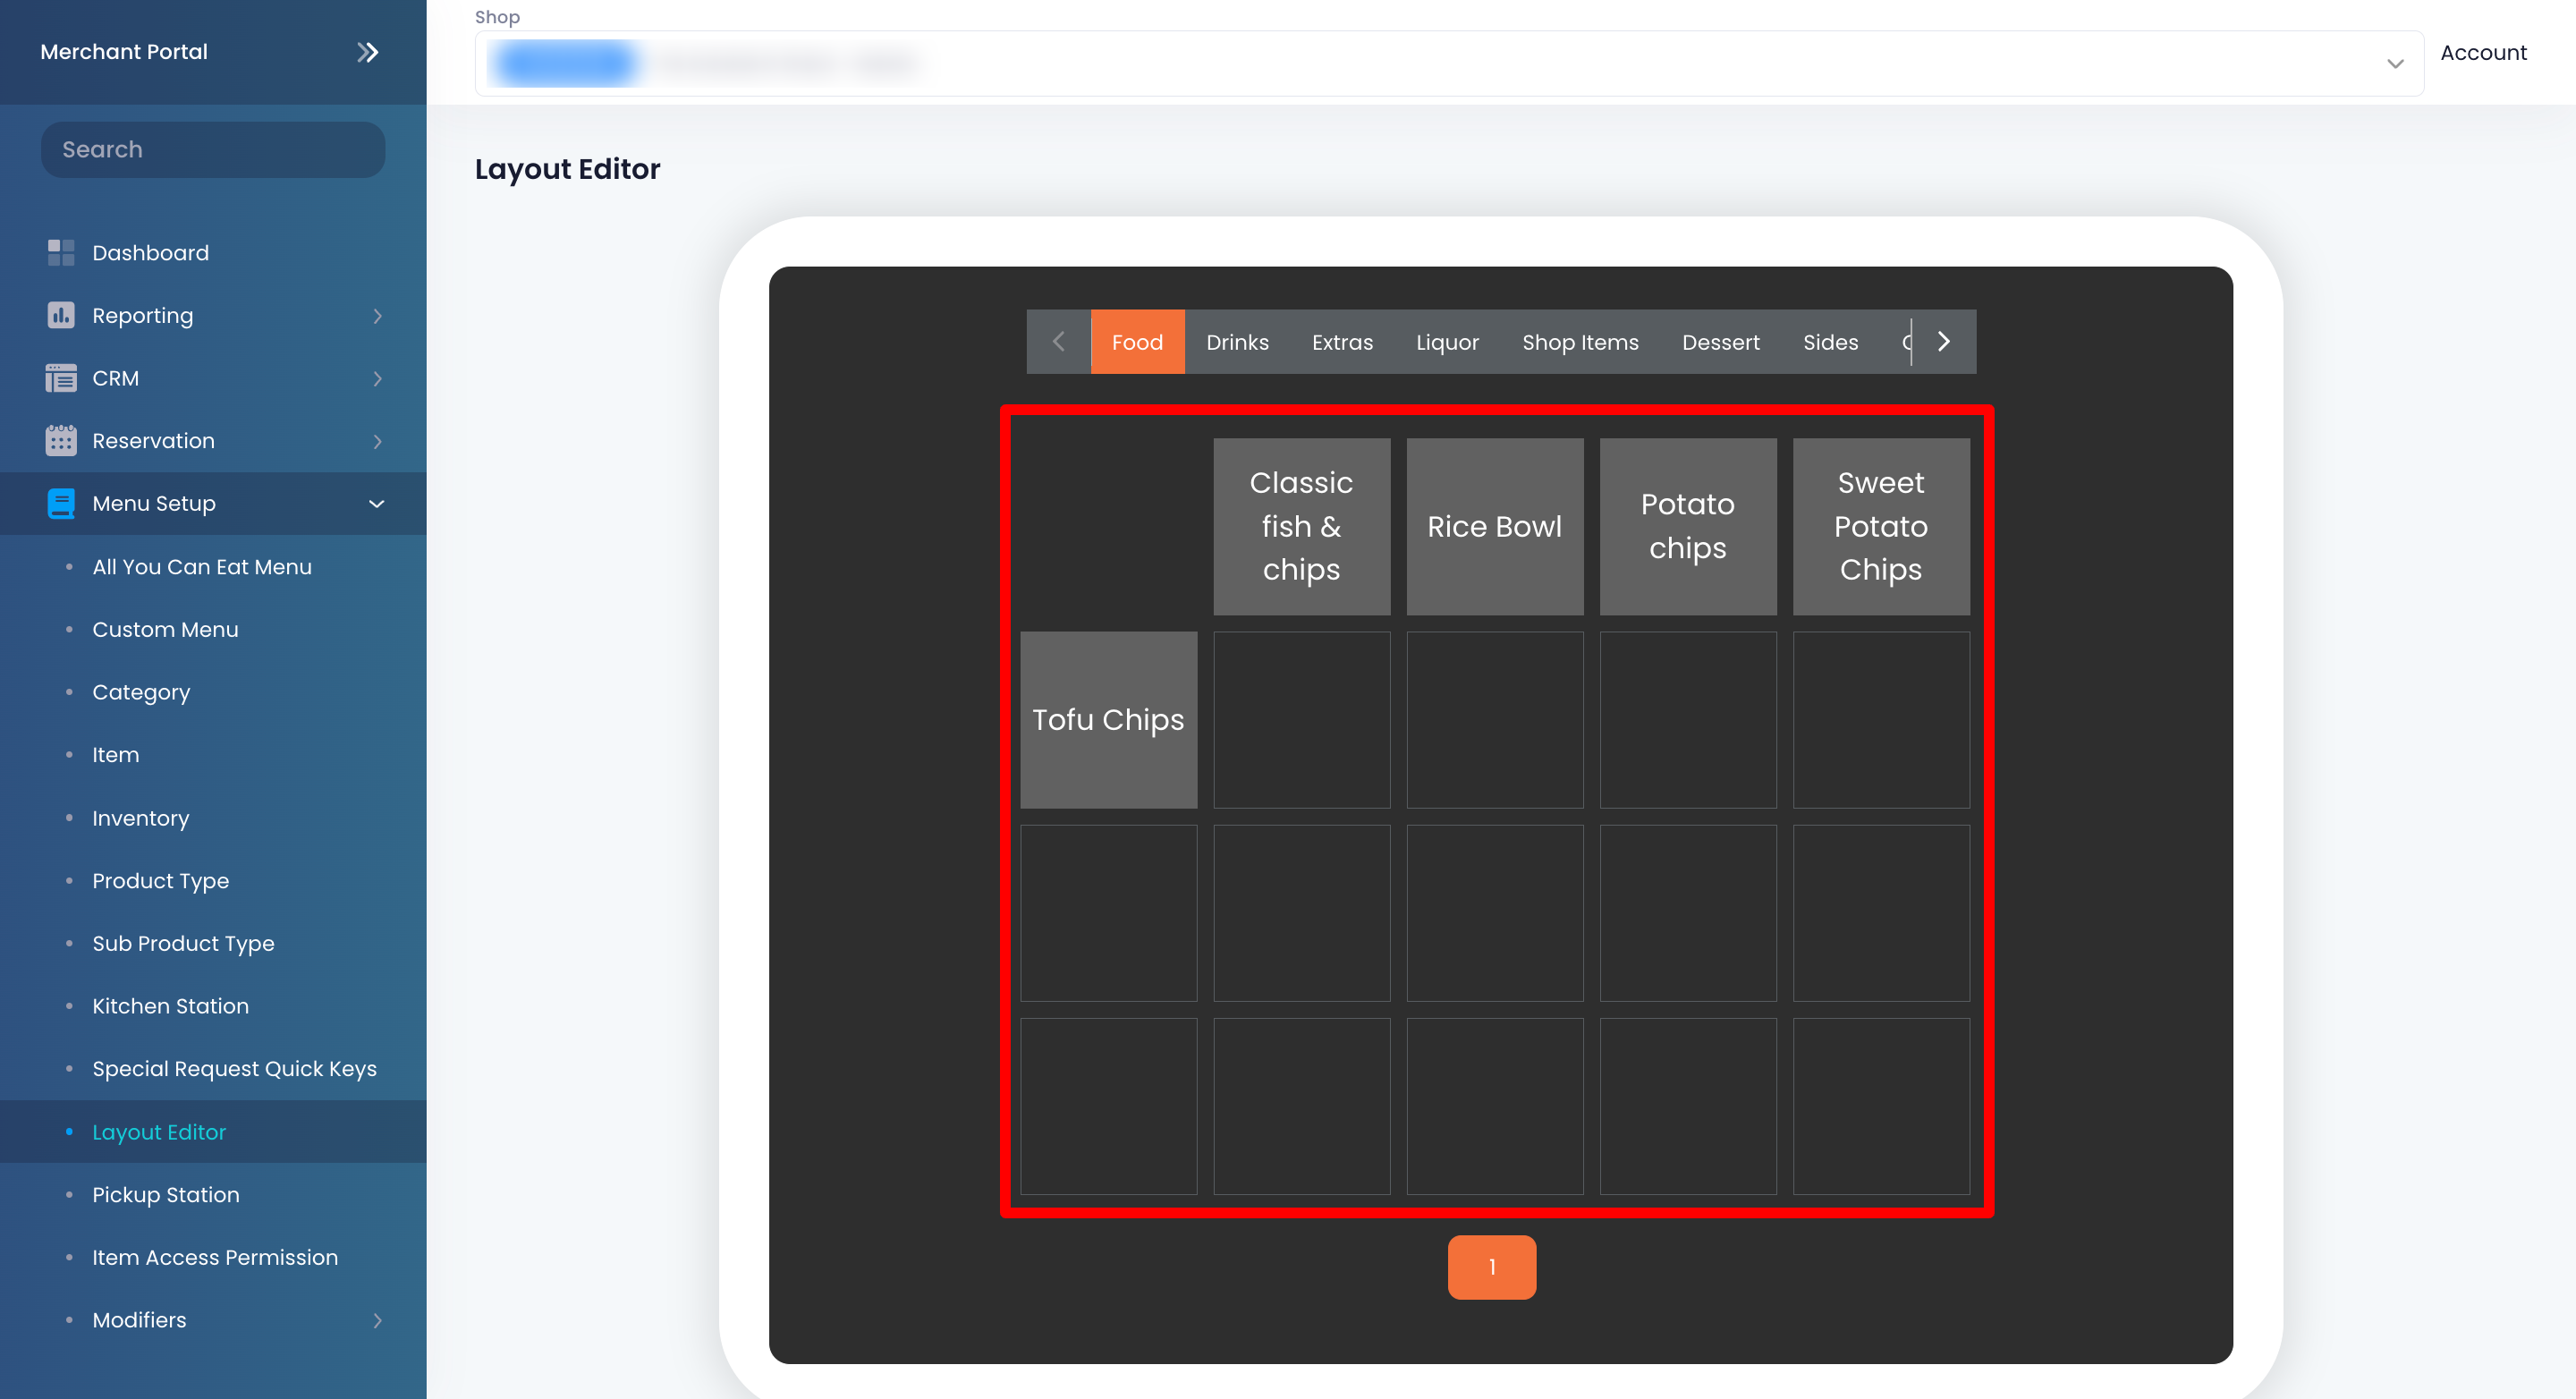
- On the left panel, click on Menu SetupLayout Editor.
- Click and hold on the item you want to move. Then, drag the item in the order that you want it to appear.
Change the Item Key name
If you want to change the Item Key name, follow the steps below:
Eats365 POS
- Log in to the Eats365 POS.
-
At the top left, tap Settings .
- Under "General," tap Menu SetupLayout Editor.
-
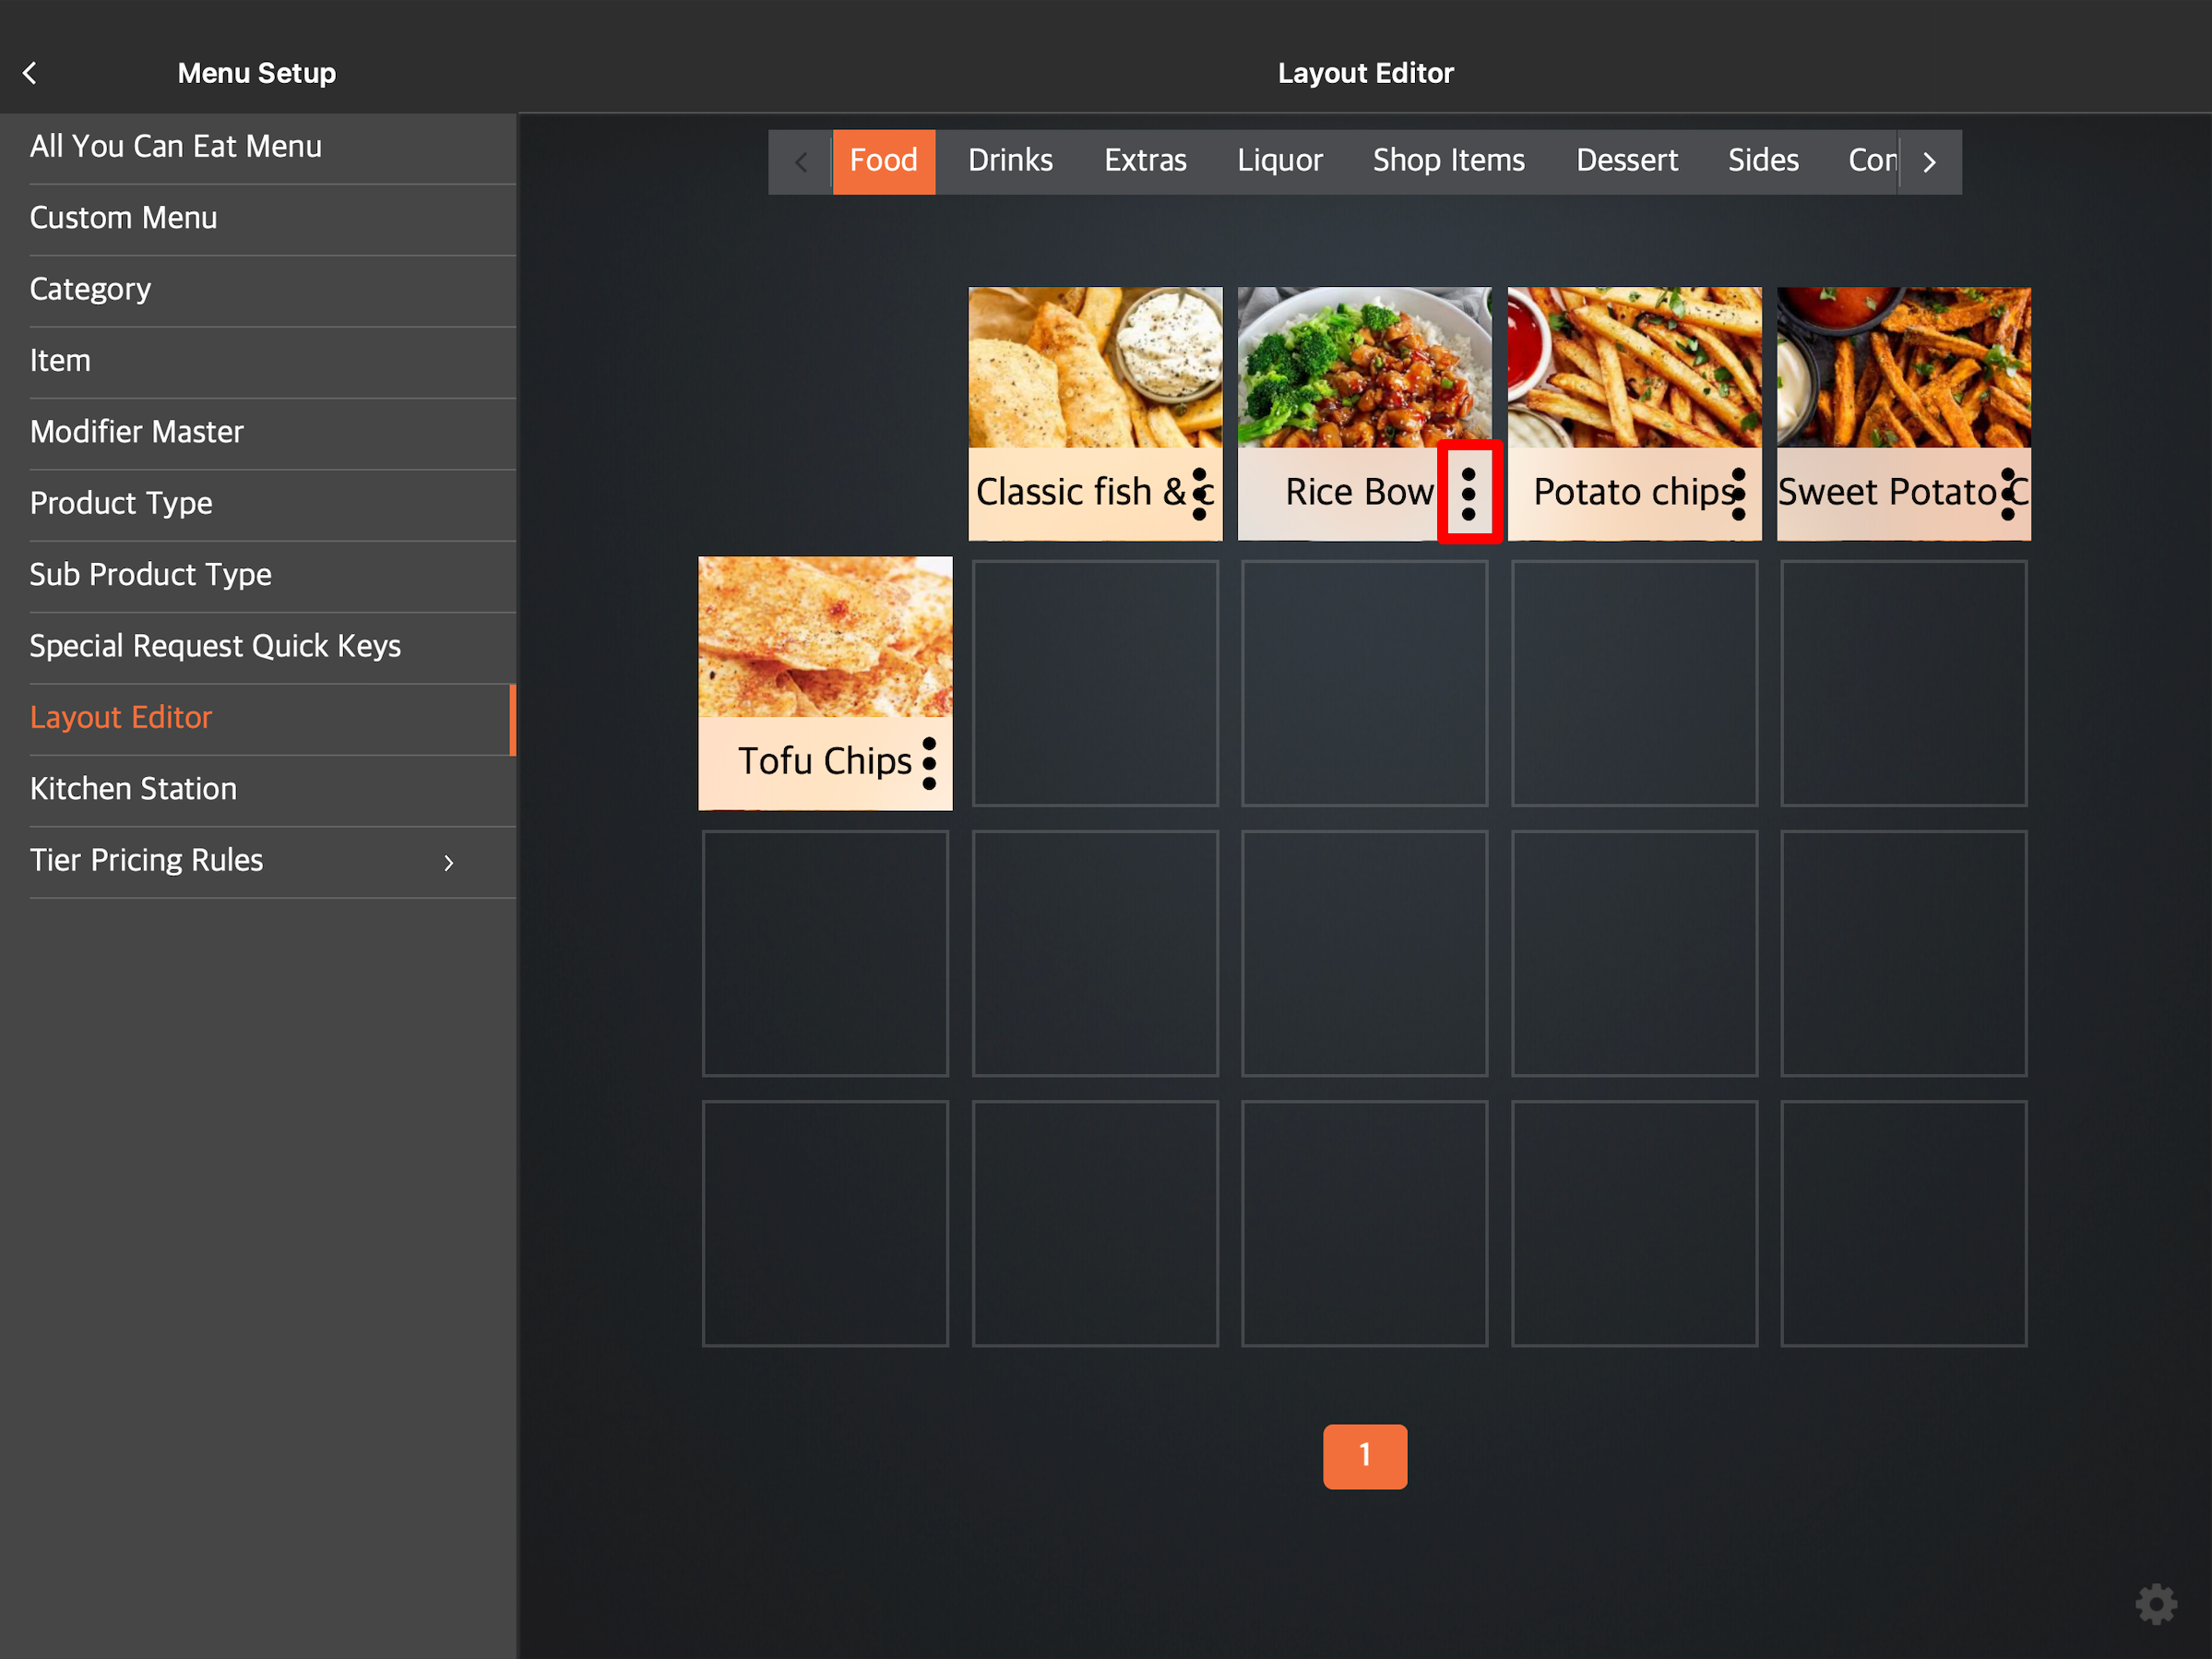
Next to the item that you want to change the name of, tap the three-dot menu
 .
.
-
Under "Item Key Name," enter the name you want to use.
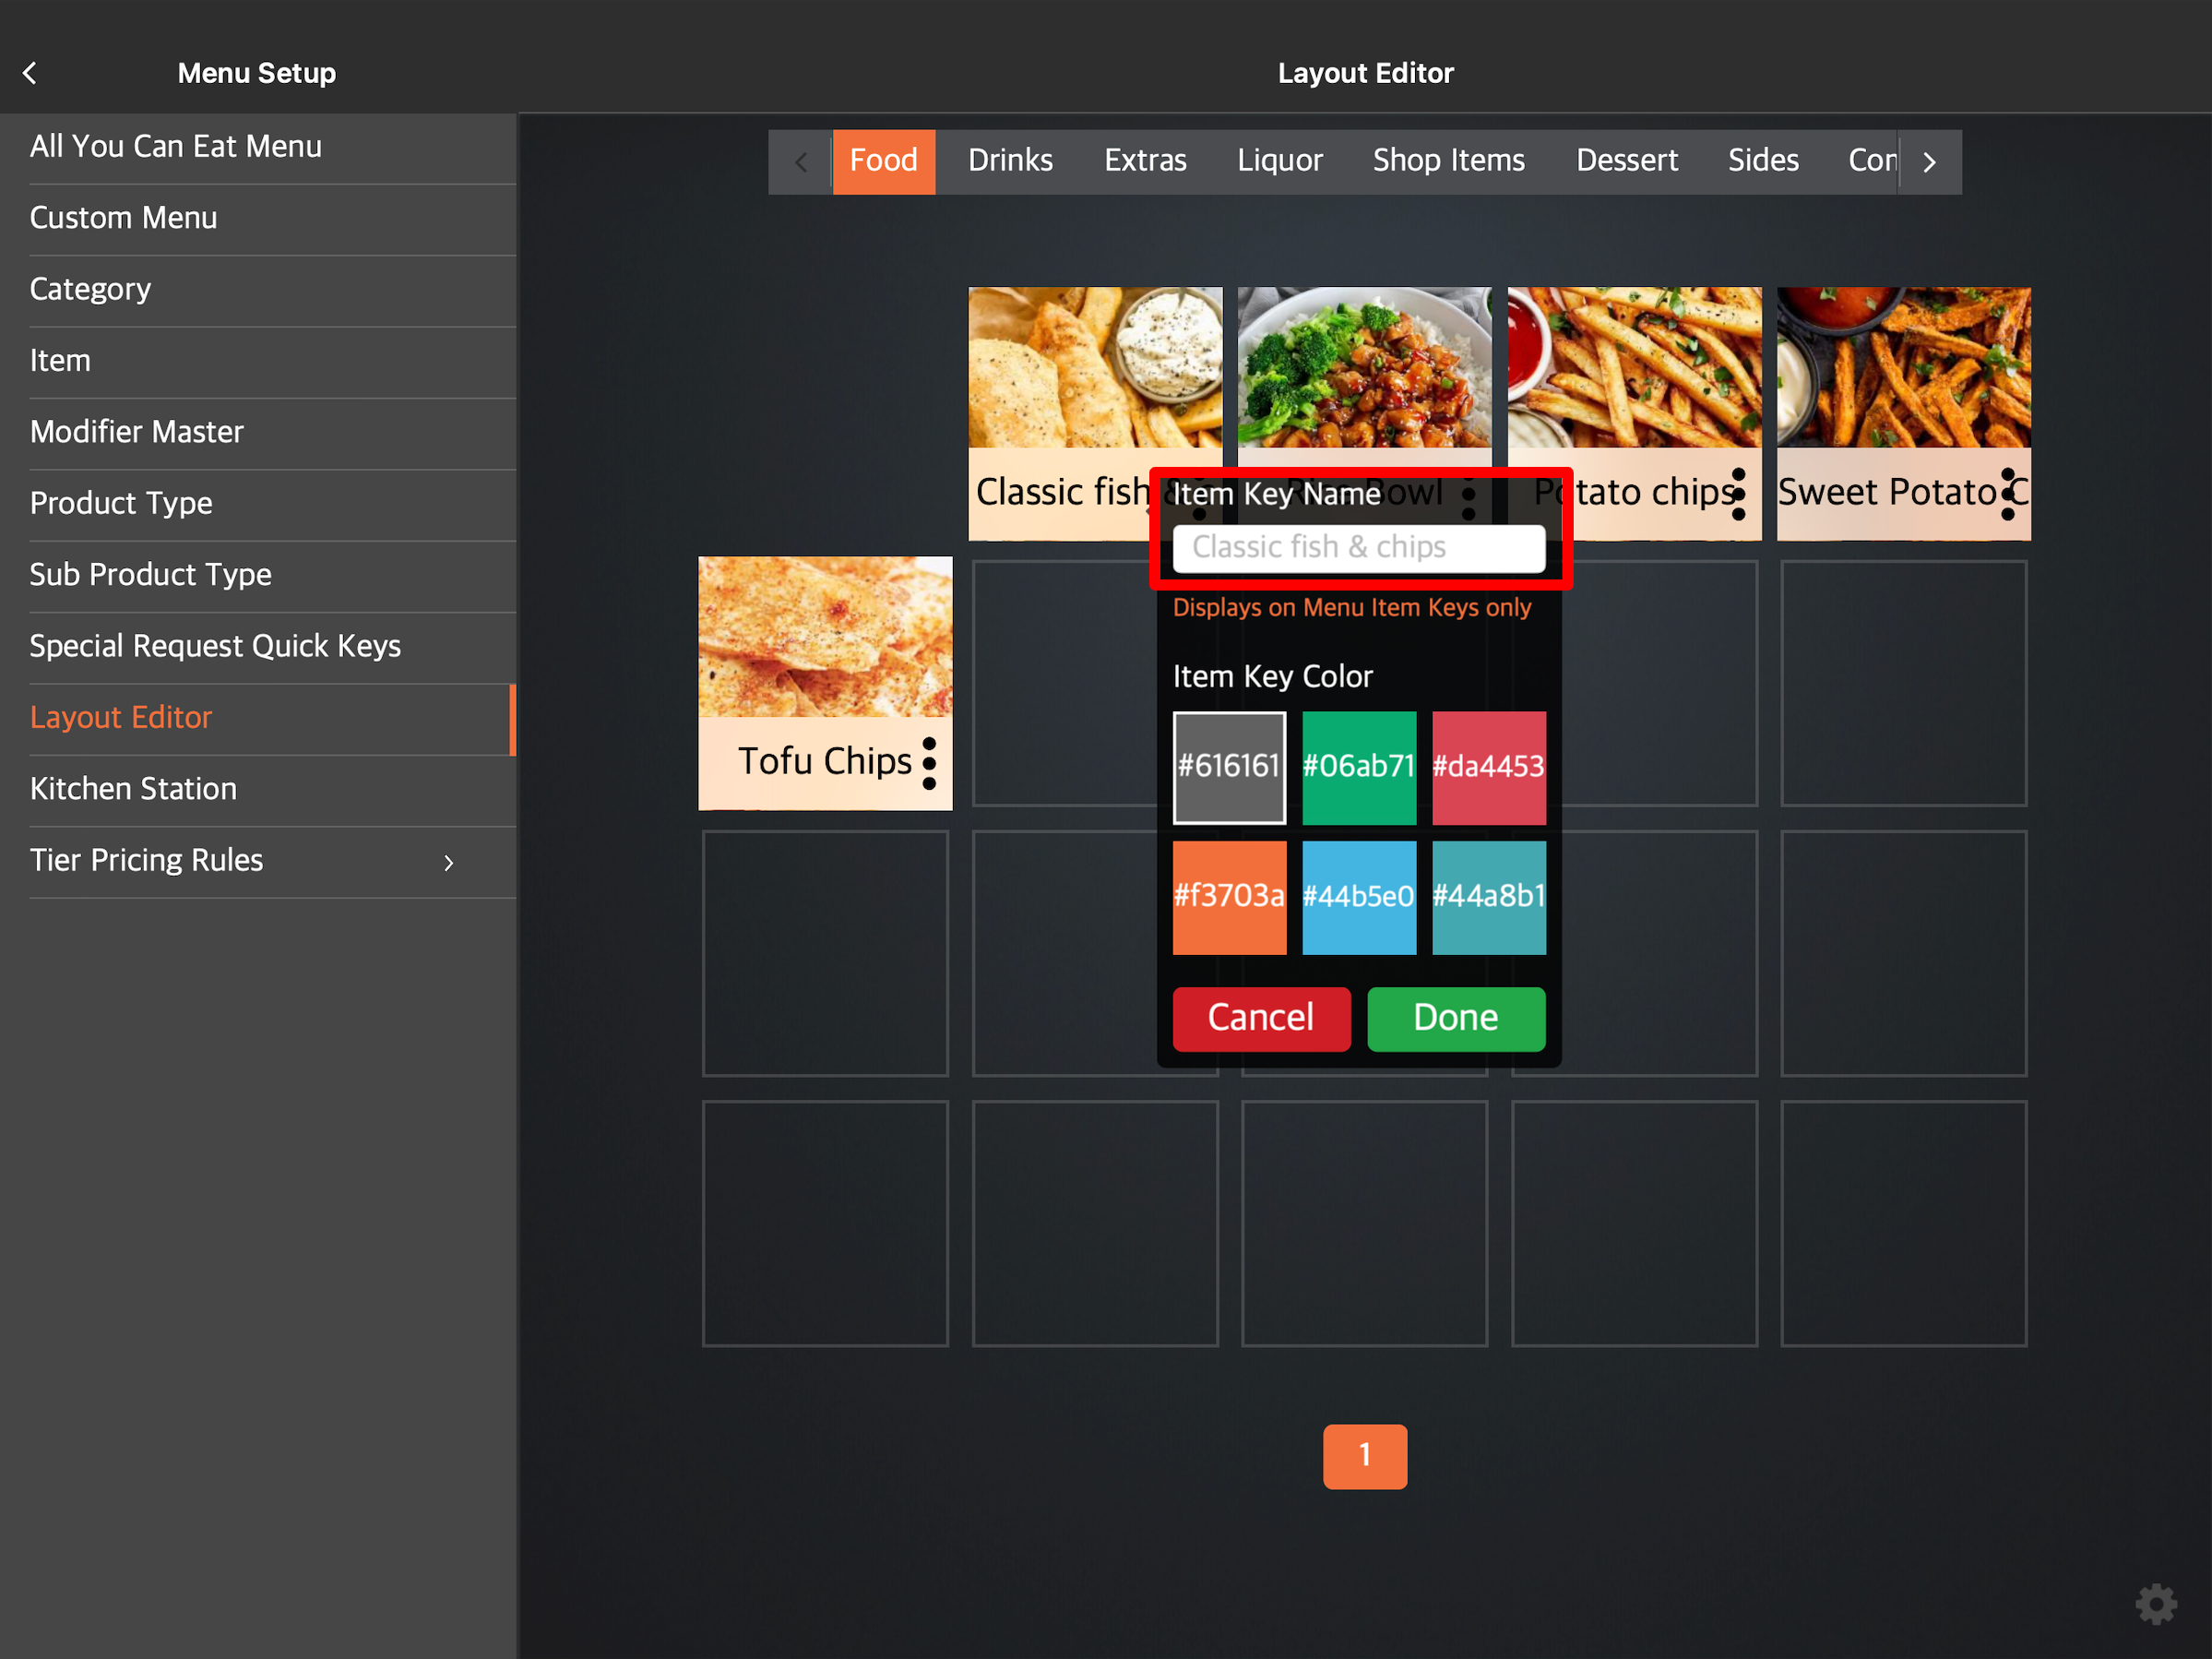
- Tap Done to confirm.
Merchant Portal (Classic Theme)
- Log in to the Merchant Portal.
- On the left panel, click on Layout Editor.
- Click on the item that you want to change the name of.
-
Under Key Name, enter the new Item Key name.
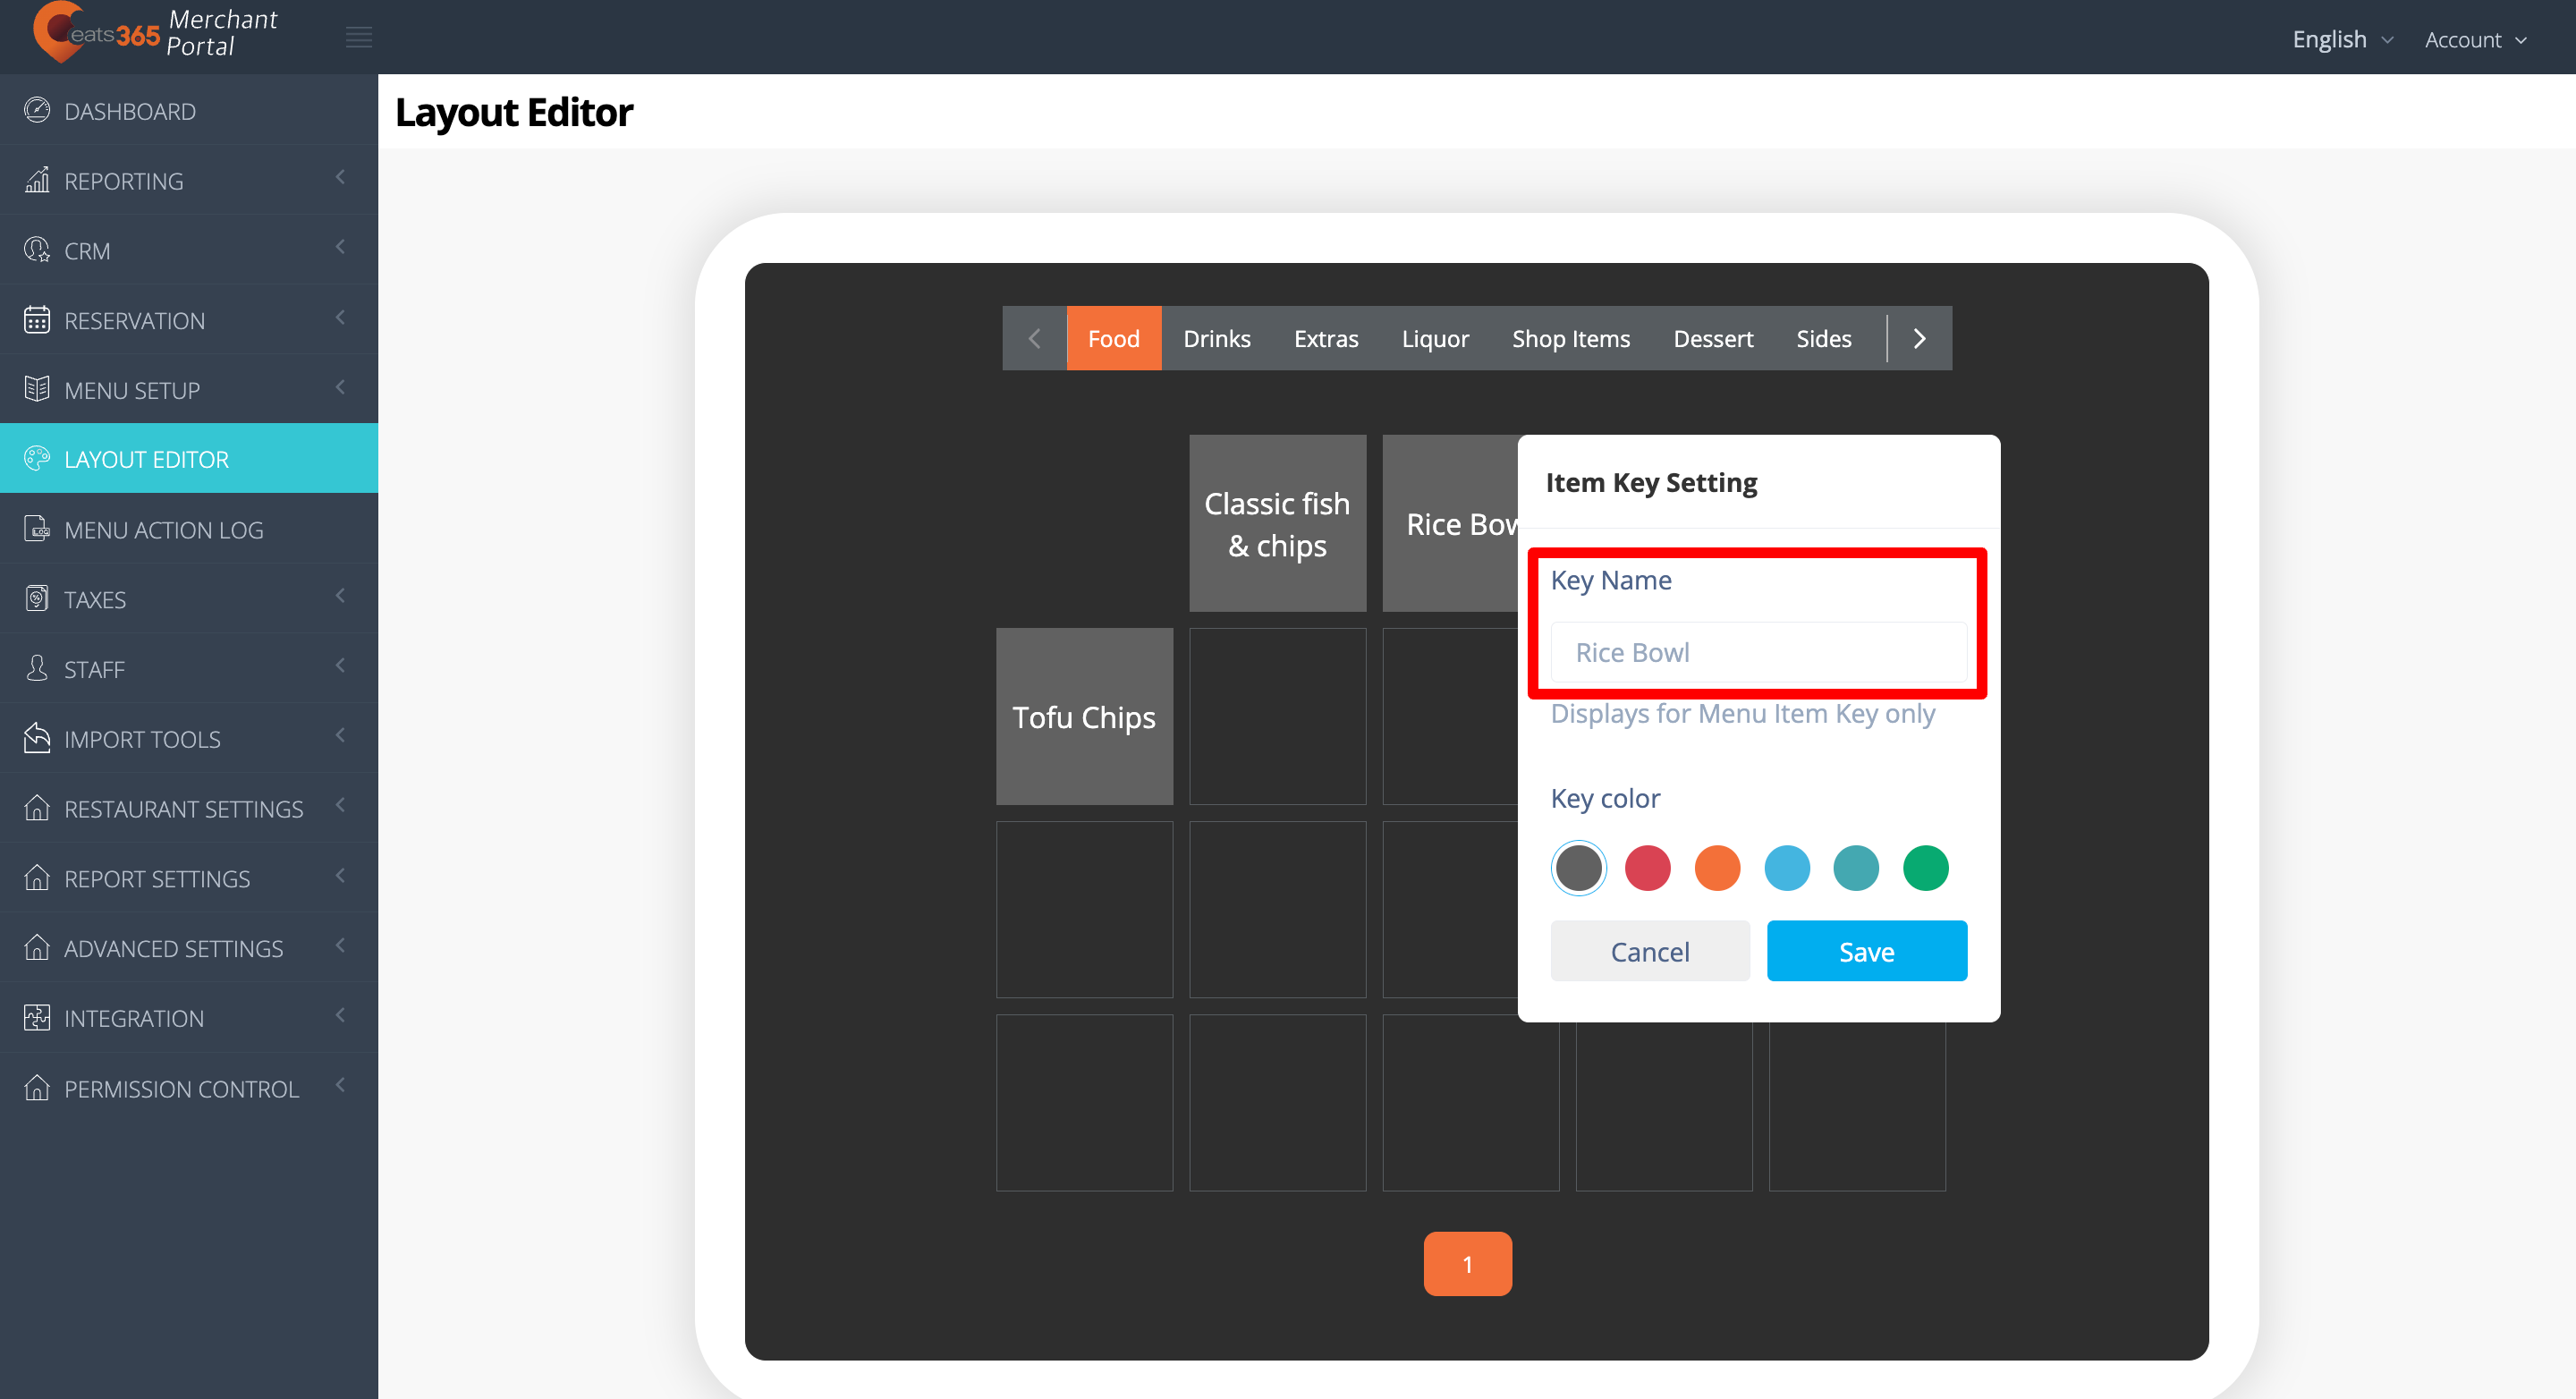
- Click on Save to confirm.
Merchant Portal 2.0
- Log in to the Merchant Portal.
- On the left panel, click on Menu SetupLayout Editor.
- Click on the item that you want to change the name of.
-
Under "Key Name," enter the name you want to use.
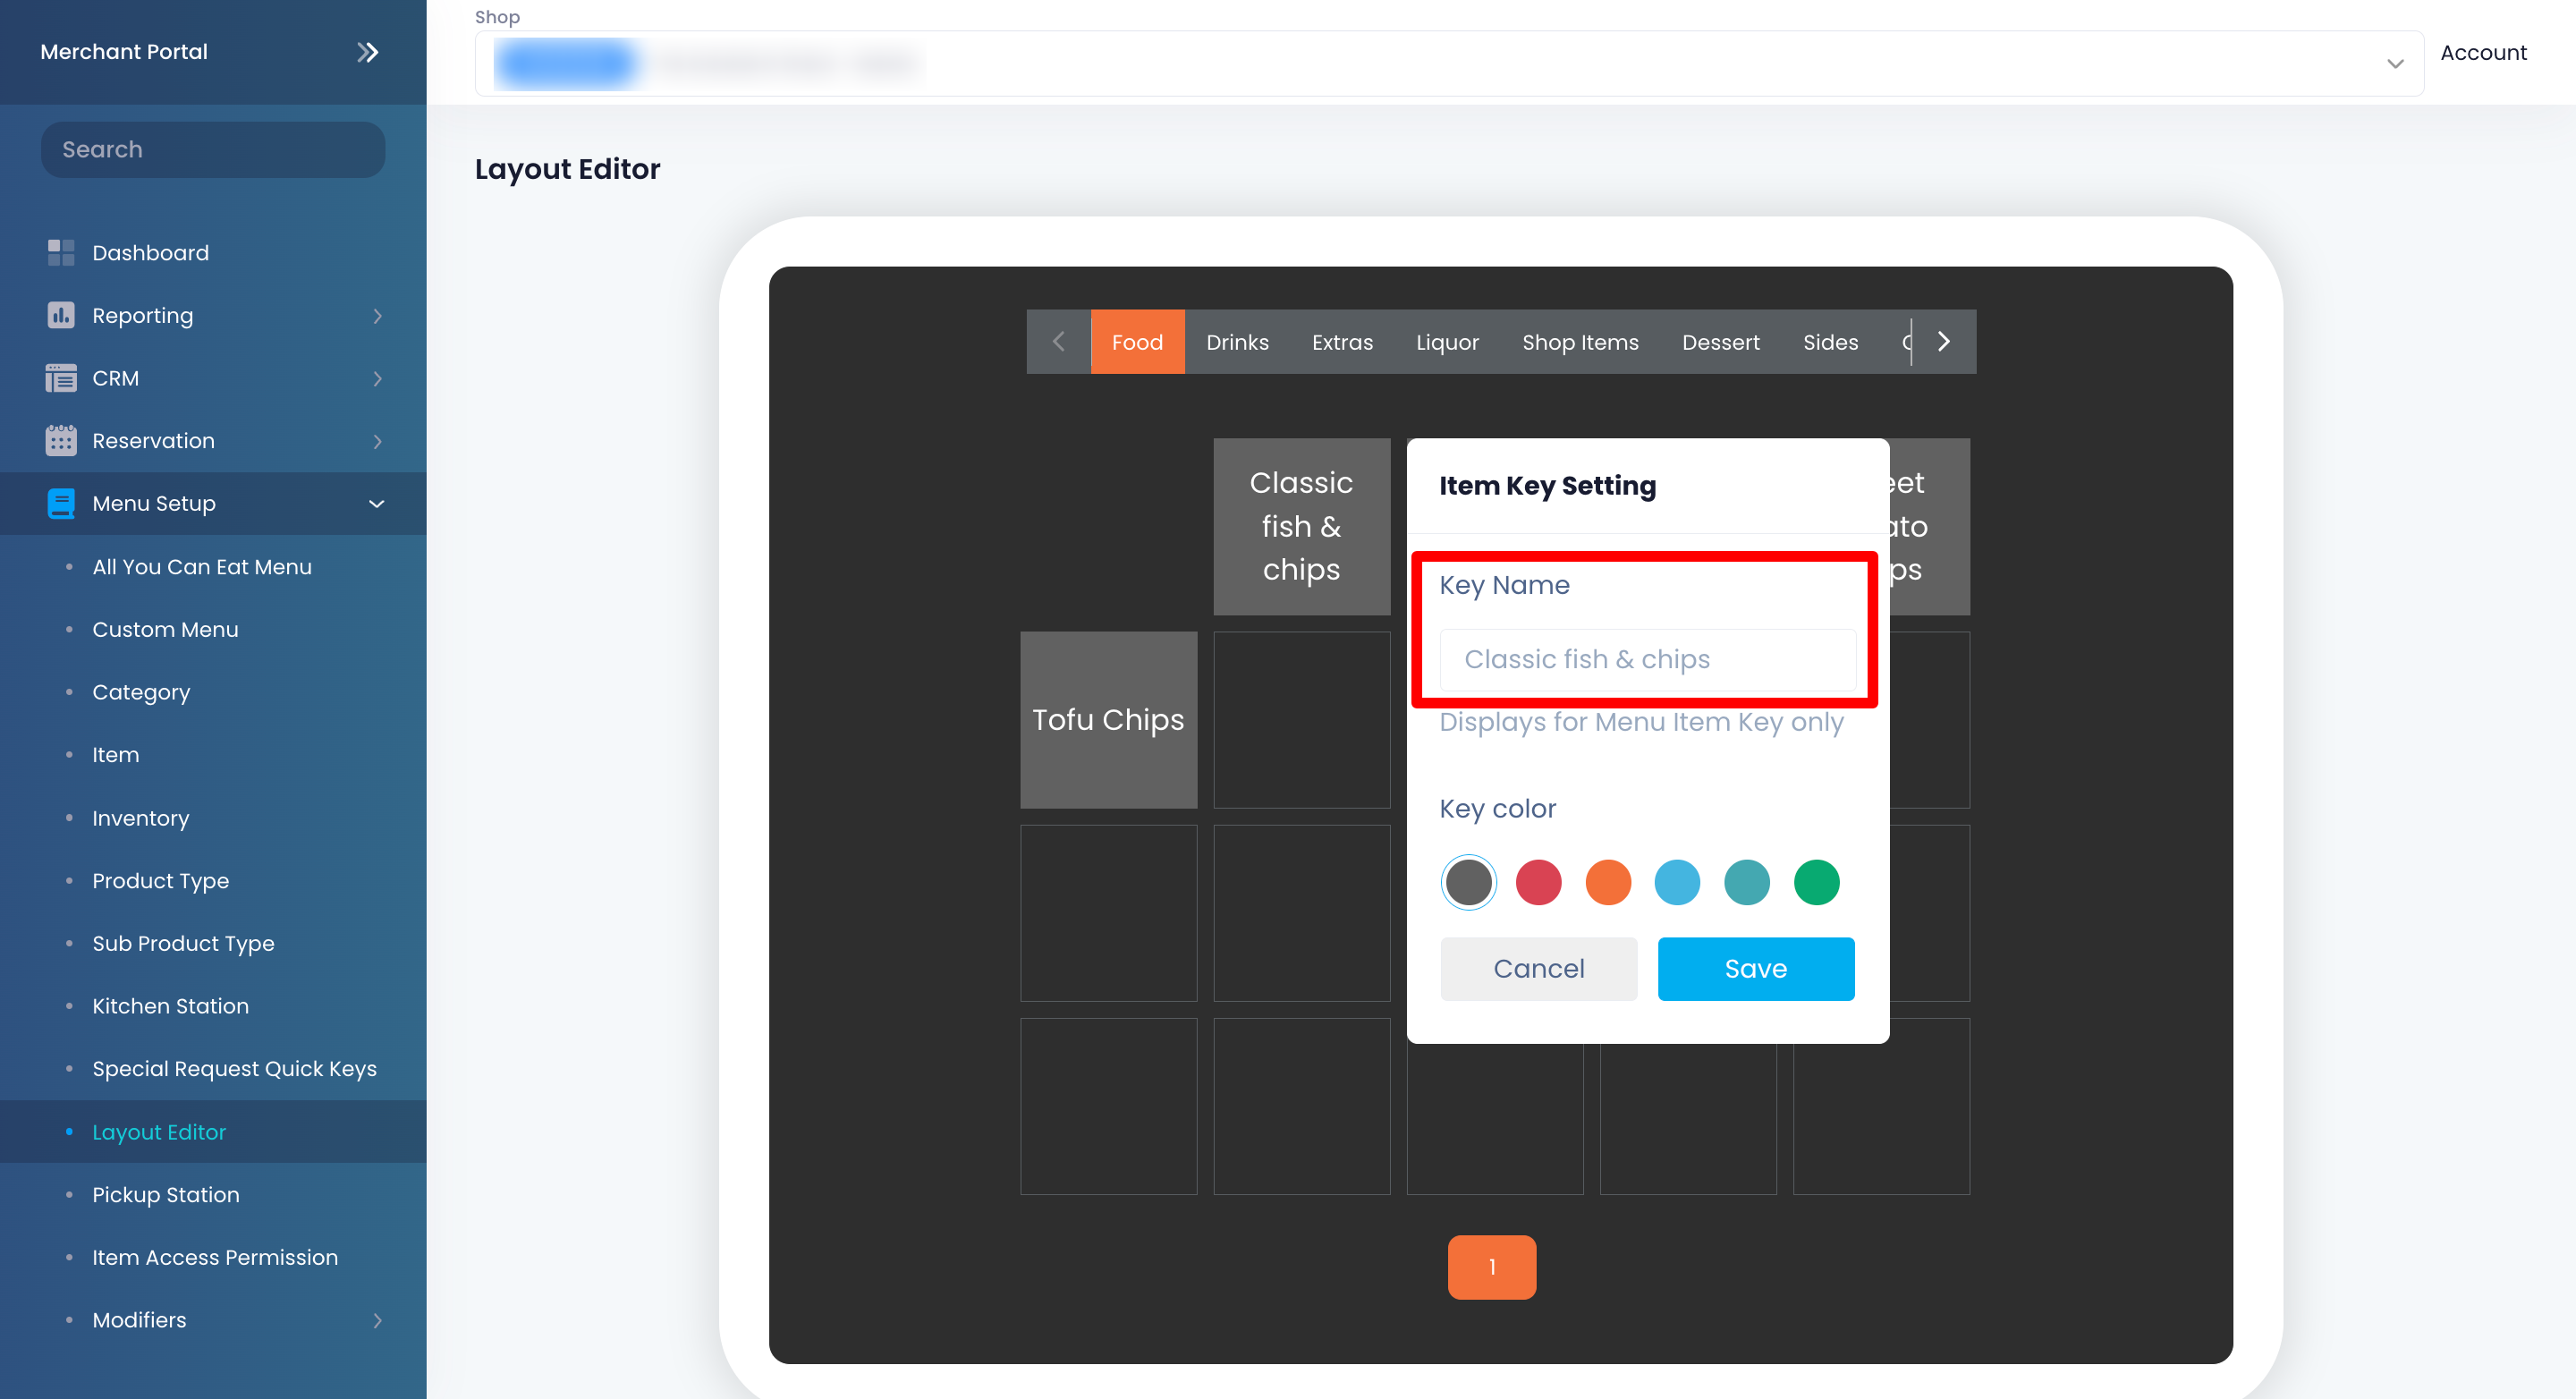
- Click on Save to confirm.
Change the item key color
If you want to customize the Item Key to show a specific color, follow the steps below:
Eats365 POS
- Log in to the Eats365 POS.
-
At the top left, tap Settings .
- Under "General," tap Menu SetupLayout Editor.
-
Next to the item that you want to change the color of, tap the three-dot menu.
-
Under "Item Key Color," select the color that you want to assign to the item.

- Tap Done to confirm.
Merchant Portal (Classic Theme)
- Log in to the Merchant Portal.
- On the left panel, click on Layout Editor.
- Click on the item that you want to change the color of.
-
Under Key color, select the color that you want to assign to the item.
- Click on Save to confirm.
Merchant Portal 2.0
- Log in to the Merchant Portal.
- On the left panel, click on Menu SetupLayout Editor.
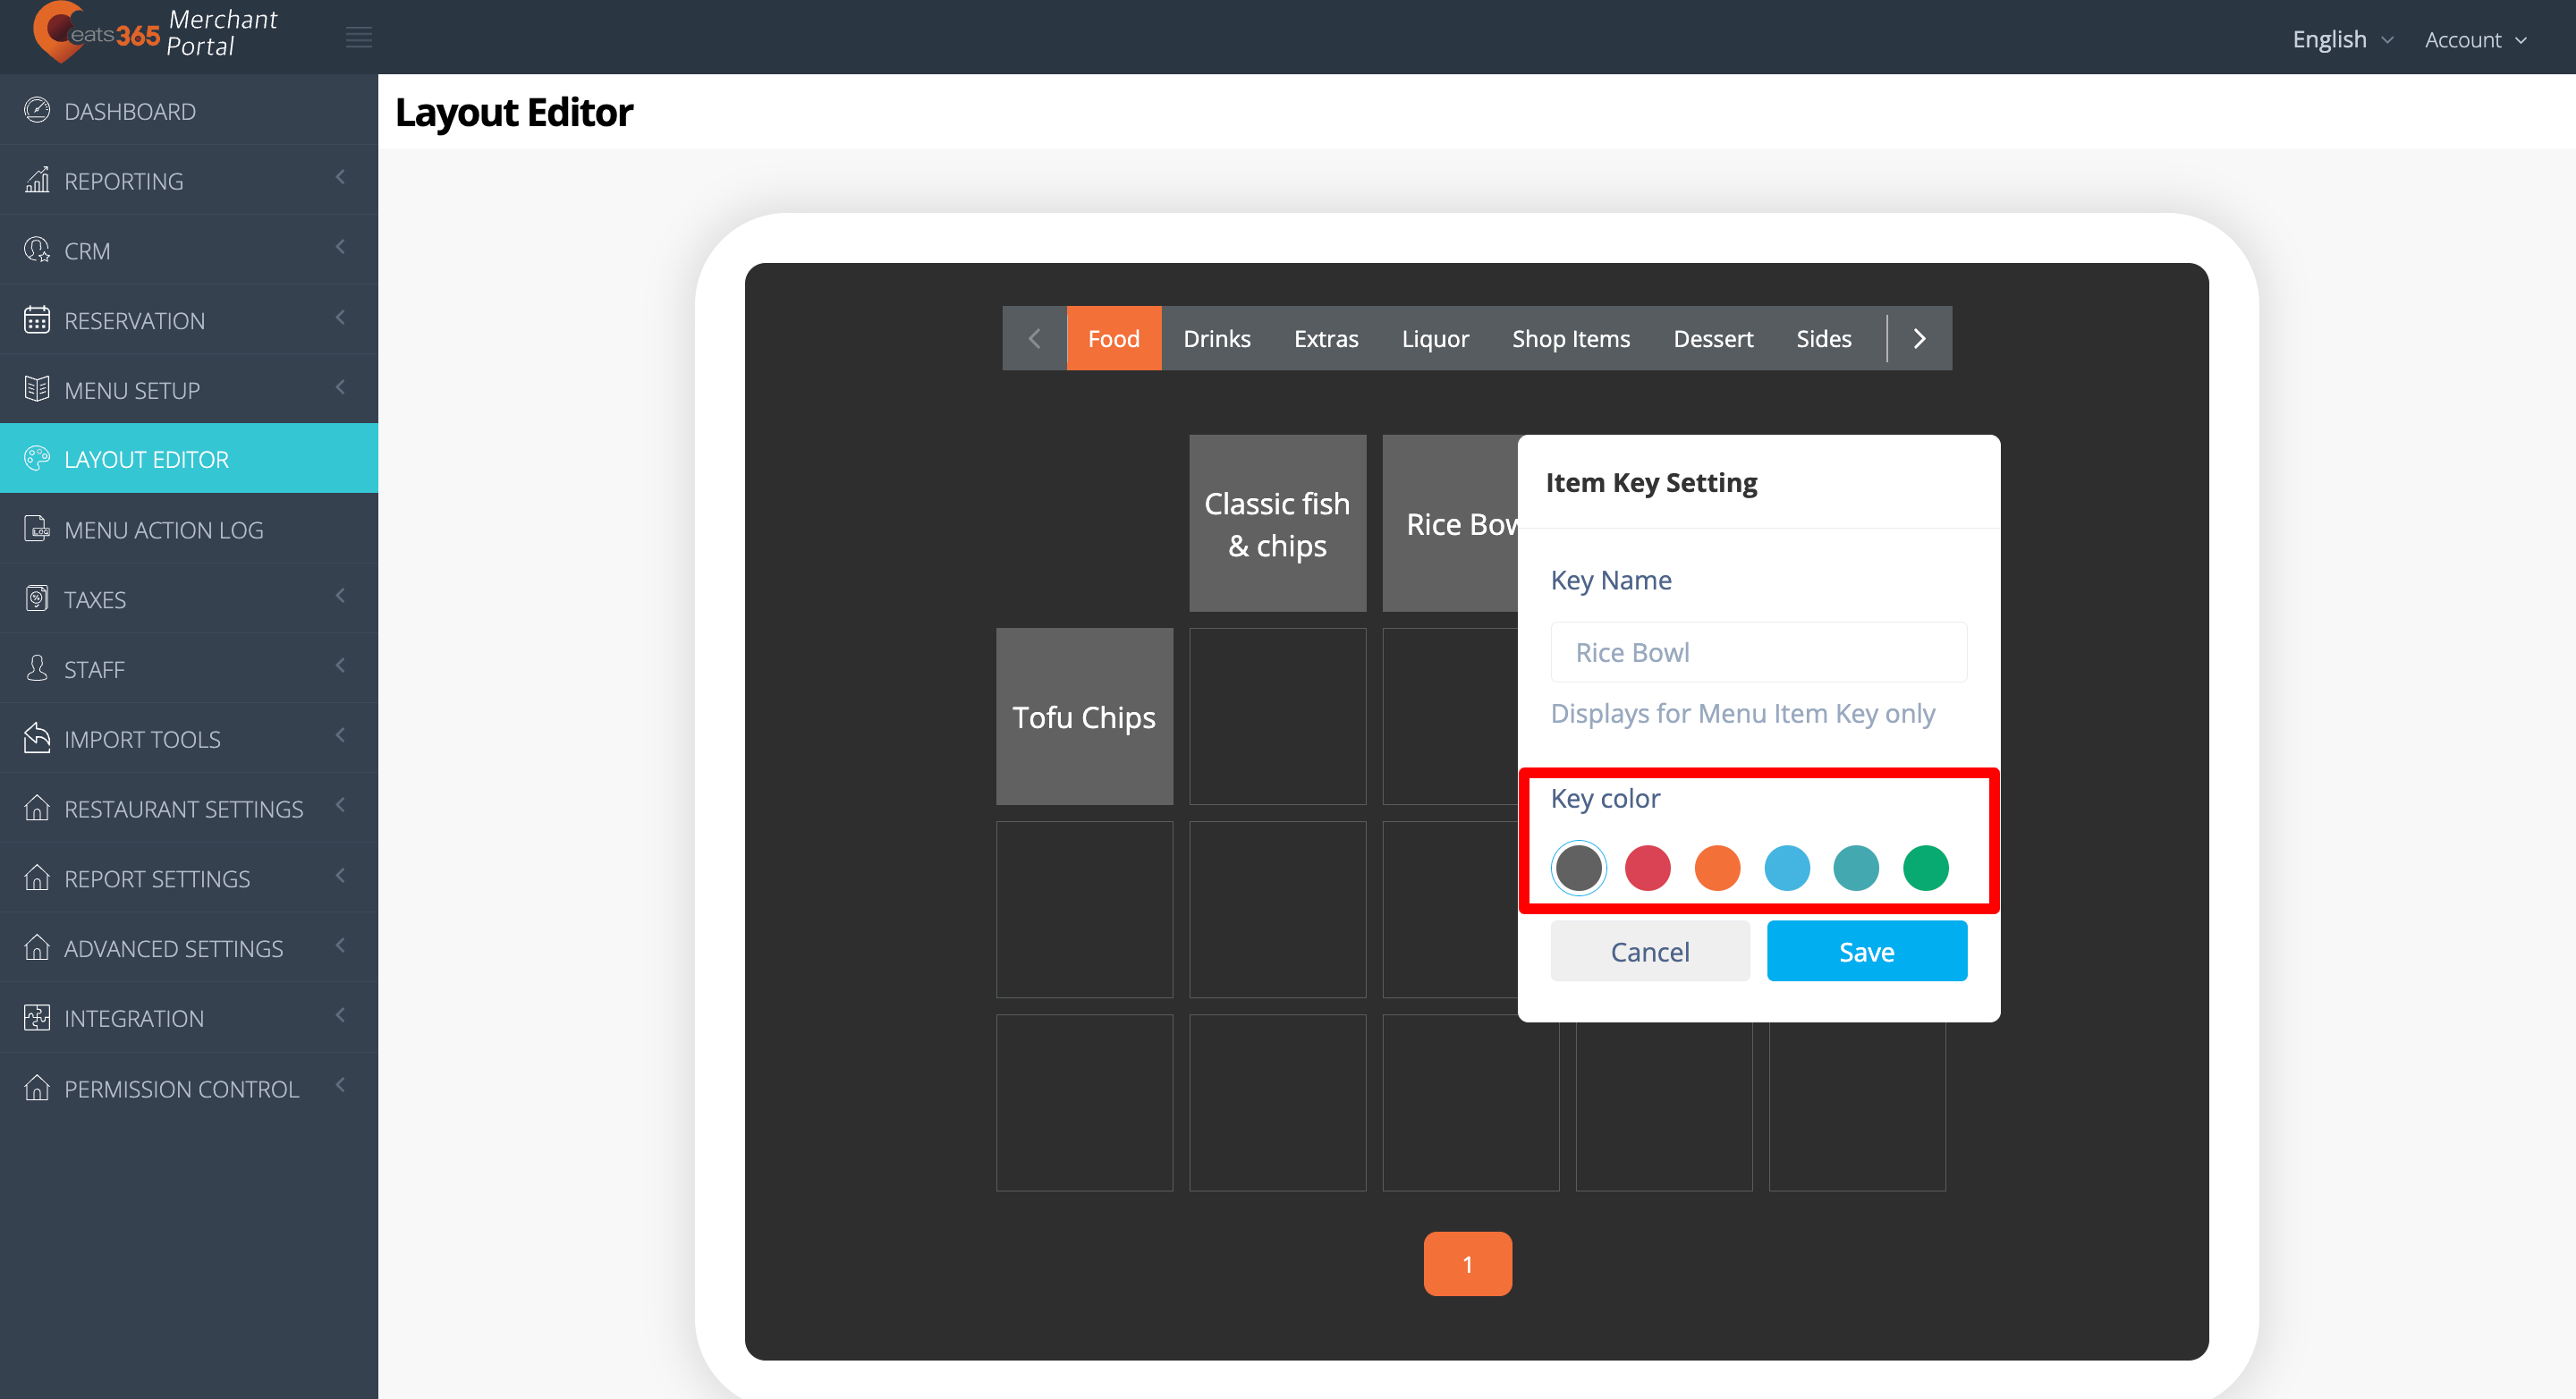
- Click on the item that you want to change the color of.
-
Under "Key color," select the color that you want to assign to the item.

- Click on Save to confirm.
Adjust item font size
To adjust the item name's font size to appear smaller or bigger on the POS, follow the steps below:
Eats365 POS

- Log in to the Eats365 POS.
- At the top left, tap Settings .
- Under "General," tap Menu SetupLayout Editor.
- At the bottom right corner, tap Settings
 .
.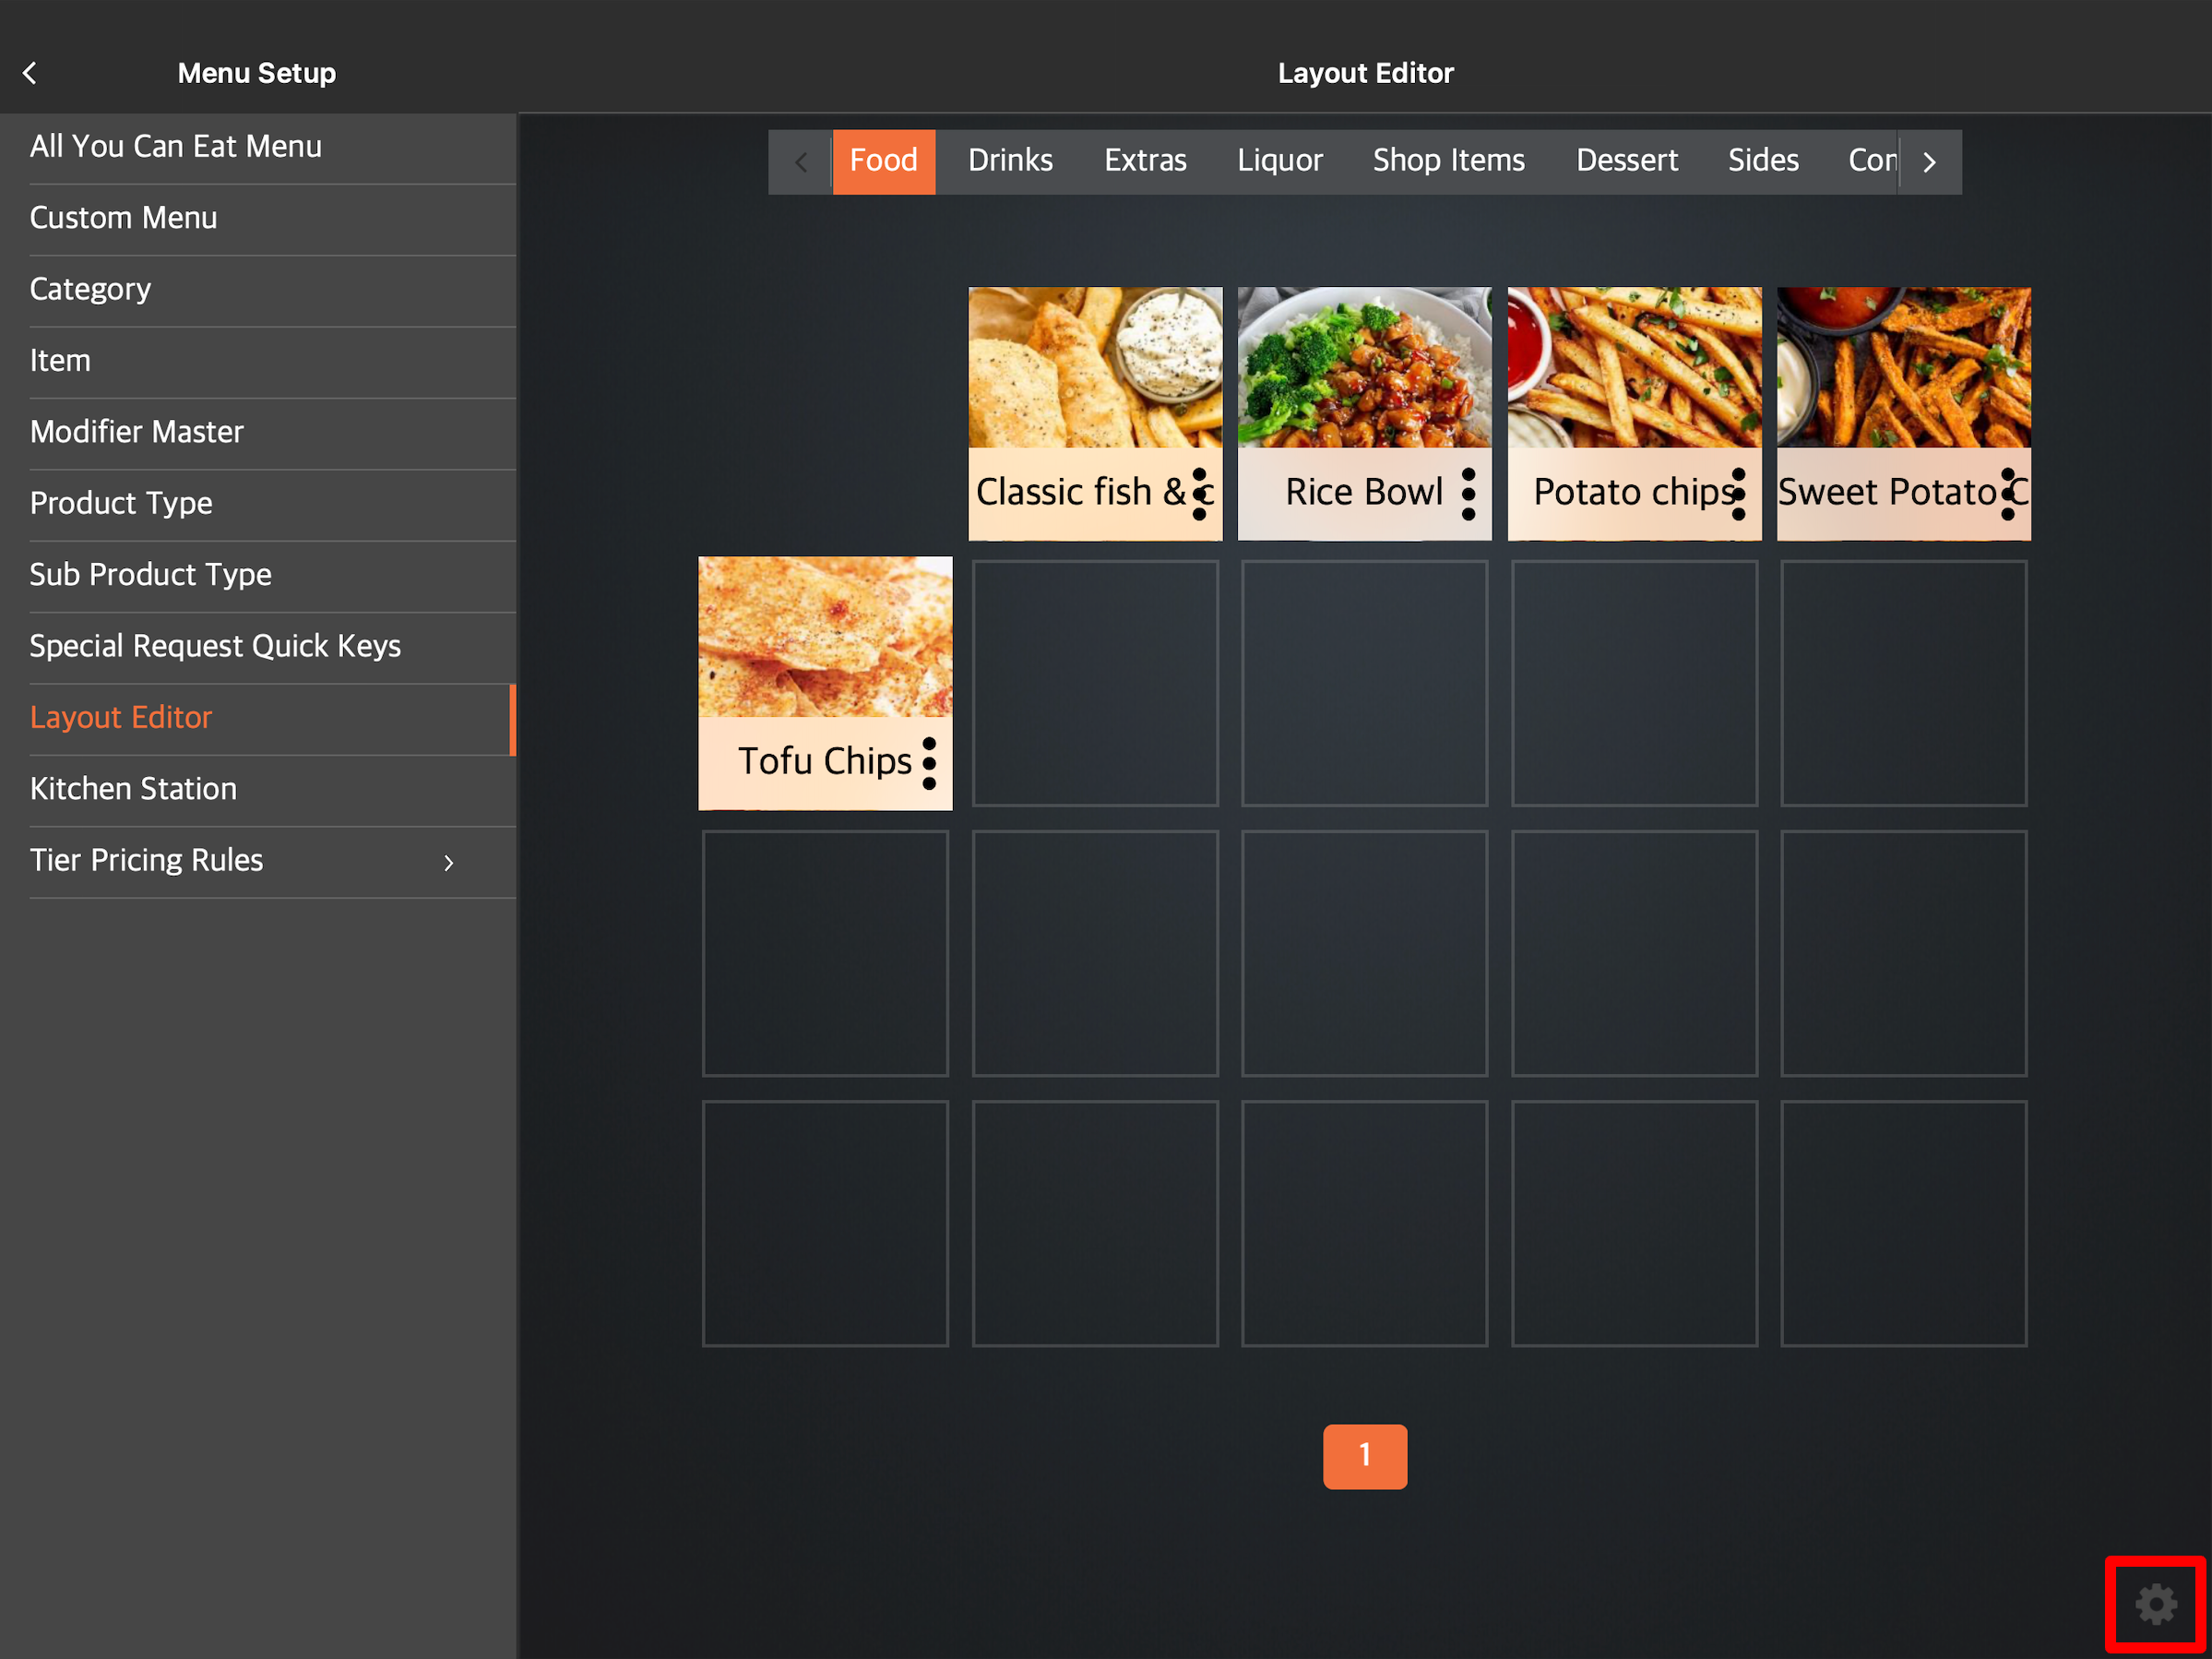
- Next to "Font Size," choose the font size that you want. Font size options include S, M, L, and XL.

Merchant Portal
Shared settings
To configure the font size across all POS in the restaurant, follow the steps below:
- Log in to the Merchant Portal.
- On the left panel, click on Advanced SettingsSystem PreferencesCashier Preferences.
- Under "Menu Layout Editor," click on the font size drop-down button and select the font size that you want to apply. Font size options include S, M, L, and XL.

- Click on Save to confirm.
Individual POS settings
To configure the font size on a specific POS terminal, follow the steps below:
- Log in to the Merchant Portal.
- On the left panel, click on ModulesPOSLicense.
- Next to the POS that you want to configure, click on Edit
 .
.
- Under "Menu Layout Editor," click on the font size drop-down button and select the font size that you want to apply. Font size options include S, M, L, and XL.

- Click on Save to confirm.
Display item image
To display or hide an item image, follow the steps below:
Eats365 POS
- Log in to the Eats365 POS.
- At the top left, tap Settings
 .
. - Under "General," tap Menu Setup
 Layout Editor.
 - At the bottom right corner, tap Settings
 .
.
- Toggle Display Item Image on
 or off
  .
.
Merchant Portal
Shared settings
To display or hide item images across all POS in the restaurant, follow the steps below:
- Log in to the Merchant Portal.
- On the left panel, click on Advanced SettingsSystem PreferencesCashier Preferences.
- Under "Menu Layout Editor," toggle Display Item Image on
 or off
  .
.
- Click on Save to confirm.
Individual POS settings
To display or hide item images for a specific POS in the restaurant, follow the steps below:
- Log in to the Merchant Portal.
- On the left panel, click on ModulesPOSLicense.
- Next to the POS that you want to configure, click on Edit .
- Under "Menu Layout Editor," toggle Display Item Image on or off .

- Click on Save to confirm.
Display item names in double rows
To display item names in two rows, follow the steps below:
Eats365 POS
- Log in to the Eats365 POS.
- At the top left, tap Settings .
- Under "General," tap Menu SetupLayout Editor.
- At the bottom right corner, tap Settings .
- Enable Allow 2-line Text
 .
.
Merchant Portal
Shared settings
To display item names in two rows across all POS in the restaurant, follow the steps below:
- Log in to the Merchant Portal.
- On the left panel, click on Advanced SettingsSystem PreferencesCashier Preferences.
- Under "Menu Layout Editor," enable Allow 2-line Text .

- Click on Save to confirm.
Individual POS settings
To display item names in two rows for a specific POS in the restaurant, follow the steps below:
- Log in to the Merchant Portal.
- On the left panel, click on ModulesPOSLicense.
- Next to the POS that you want to configure, click on Edit .
- Under "Menu Layout Editor," enable Allow 2-line Text .

- Click on Save to confirm.