 Eats365 Products
 Merchant Guide
 Modules
 Membership
 Integrations
 Hardware
 Staff Operations
 Roles & Permissions
 Payments
 Reports
 What’s New
 Release Notes
 Troubleshooting
 Simulators
 Glossary
 Troubleshooter
 System Status
Dine-In Settings
Table of Contents
Set up Self-checkout for dine-in orders
Learn how to set up Self-checkout to allow customers to check out and pay for their Dine-in orders using their own devices.
The "Self-checkout" feature allows customers to perform a self-checkout and pay for their orders online using their own devices when dining in. When this feature is enabled, customers can settle their bill directly on your restaurant’s website or scan the QR code printed on the bill or assigned to their table which will direct them to a payment gateway where they can process the payment using their own devices.
Depending on your setup, self-checkout payments may need to be approved by staff on the Eats365 mPOS or POS first before customers can proceed. Refer to the following articles to learn more:
In this article, you’ll learn how to enable Self-checkout and manage its settings to allow customers to pay for their dine-in orders from their mobile devices.
Enable Self-checkout
To enable Self-checkout, follow the steps below:
- Log in to the Merchant Portal.
- On the left panel, click on Restaurant Settings
 Dine-in Scan to Order.
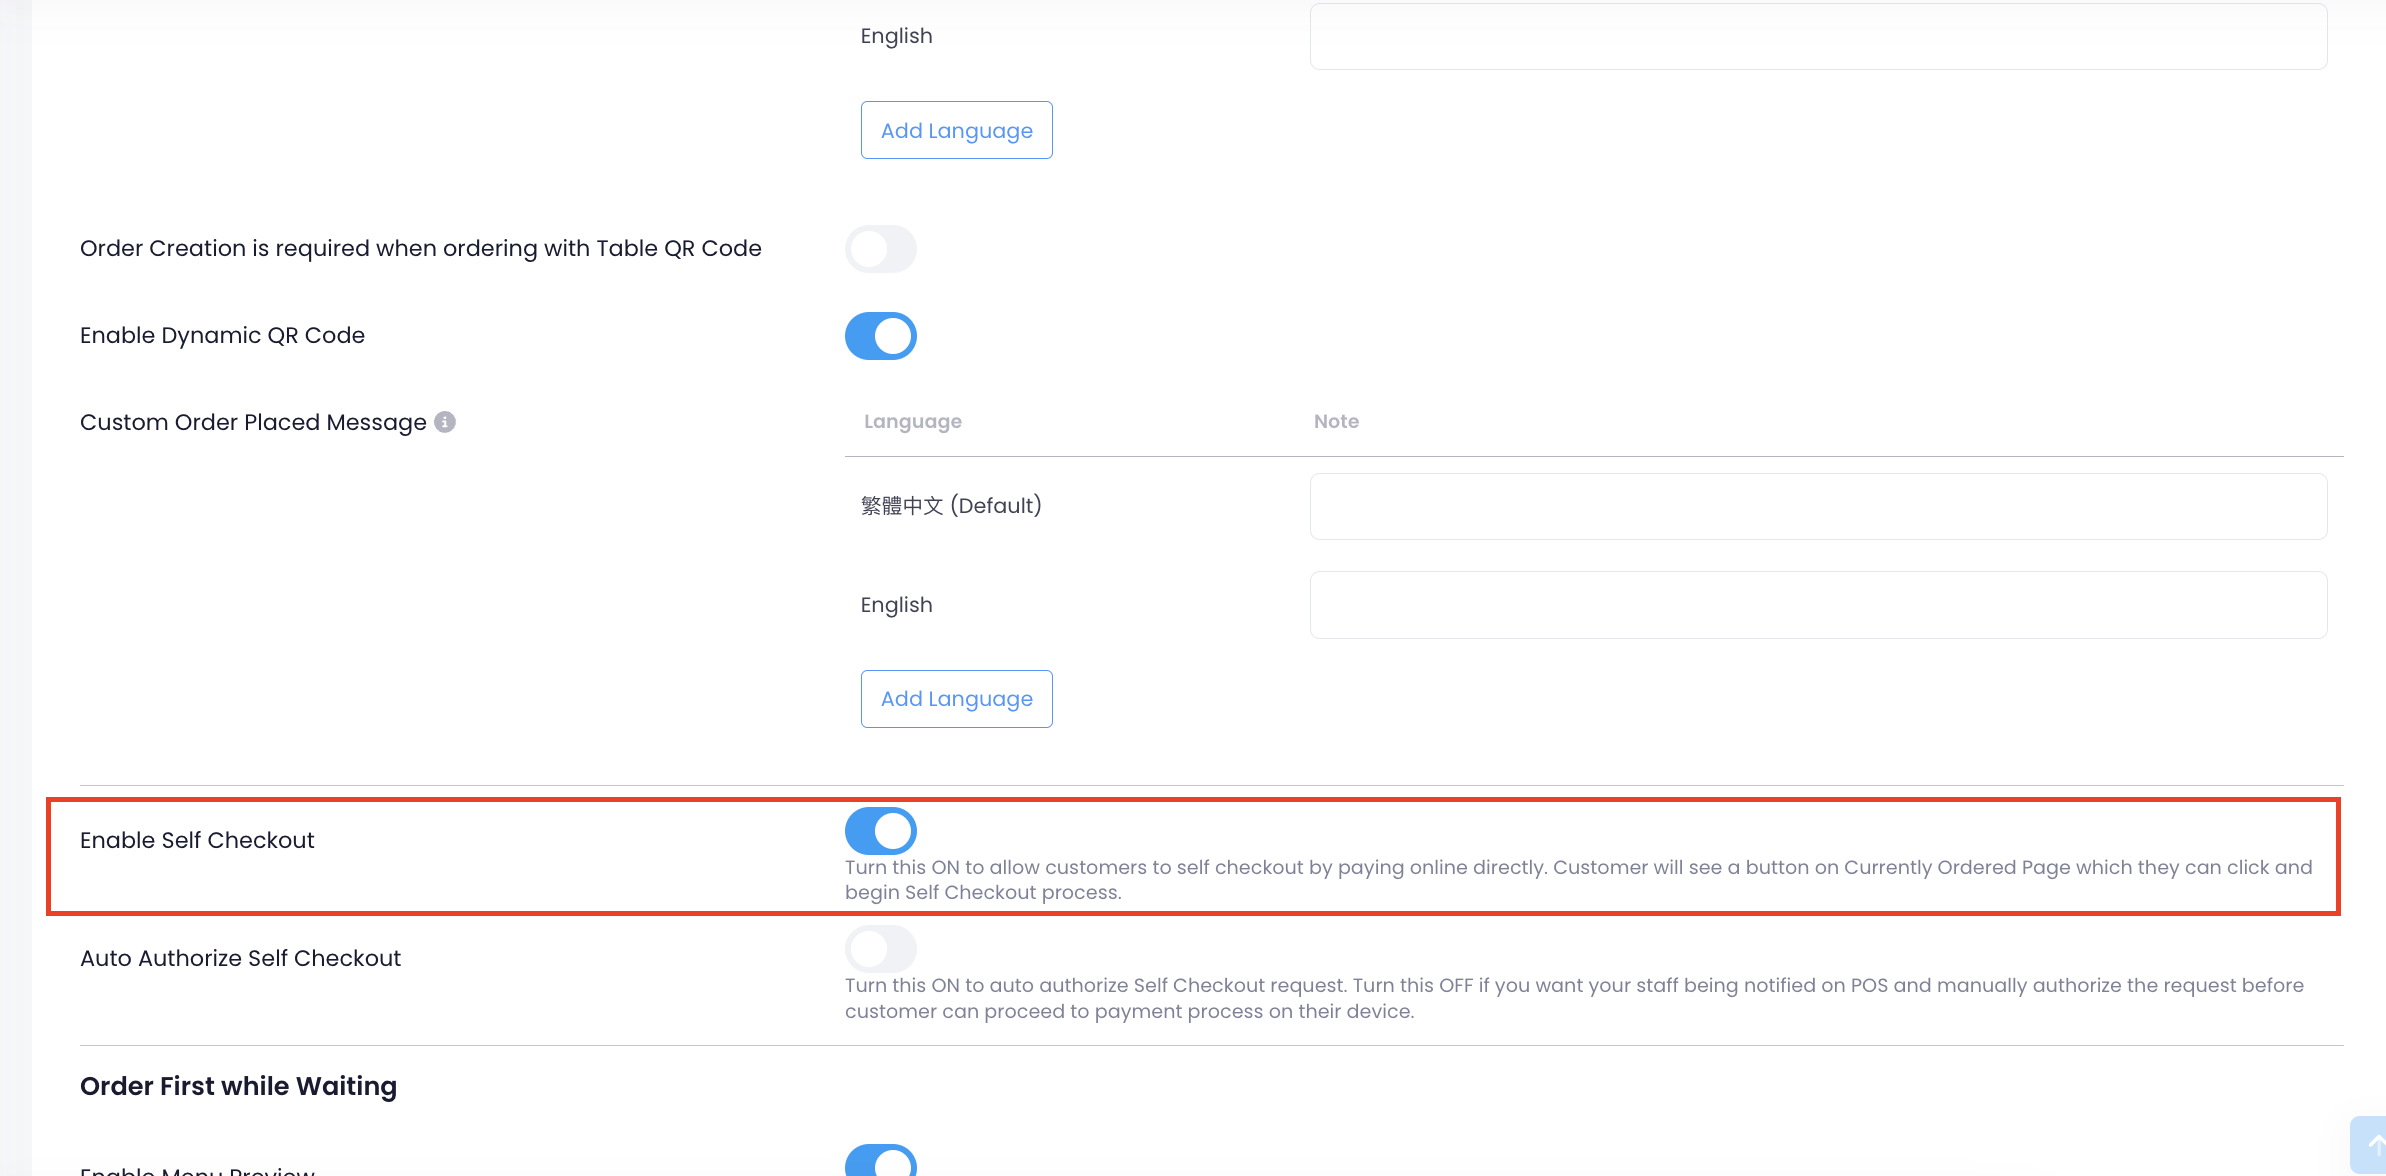
 - Under "Scan to Order," turn on Enable Self Checkout
 .
.
- (Optional) If you want customers to automatically proceed with the payment process without a staff member manually accepting the checkout request, turn on Auto Authorize Self Checkout .
Tip: You can disable this setting if you want your staff to manually accept all self-checkout requests from customers.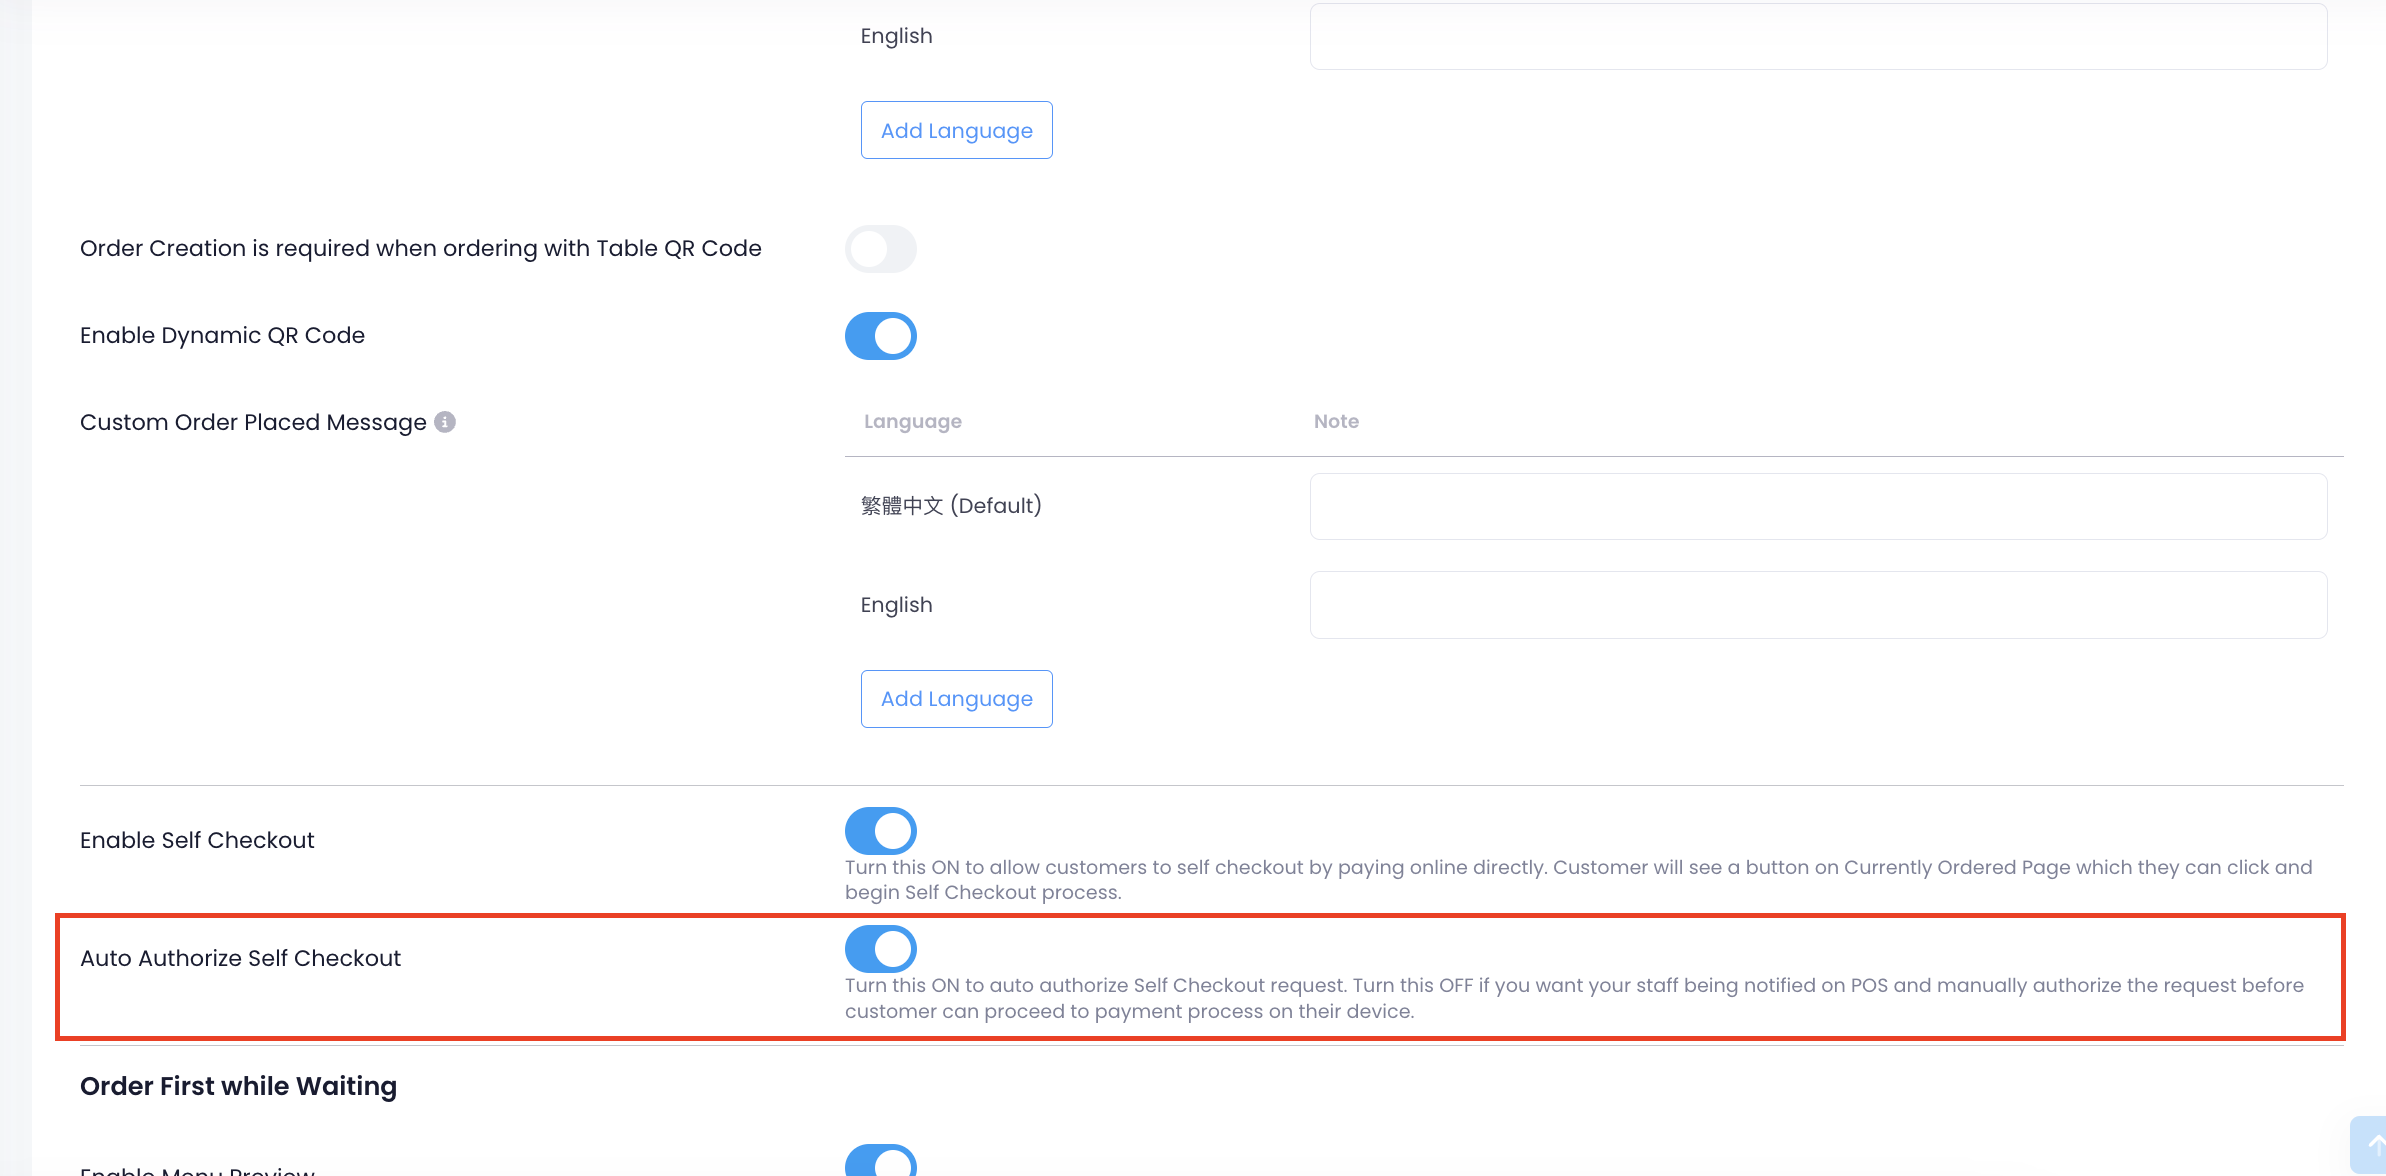
- At the top right, click on Save to confirm.
Once Self-checkout is enabled, customers can settle their own bill and pay for their own orders from the Branded Online Store. For more information on how to handle self-checkout orders, refer to Manage self-checkout orders.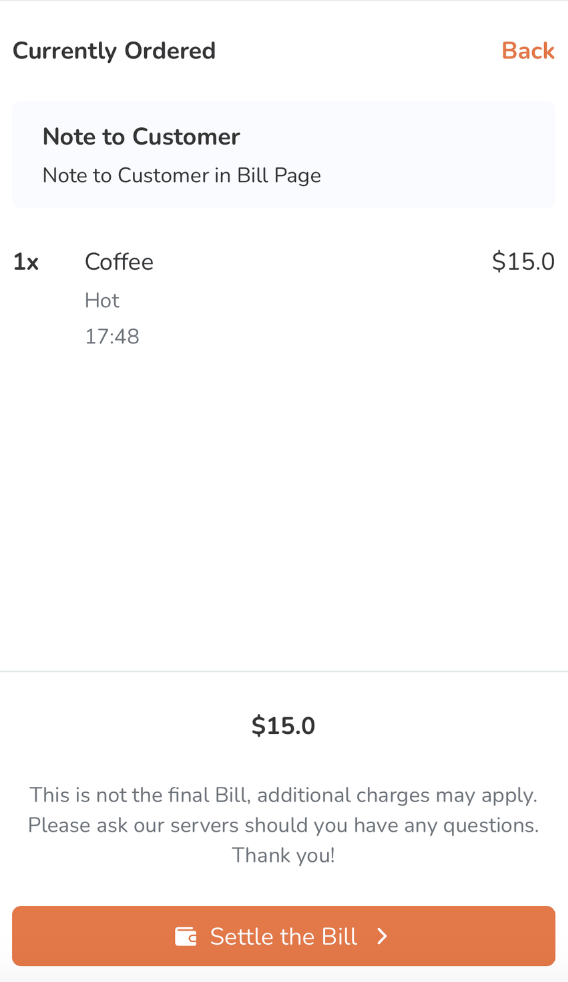
Self-checkout using QR Codes
Dine-in customers can scan a QR code to perform self-checkout and pay for their order. You can either print QR codes on the bill, or assign and affix them to specific tables.
Print Payment QR Code on Bill
To enable "Print Payment QR Code on Bill," follow the steps below:
- Log in to the Merchant Portal.
- On the left panel, click on Restaurant Settings Dine-In Workflow.
- Under "Order Payment," turn on Print Payment QR Code on Bill .

- At the top right, click on Save to confirm.
Once "Print Payment QR Code on Bill" is enabled, a QR code will be printed on the customer’s bill. The customer can then scan the QR code from their mobile device and directly pay for their order online. For more information on how to print a QR code on the bill, refer to Manage self-checkout orders.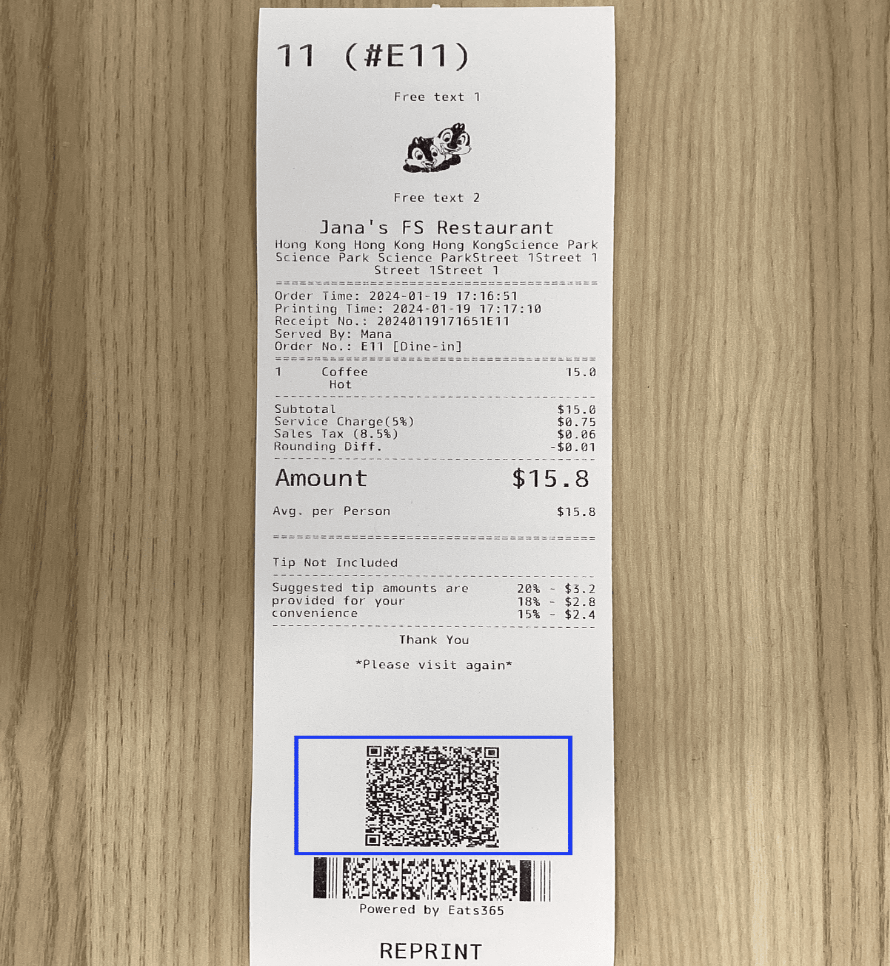
Place static QR codes on tables
To generate QR codes that can be affixed to tables for payment purposes, follow the steps below:
- Log in to the Merchant Portal.
- On the left panel, click on Restaurant SettingsDine-In Workflow.
- Under "Order Payment," turn on Enable Self Checkout using Static QR code .

- Click on Save to confirm.
- On the left panel, click on Restaurant SettingsScan to OrderStatic Table QR Code.
- Next to the area where the tables are located, click on Edit
 .
.
- Click on the checkbox beside the table name for the tables that you’d like to generate codes for. You can select one or more tables per export.

- At the top right, click on Export Payment QR Code.

A zip file containing the unique payment QR codes is automatically downloaded to your computer.