 Eats365 Products
 Merchant Guide
 Modules
 Membership
 Integrations
 Hardware
 Staff Operations
 Roles & Permissions
 Payments
 Reports
 What’s New
 Release Notes
 Troubleshooting
 Simulators
 Glossary
 Troubleshooter
 System Status
Scan to Order
Table of Contents
Set up Static QR code
Learn how to generate a Static QR Code that you can assign to tables in your restaurant.
Static QR Codes refer to QR codes that have a fixed destination and cannot be updated or changed. Static QR Codes are useful if you want to assign a specific QR code to your restaurant's tables in advance. When a customer scans the QR Code, the system automatically recognizes any orders made on that table and processes them accordingly.
Enable Static QR Code
To turn on Static QR Code, follow the steps below:
- Log in to the Merchant Portal.
- On the left panel, click on Modules. Then, click on Branded Online Store.
- Click on Ordering Site Settings.
- Next to the Branded Online Store that you want to enable the Static QR Code, click on Edit
 .
.
- Under "Ordering," turn on Enable Static QR Code
 .
.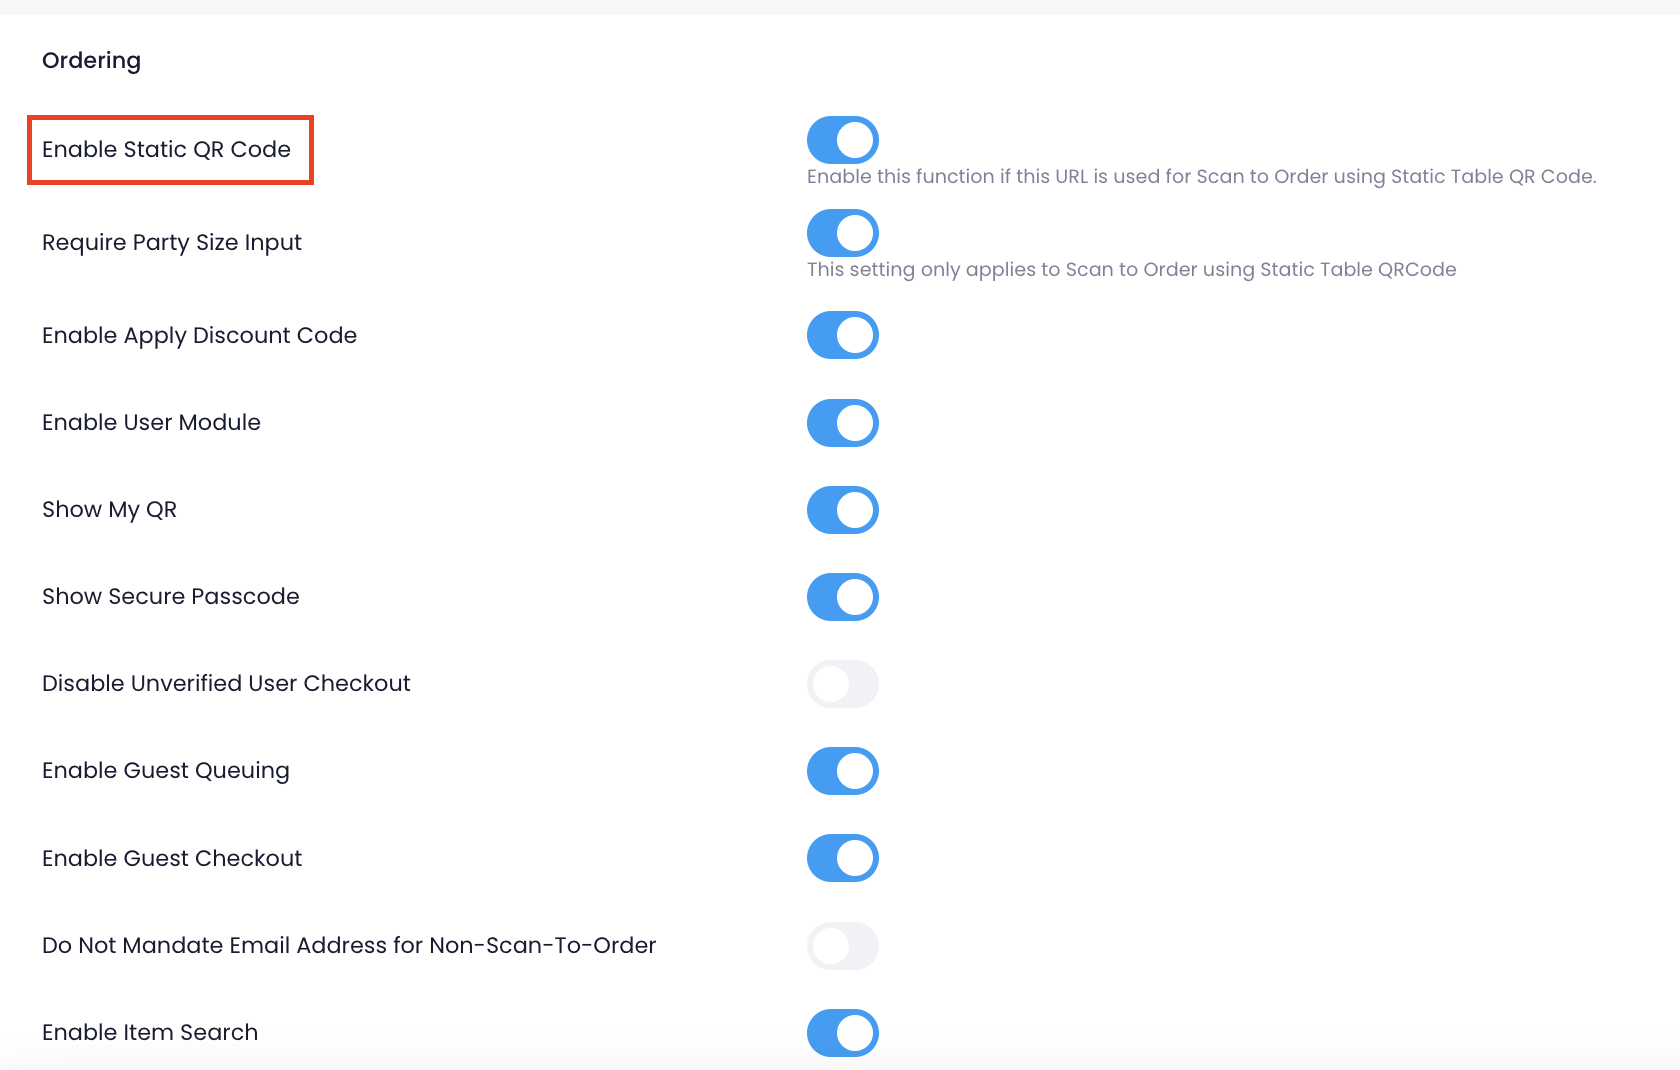
- At the top right, click on Save to confirm.
Generate a Static QR Code
Merchant Portal (Classic Theme)
- Log in to the Merchant Portal.
- On the left panel, click on Restaurant Settings.
- Under Mapping, click on Table.
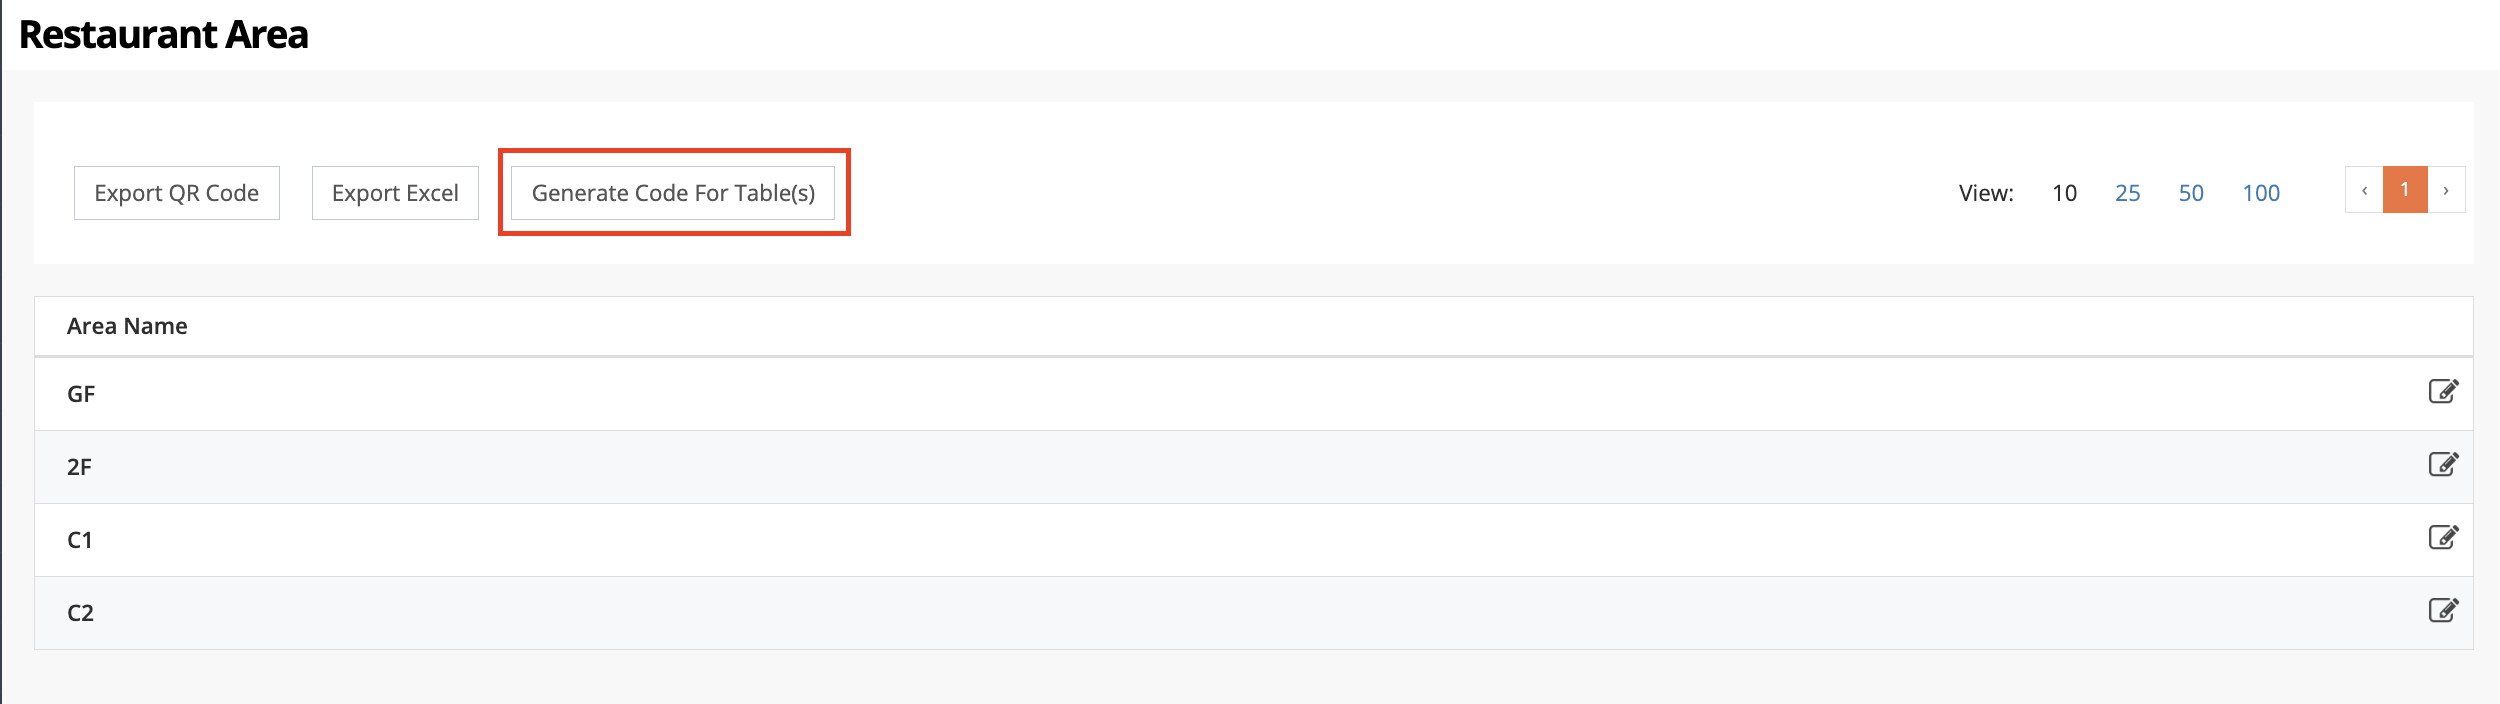
- Generate Static QR Codes.
- To generate unique codes for all of the tables in the restaurant, click on Generate Codes for Table(s).
-
 To generate unique codes for specific tables, follow the steps below:
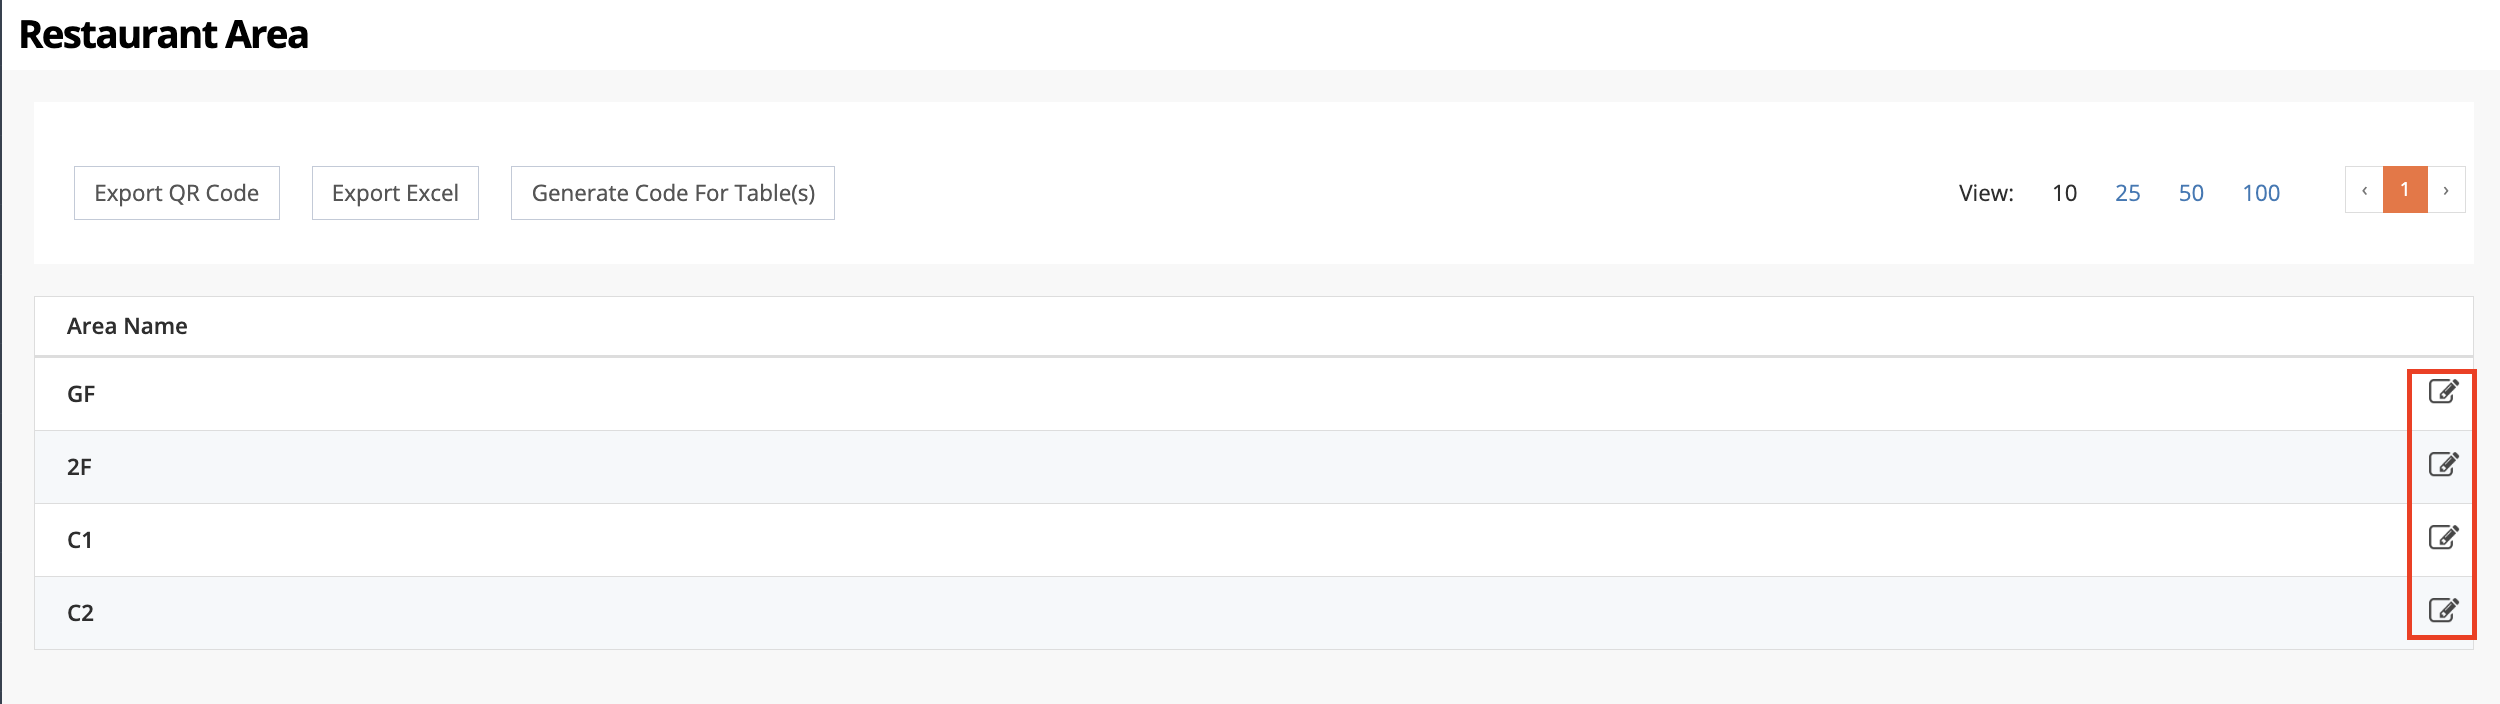
- Select the area where the tables are located, then click on Edit
 .
.
- Click on the checkbox beside the table name for the tables that you’d like to generate codes for.
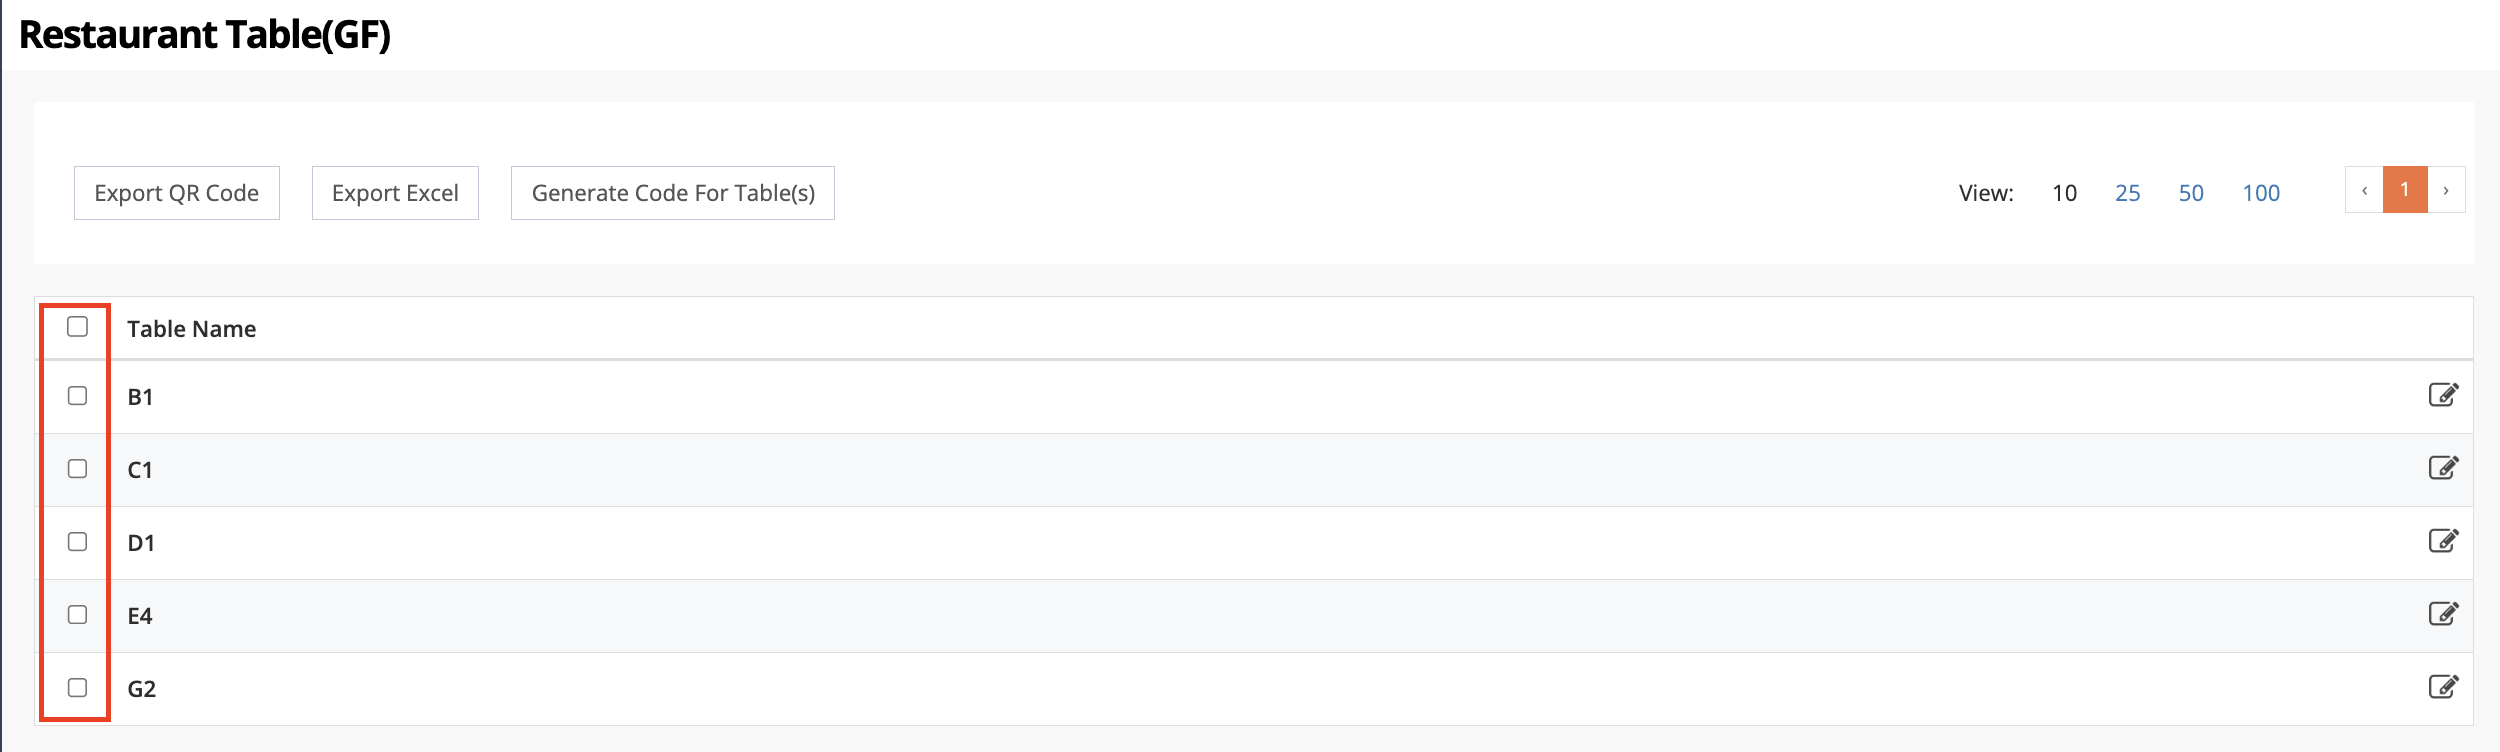
- Click on Generate Codes for Table(s).
- If you'd like to use your own codes, next to the table that you'd like to generate a unique code, click on Edit . Click on +Code and enter the code that you prefer to use.
- Select the area where the tables are located, then click on Edit
- (Optional) Enter the Invoice Number and Remarks.
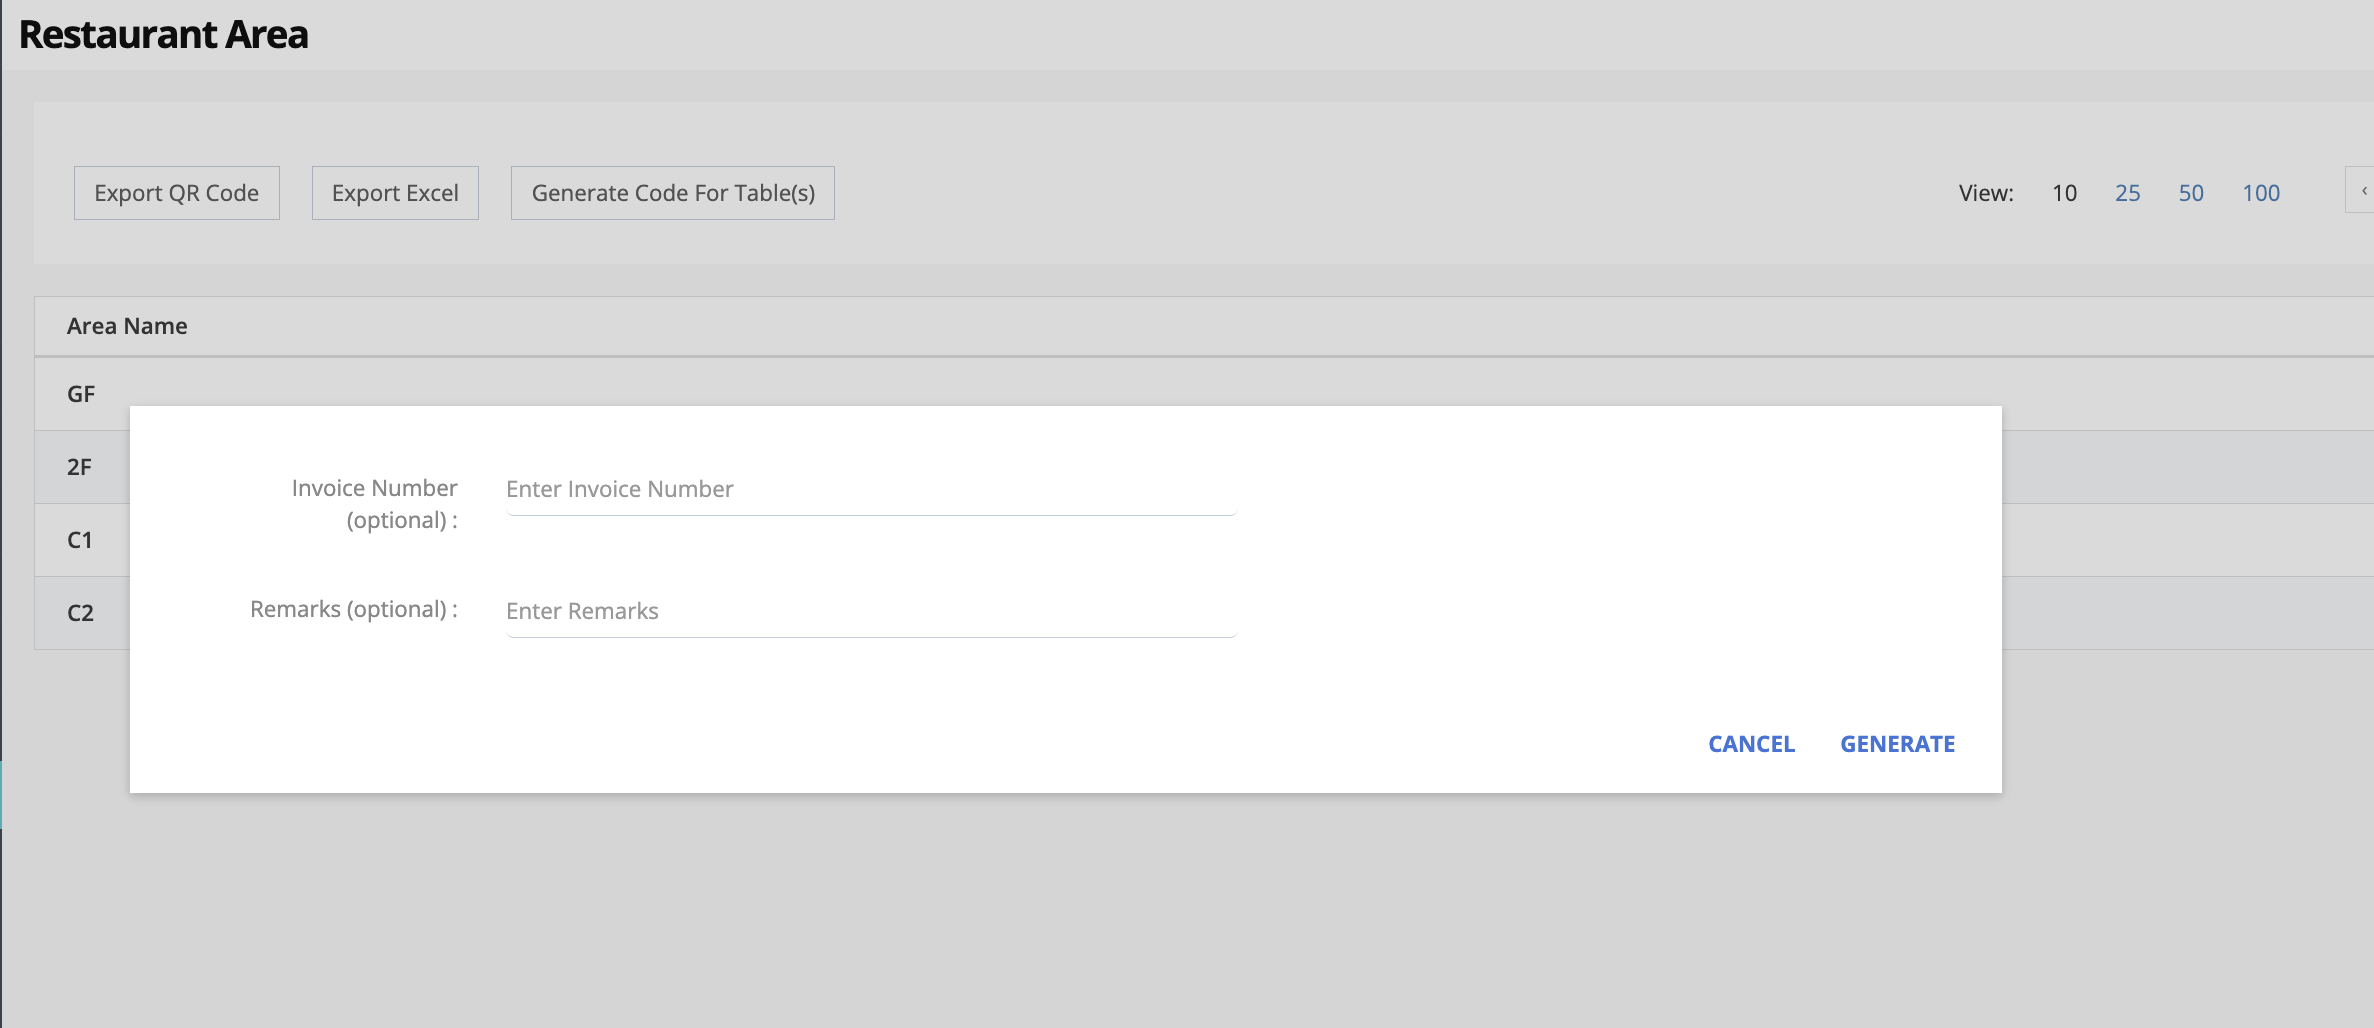
- Click on Generate to confirm. The selected tables are assigned a unique code that sets them apart from each other.
- To create a scannable QR Code, at the top left, click on Export QR Code then select the branded online store URL that you want the link to direct to.
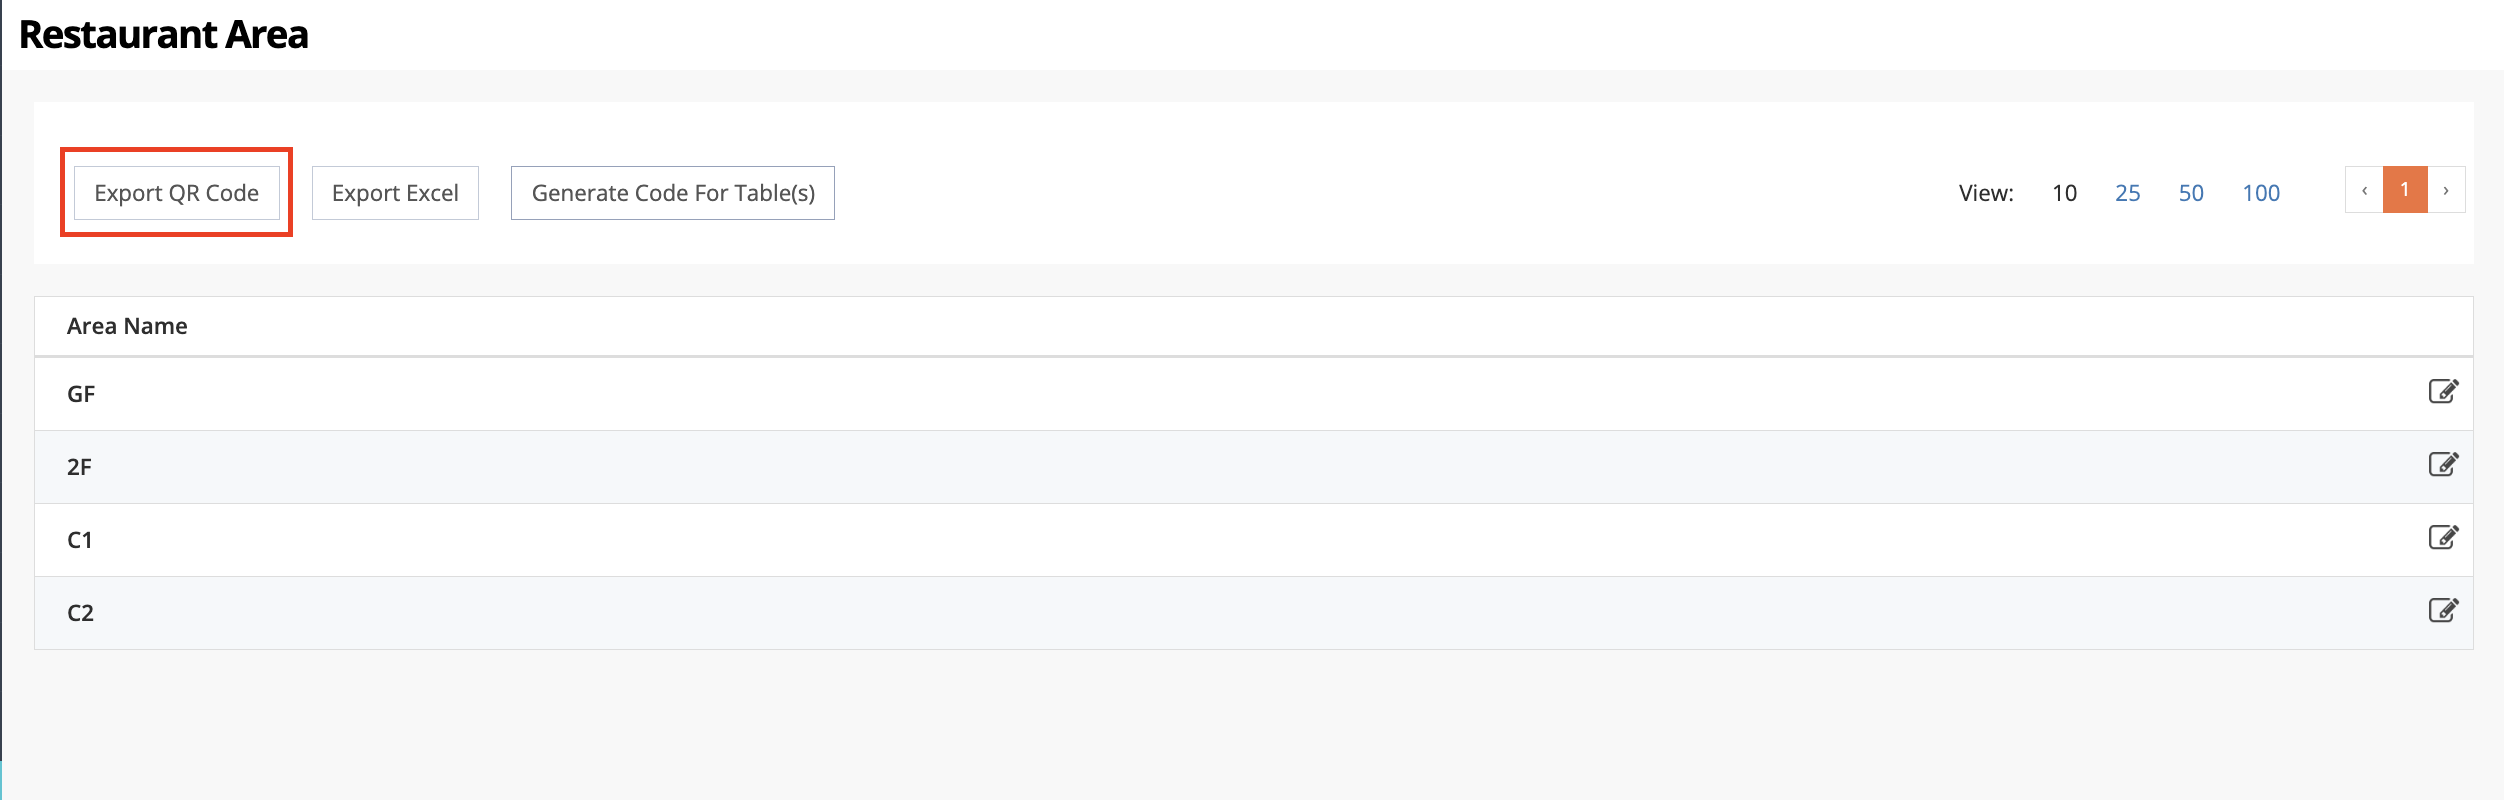
- Click on Export to confirm. A zip file containing the unique QR codes is automatically downloaded to your computer.
Merchant Portal 2.0
- Log in to the Merchant Portal.
- On the left panel, click on Restaurant Settings.
- Click on Scan to Order. Then, click on Static Table QR Code.
- Generate Static QR codes.
- To generate unique system-generated codes for specific tables, follow the steps below:
- Next to the area where the tables are located, click on Edit .

- Click on the checkbox beside the table name for the tables that you’d like to generate codes for.

- Click on Generate Serial Codes For all Tables.

- Next to the area where the tables are located, click on Edit
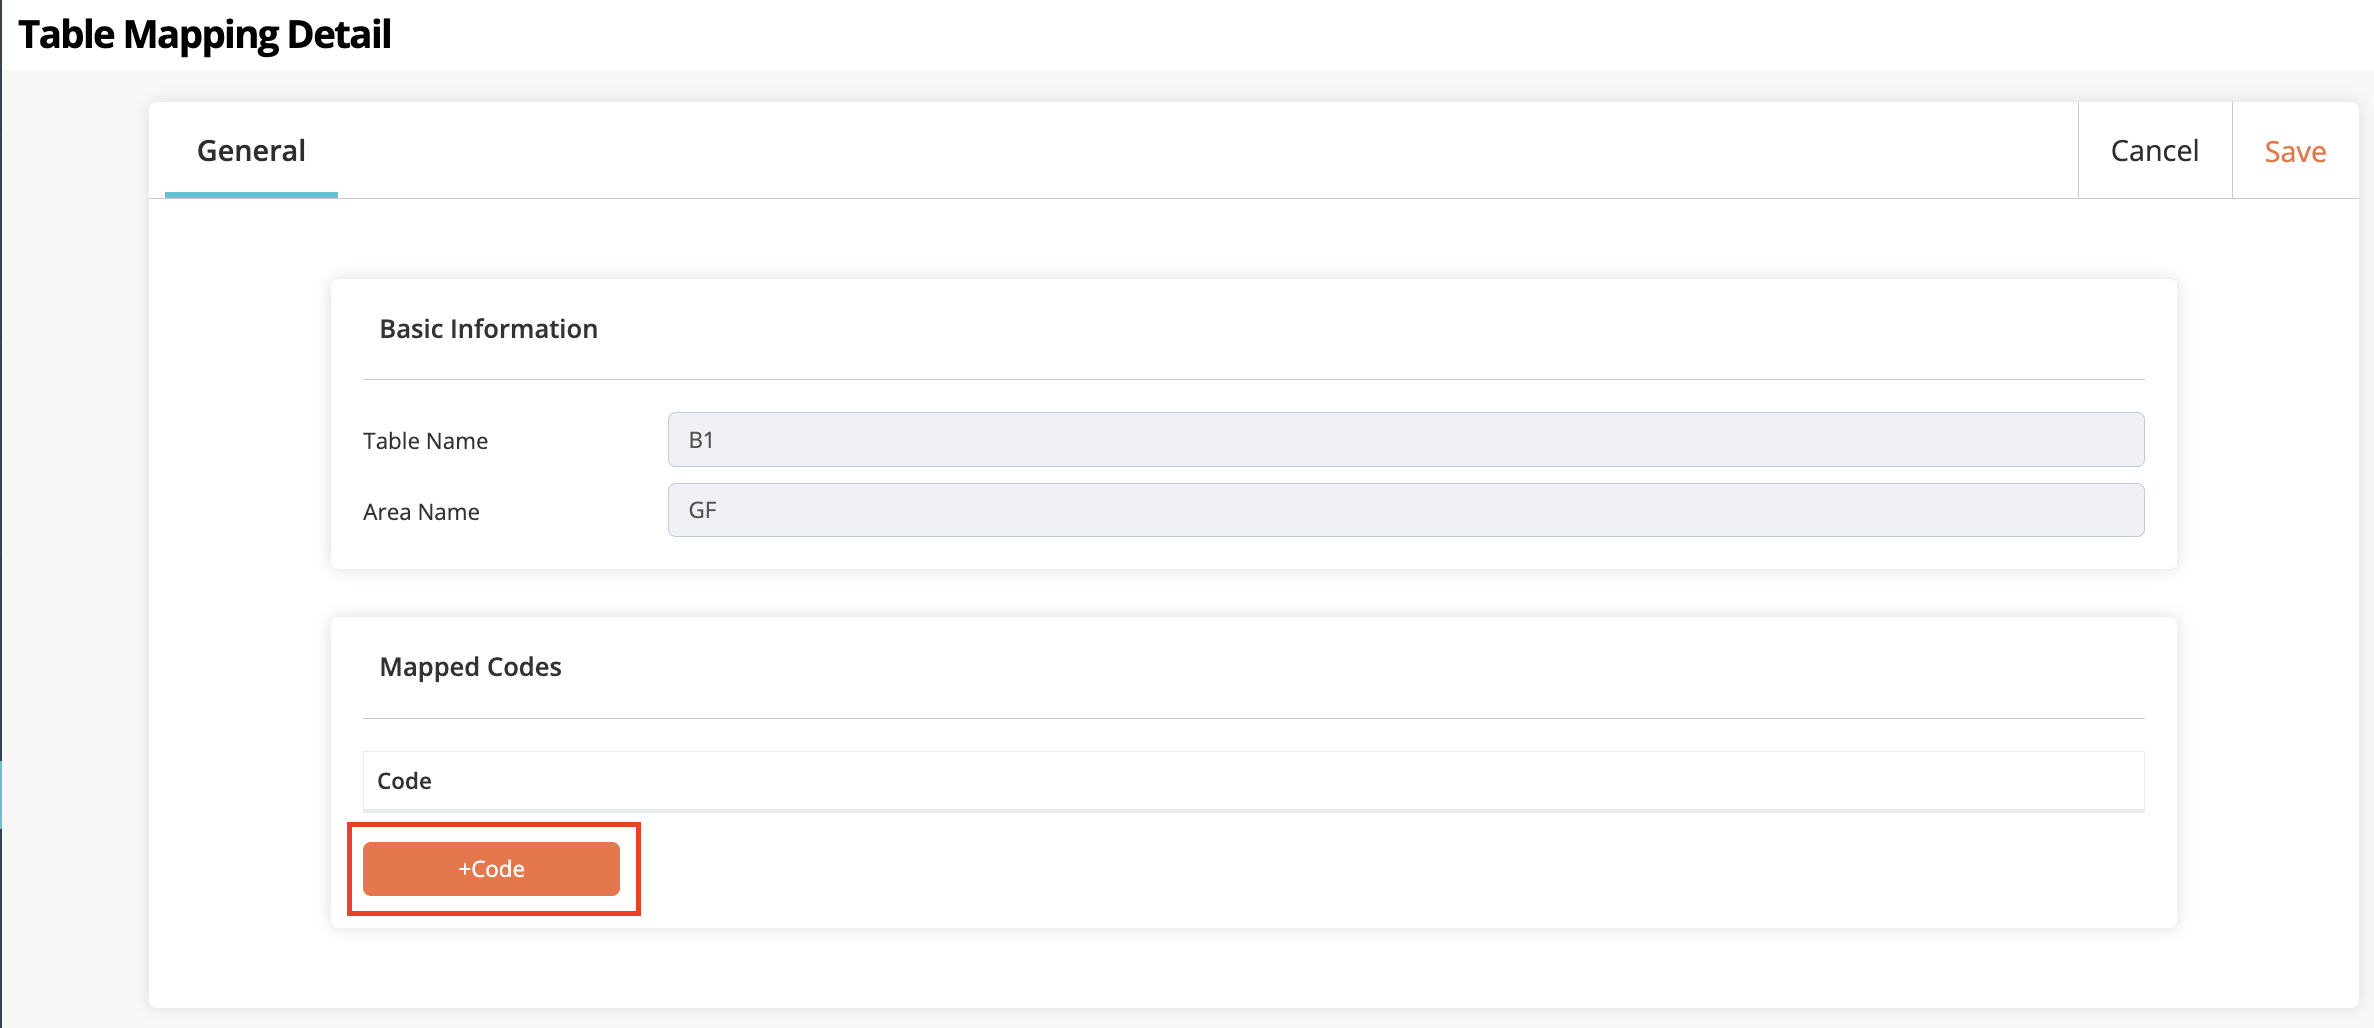
- To use your own codes, follow the steps below:
- Next to the table that you'd like to generate a unique code, click on Edit .

- Under "Mapped Codes," click on + Code and enter the code that you prefer to use.

- At the top right, click on Save to confirm.
- Next to the table that you'd like to generate a unique code, click on Edit
- To generate unique system-generated codes for specific tables, follow the steps below:
- On the left panel, click on Static Table QR Code to return to the main page.
- Create a scannable QR Code.
- To create a scannable QR Code that can be used for ordering, at the top right, click on Export QR Code and select the Branded Online Store URL that you want the link to direct to. Then, click on Export to confirm.
- To create a scannable QR Code solely for payment purposes, at the top right, click on Export Payment QR Code.
A zip file containing the unique QR codes is automatically downloaded to your computer.
DeleteThe downloaded QR Codes can be printed and affixed to a restaurant’s respective tables. The QR code lets customers scan and order items directly from their mobile devices. Orders placed through this method register through the POS automatically.