Order Handling
Table of Contents
Manage orders from Delivery Integrations
Learn how to manage and handle orders from integrated delivery services on the Eats365 POS and Merchant Portal.
When you integrate delivery services, such as Foodpanda or GrabFood, with your Eats365 POS, you can receive and manage orders placed through those delivery services on the POS. You can set your restaurant’s status and preferences for each delivery service, allowing you to define the hours when the restaurant can start and stop receiving orders on the POS.
In this article, you’ll learn how to set your restaurant’s availability for specific delivery services, handle incoming orders, and manage Delivery Integration settings.
Set the restaurant’s status for a delivery service
You can set your restaurant’s status for a delivery service as “Open” or “Closed.” Choosing Open allows you to start receiving orders that are placed through the delivery service that you’ve integrated with. To configure the status, follow the steps below:
- Log in to Eats365 POS.
- Tap Settings .
- Under Advanced Settings, tap Online Ordering Setting.
- On the left panel, select the settings for delivery service. For example: Deliverect settings.
- Under Your Restaurant Status, choose Open or Closed.
- At the top right, tap Save to confirm.
Manage Delivery Integration settings
To modify Delivery Integration settings, follow the steps below:
- Log in to Eats365 POS.
- Tap Settings .
- Under Advanced Settings, tap Online Ordering Setting.
- On the left panel, select the settings for delivery service. For example: Deliverect settings.
- Under Order Preparation Time:
- Set the Average Order Preparation time. If you set the time as “30 mins,” order placed on selected delivery service will be expected to be available in 30 minutes.
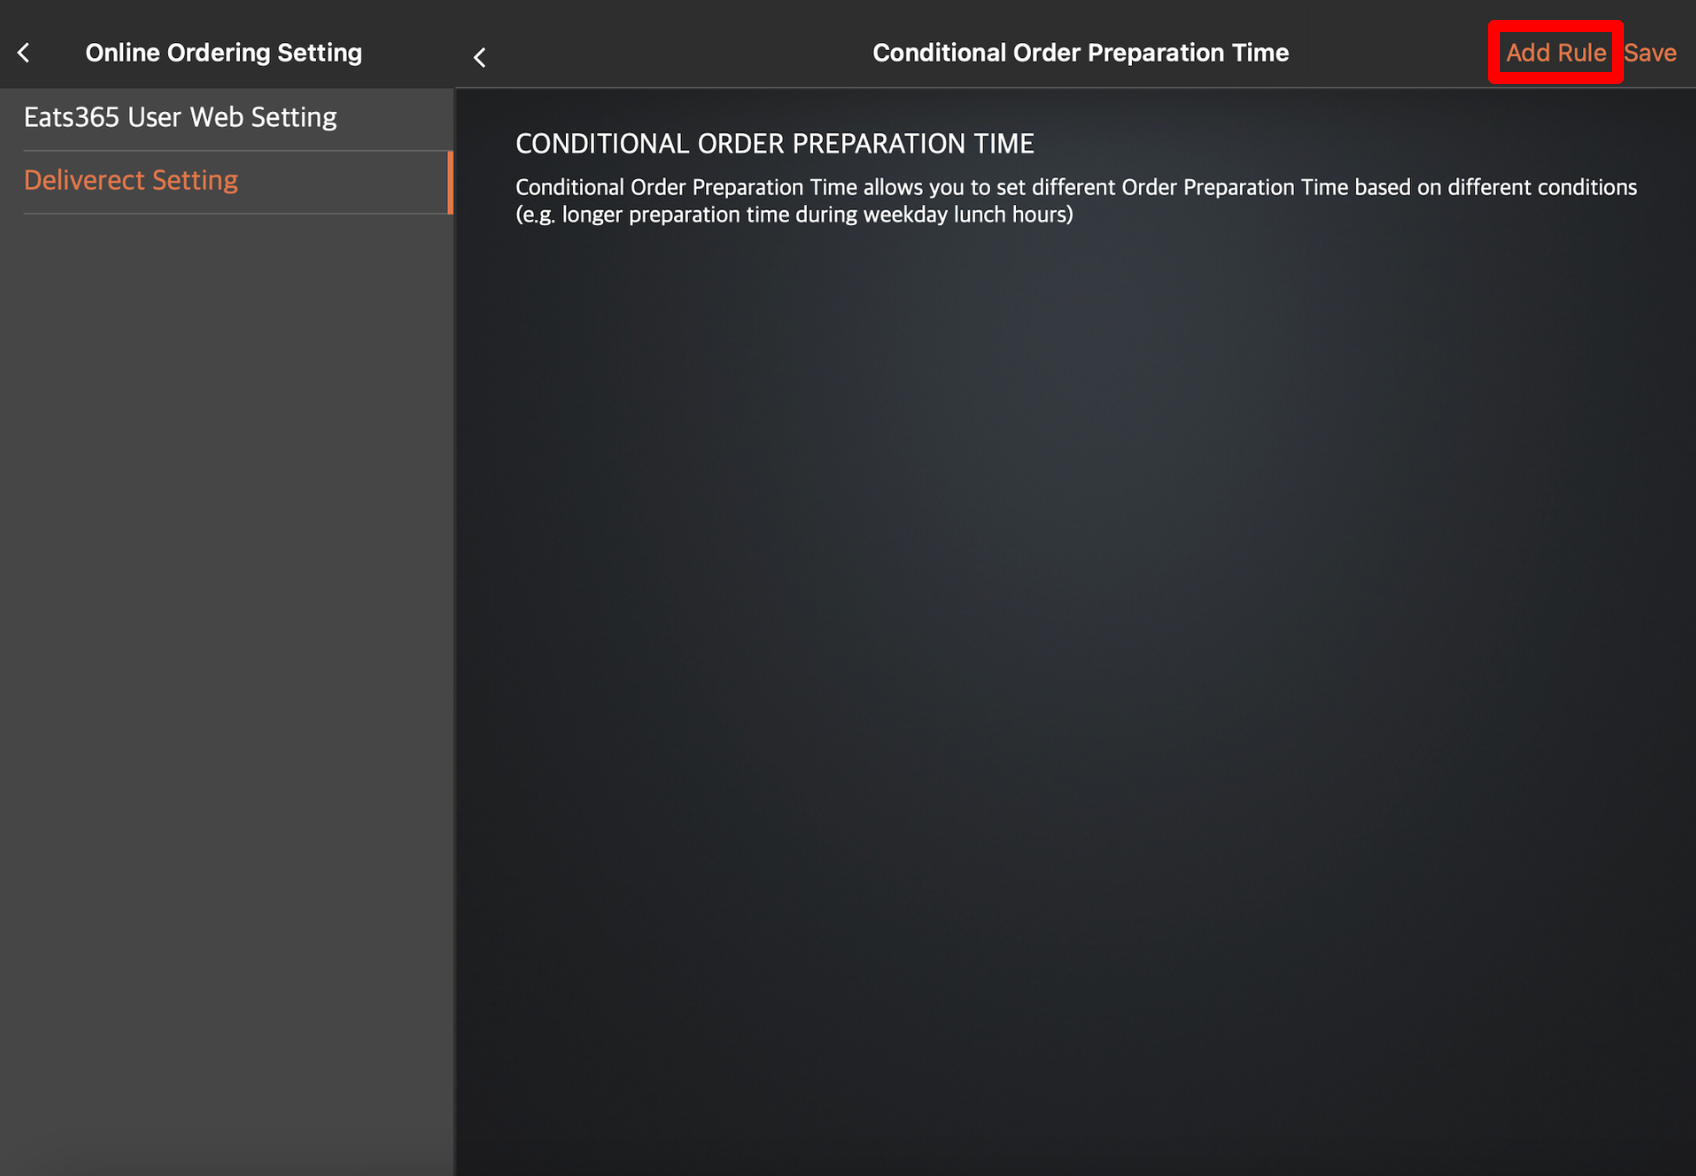
- Add a Conditional Order Preparation Timeto set the preparation time to automatically adjust based on the time the order is placed or order’s total amount.
- At the top right, tap Add Rule.
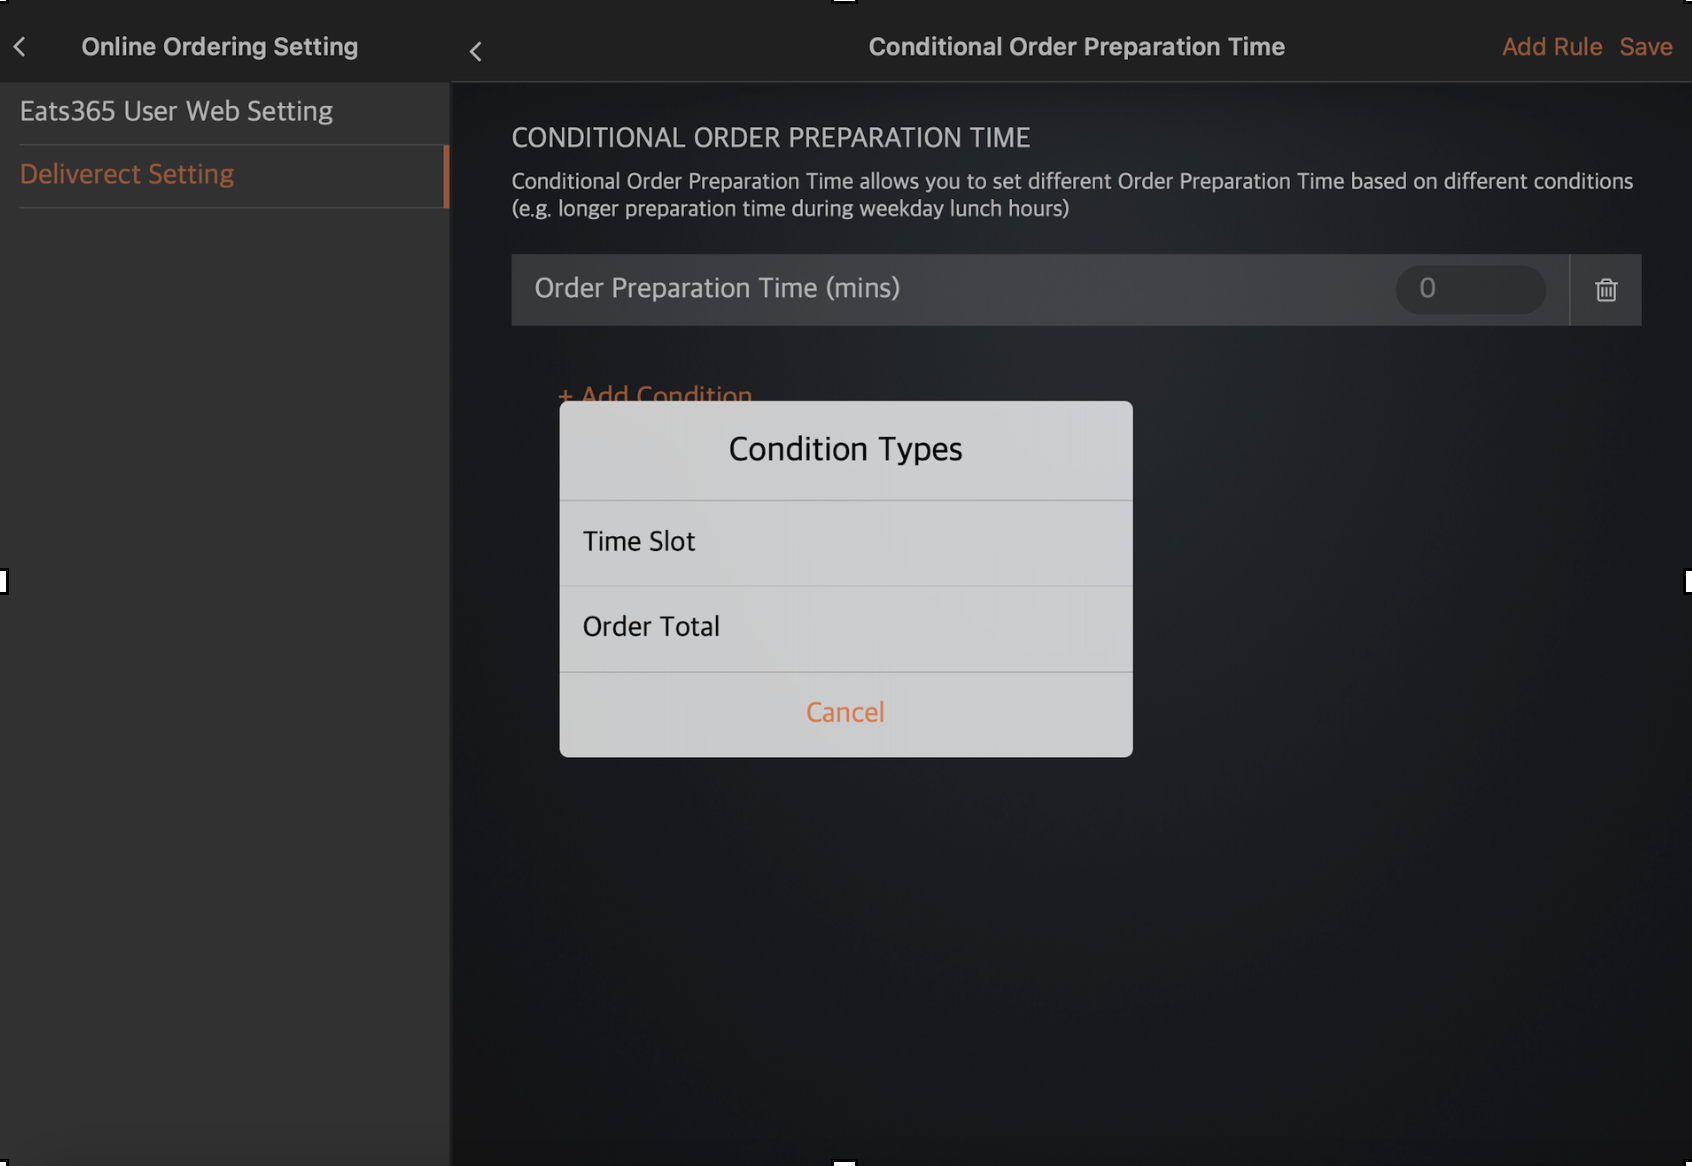
- Tap + Add Condition. Then, select the condition type. If you choose Time Slot, set the date and time when the specific preparation time is applied. For example, you may create a rule where every lunch period, the preparation time for orders meant for pick-up is shorter and set to 5 minutes. If you choose Order Total, set a range based on the order total when the specific preparation time is applied. For example, you may create a rule where orders totaling to $100 would require a longer preparation time due to having more menu Items to prepare.
- At the top right, tap Add Rule.
- At the top right, tap Save to confirm.
To learn how to sync menus to Delivery Integrations, refer to Sync Menus for Delivery Integrations.
How to handle incoming orders on the POS
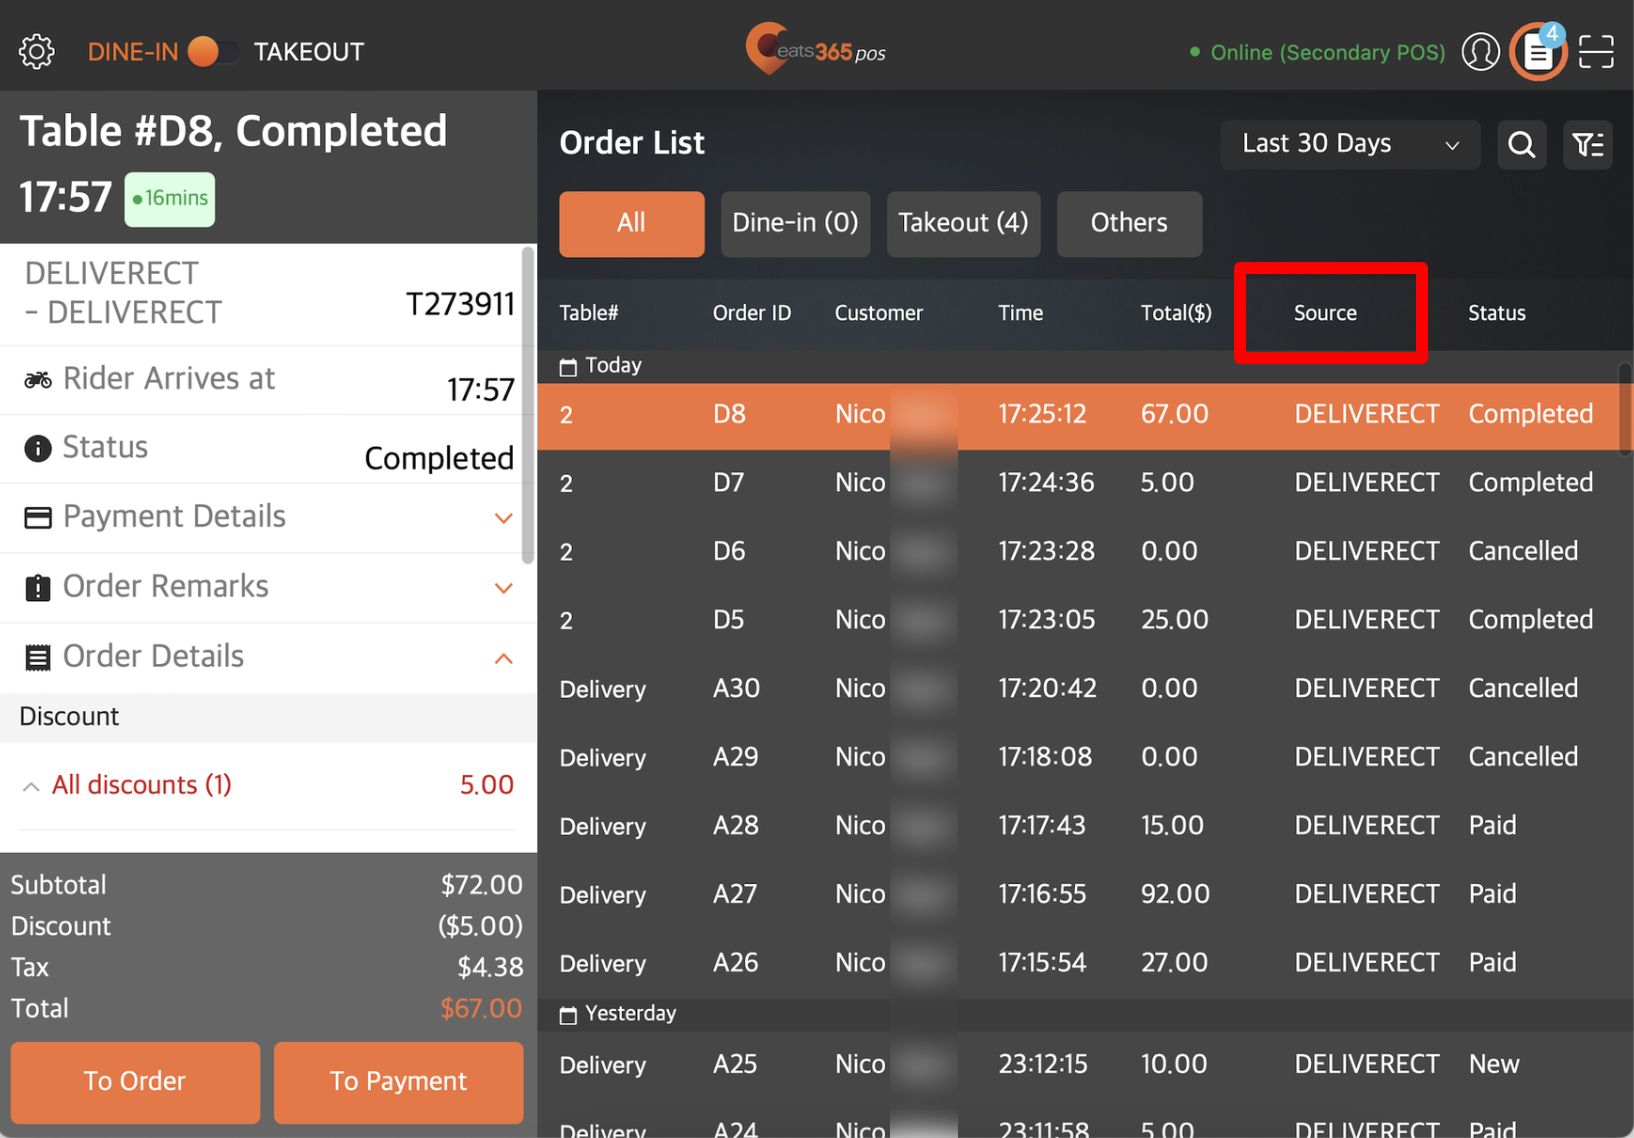
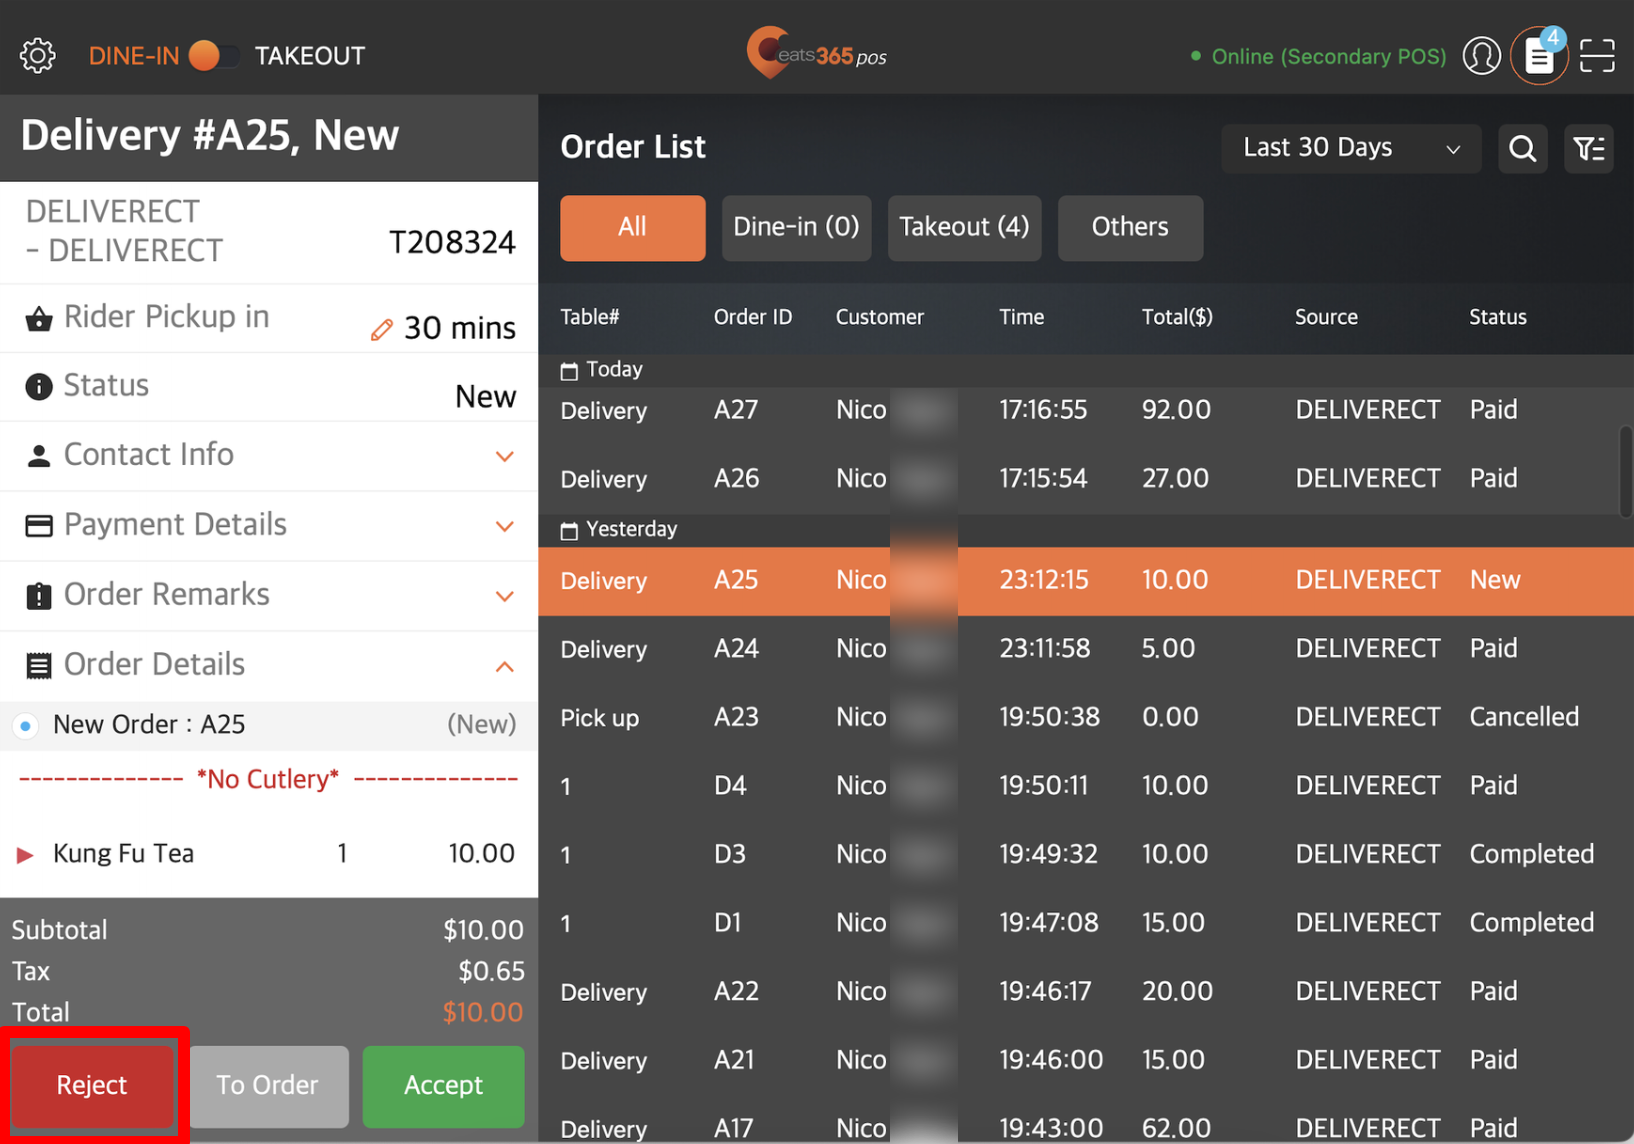
Incoming orders from integrated delivery services can be found in the POS’ Order List. You can determine the specific delivery service responsible for the order under the Source column.
Accept orders
To manually accept an order from a delivery service, follow the steps below:
- Log in to Eats365 POS.
- At the top right, tap Order List .
- Tap All or New to find the current list of orders.
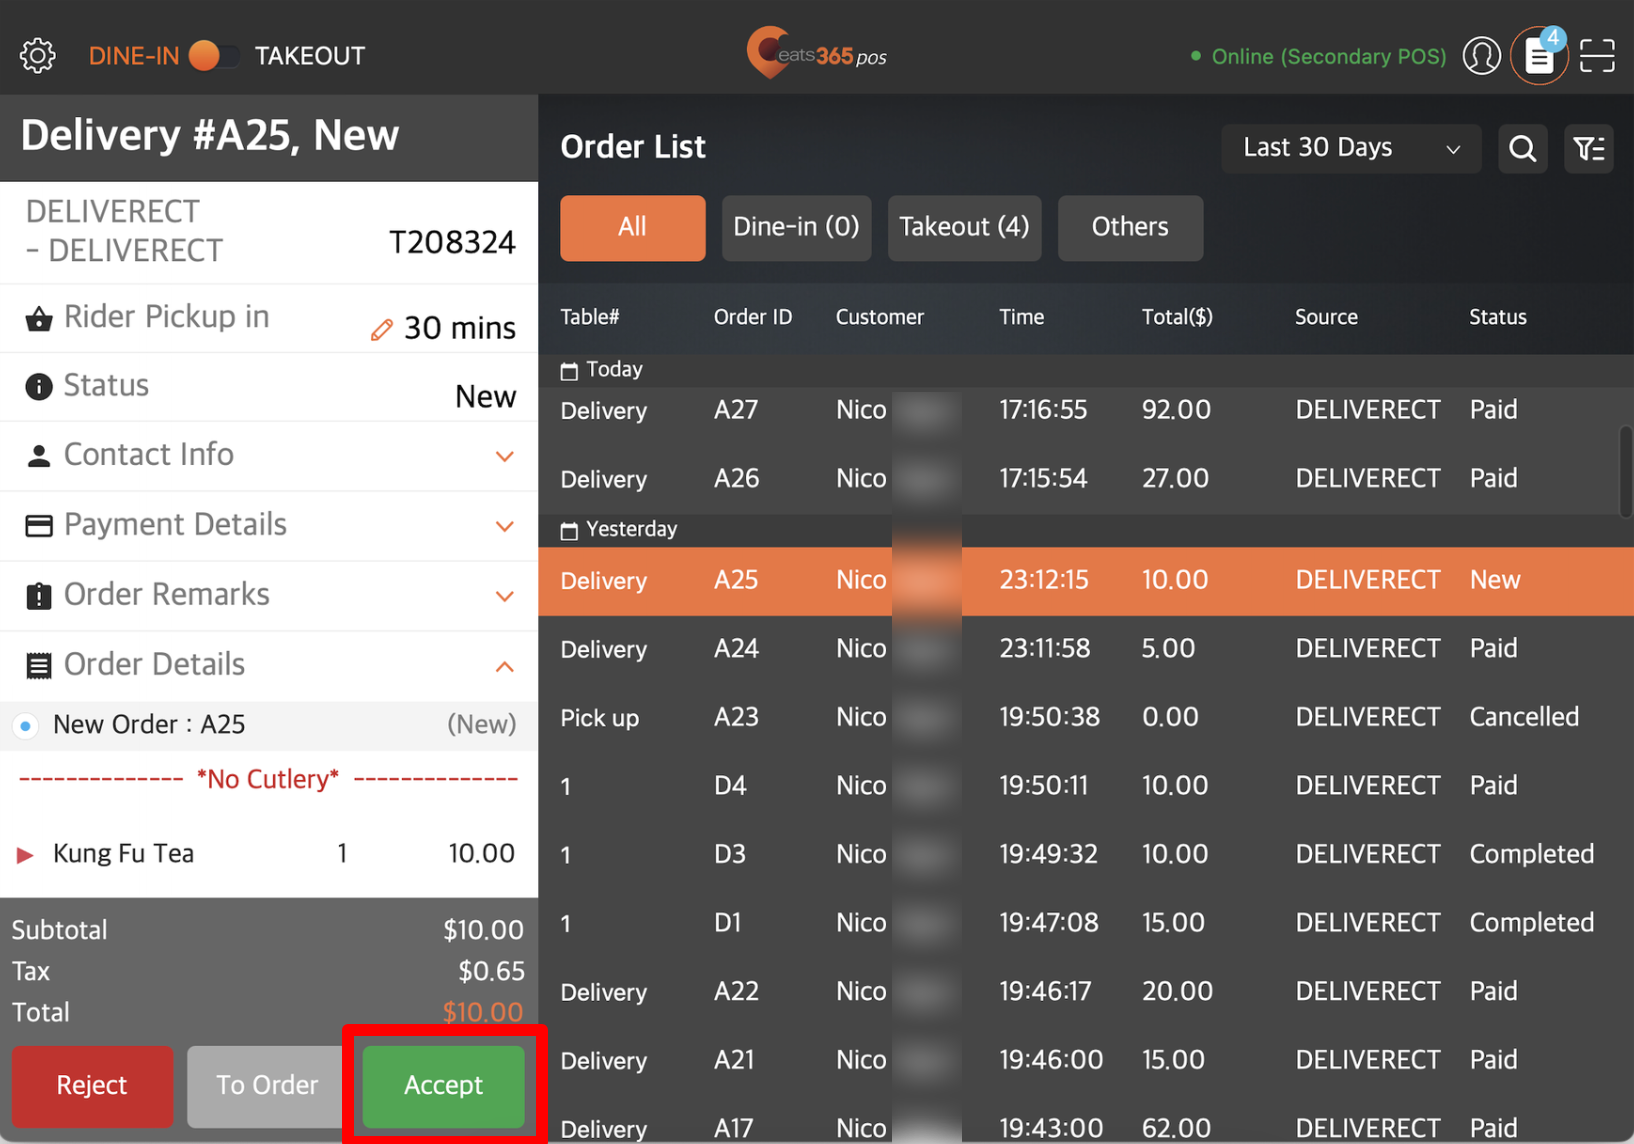
- Select the order that you’d like to accept.
- On the left panel, tap Accept.
- For Pickup and Delivery orders, set the time it takes to prepare the order. If you set the Rider Pickup in as “30 mins,” then the order will be expected to be available in 30 minutes.
Once an order is accepted, the restaurant staff may begin preparing the order.
To learn how to process payments, refer to Handling Payments.
Reject orders
To reject an order from a delivery service, follow the steps below:
- Log in to Eats365 POS.
- At the top right, tap Order List .
- Tap All or New to find the current list of orders.
- Select the order that you’d like to reject.
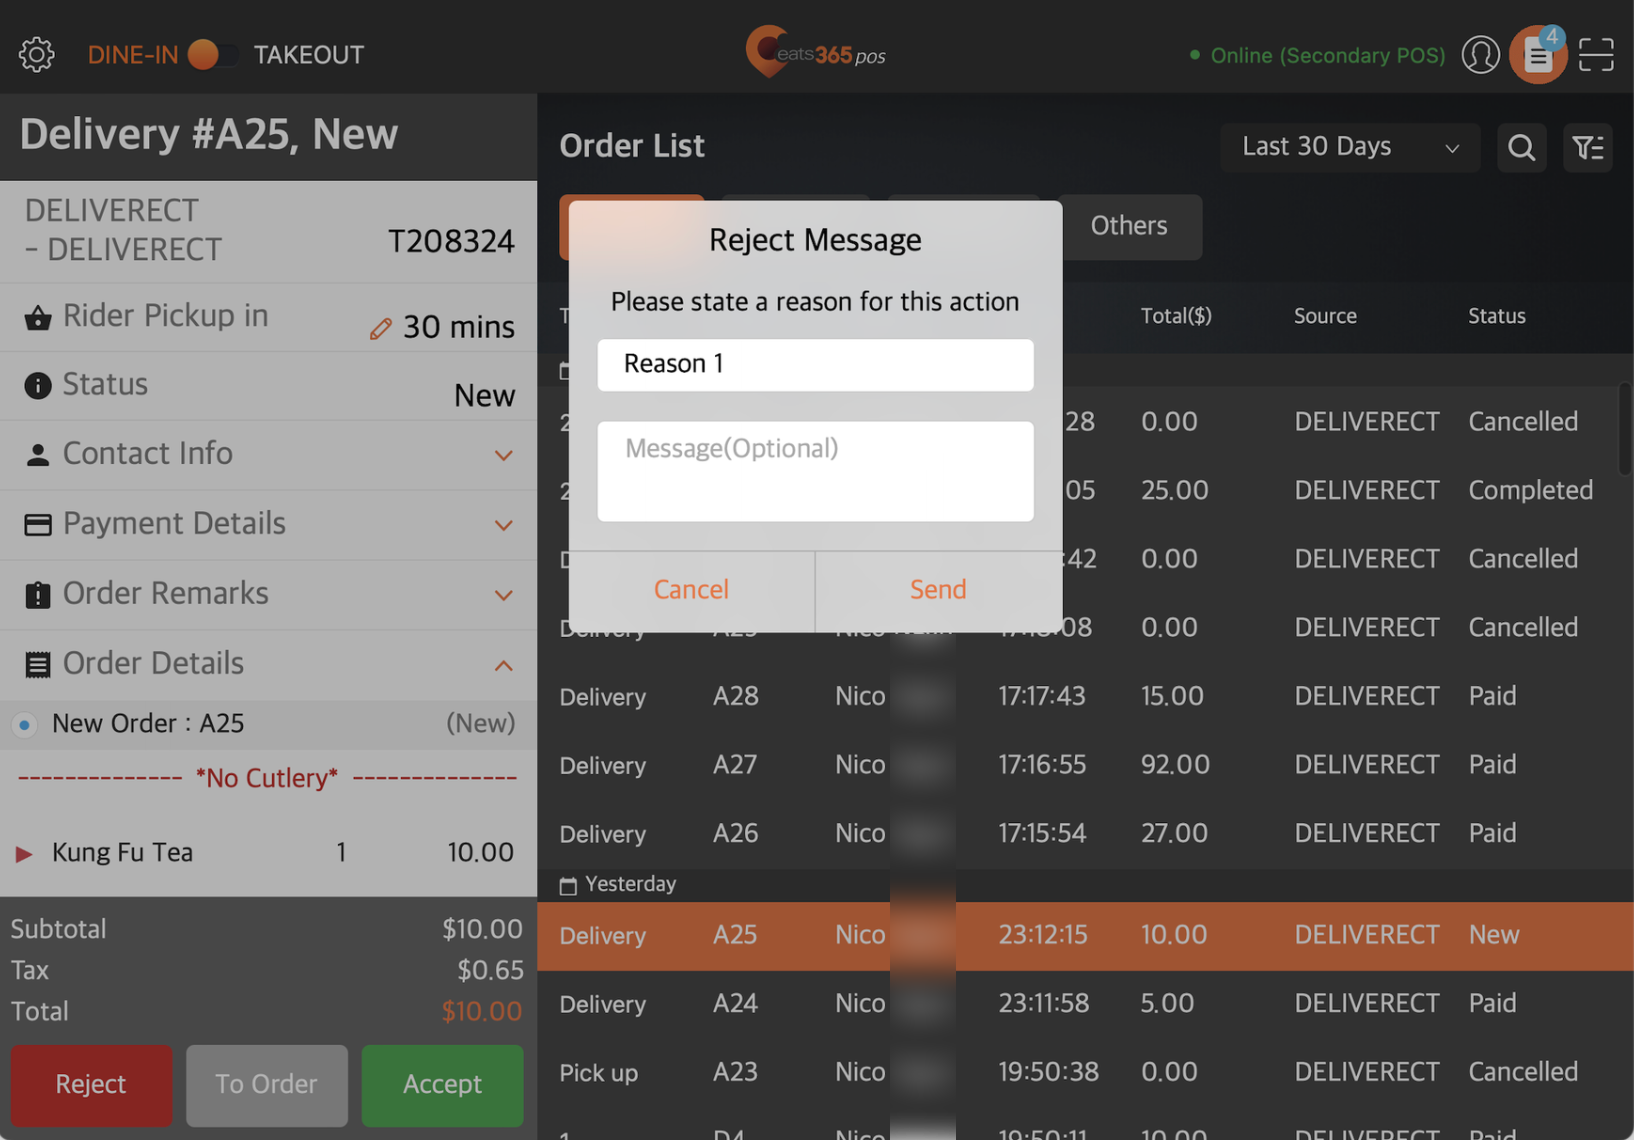
- On the left panel, tap Reject.
- Enter a reason for rejecting the order, if needed. Then, tap Send.